Carrot & Apple Cake Cheesecake

Carrot & Apple Cake Cheesecake  | Selma's Table
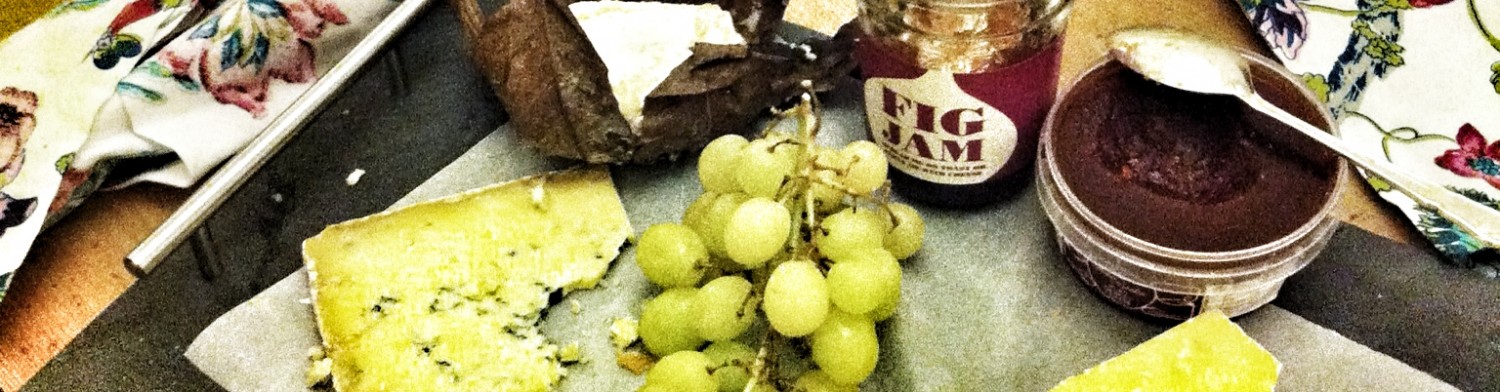
A few weeks ago my friend Rupert held a fundraising ‘coffee’ morning, taking part in an event which is billed as ‘The world’s biggest Coffee Morning for Macmillan Cancer Support”.  My understanding is that it’s a bit like a bring and buy bake sale, so that you can take cakes home as well as indulging in a slice or two while you are there, with a cuppa. Well, Rupes was having none of “that buying thing” – he thought that a donation would be more in keeping with what he had in mind. And he was certainly not thinking of a lot of cakes and biscuits either. He organised the event for between 11 – 2 on a Saturday to give people plenty of time to either lie in, go to the gym or get Saturday chores or shopping done. Well beforehand, he made the phone calls to invite people and he collected money from people who were not able to attend. In true Rupert style, his flat gleamed and was filled with flowers and burning Diptique candles. We sipped  Bucks Fizz from crystal flutes, gorged on delicious savoury nibbles, including crispy prawns, stuffed vine leaves, chicken tikka bites and prosciutto wrapped figs with goats cheese. He served jasmine tea in beautiful Coalport porcelain tea cups  and individual tea pots from a tea service which had been part of his mother’s wedding trousseau. His sister donated a box of Jordanian pastries which were stuffed with dates and walnuts and a friend brought some Matcha macaroons which she had made. I brought this Carrot & Apple Cake Cheesecake which I had made the evening before, because I always have to take something! It was a really lovely event, more like a cocktail version of a brunch party rather than a cake sale and everyone got a chance to mingle and catch up or finally meet. The donations were extremely generous and I am quite certain that the same  amount would not have been raised had people been buying cakes and biscuits in the more traditional manner.

Carrot & Apple Cake Cheesecake  | Selma's Table

Rupes doesn’t do sweet -he really does not have a sweet tooth so I wanted to make something that he would enjoy. I thought about doing a spicy, fruity, carrot cake topped with creamy cheesecake – an idea that I had seen in a magazine at some point and had written down in my notebook. I tweaked an old recipe for carrot cake that I’ve had for years, substituting butter for the oil as I thought that the batter should be fairly stiff to support the cheesecake topping. I have really enjoyed using ‘Dairy’ from Lurpak’s Cook’s Range – it really is a joy to use in baking as you can use it straight from the fridge. I reviewed it in my last IMK post.   I also realised too late that I didn’ have enough carrots so topped them up with apples. I used an old recipe for a baked cheesecake that I had found on the back of a Carnation Condensed Milk tin in Canada. I can tell you that I was quite nervous putting it in the oven and said a few words as it went in!

Carrot & Apple Cake Cheesecake  | Selma's Table

I got there a little early, taking it over whole and asked Rupes to cut up some of it into one inch pieces. He began to trim off the edges, and popped a shard of trimming into his mouth. He stopped and said “OMG this is gorgeous!” and then passed the trimmings round to a couple of others who had arrived in the meantime. I was so pleased and very relived that it worked out. Rupes gave me a portion of the left over slab to take home – he was keeping the rest for himself, which made me very happy! Happy that he liked it enough to keep and happy that Jake would have some as well. Jake likes a cheesecake and really enjoyed the combination of spicy cake and cheesecake so it got the thumbs up from him too.

Carrot & Apple Cake Cheesecake  | Selma's Table

I had some caramel sauce which I had intended to take with me to drizzle enticingly over the top but I am afraid that it got left behind. The slices would have looked much prettier with a few swirls of caramel sauce. Also an apology for the photos – food photos can be difficult to take at the best of times and these were difficult to photograph in an unfamiliar setting with people about, little time to faff and without my props. But you get the idea – they baked up really well!

Carrot & Apple Cake Cheesecake  | Selma's Table

Carrot & Apple Cake Cheesecake  | Selma's Table

At the end of the event, the last few of us remaining, (photo at the tip of the post) counted the money in the donation box and were delighted to find that there was a really good sum in there to send to Macmillan. A big thanks to everyone for such generous donations. Rupes has since had a lovely thank you letter from Macmillan too!

Carrot & Apple Cake Cheesecake

  • Servings: 24 pieces
  • Difficulty: easy
  • Print

INGREDIENTS

For the carrot & apple cake base:

  • 75 g soft brown sugar
  • 75 g caster sugar
  • 200 g plain/AP flour
  • 1 ½  tsp baking powder
  • ½ tsp baking soda
  • ¼ tsp table/fine salt
  • 2 tsp cinnamon powder
  • ¼ tsp grated nutmeg
  • ¼ tsp allspice powder
  • 75 g golden raisins (or just use normal ones)
  • 45 g desiccated coconut
  • 75 g grated carrot (about 3 medium carrots – weigh them out before grating them)
  • 75 g grated apple (about 3 medium apples – weight them out factoring in an additional 5 g per apple for the core)
  • 1 large egg at room temperature
  • 115 g Baking  (Lurpak’s Cook Range) (or unsalted butter at room temperature)

For the cheesecake:

  • 560 g (2 large tubs) full fat cream cheese at room temperature
  • 397 g (1 tin) of condensed milk
  • ¼ c sour cream
  • ⅛ tsp salt
  • ½ tsp vanilla
  • 2 large eggs at room temperature

INSTRUCTIONS

For the carrot & apple cake base:

  1. Pre-heat oven to 180C/350F. Line a 8″ x 12″ tin with grease proof paper leaving enough up the sides so that it can easily be used as handles to pull the cake out. (See my Tips and Tricks page for an easy way to do this.)
  2. Measure all the dry ingredients (from sugar through to coconut) into a mixing bowl and whisk well to combine.
  3. Peel and grate the apples and carrots, cover closely with cling film and set aside.
  4. Beat the egg and Dairy/butter until light and fluffy.
  5. Stir in the dry ingredients until combined then stir in the grated carrots and apples and whisk until the batter is well combined.
  6. Scrape batter into the tin and level it as well as you can. One of those offset spatulas would come in very handy here!

For the cheesecake:

  1. Beat the cream cheese until light and fluffy
  2. Beat in the condensed milk until the mixture is smooth.
  3. Beat in the eggs, sour cream, salt and vanilla until well combined.
  4. Pour this over the carrot & apple cake base and level.
  5. Bake for 25 – 30 minutes, testing with a wooden toothpick or a piece of dry spaghetti to ensure that the cake base is cooked. The cheesecake top should be set but with a little wobble which will firm up when it cools.
  6. Cool in the tin then cover and refrigerate until serving. Can be sliced into 24 x 2 inch squares or larger pieces if preferred.

© Selma Jeevanjee and Selma’s Table, 2013, 2014. Unauthorised use and/or duplication of this material, including photographs without express and written permission from this blog’s author and/or owner is strictly prohibited. Excerpts and links may be used, provided that full and clear credit is given to Selma Jeevanjee and Selma’s Table with appropriate and specific direction to the original content.


Ambassador Cupcakes

Ambassador Cupcakes | Selma's TableIt was Jake’s birthday a few weeks ago and I made him these fabulous Ambassador Cupcakes to take to a party that one of his friends was throwing for him. He is not a big fan of chocolate cakes and icing, though he loves chocolate, but when I mentioned that I could make them with a Ferrero Rocher chocolate  inside as well as on top of them, his eyes lit up, so that was that! Ambassador Cupcakes | Selma's TableI’ve been making birthday cakes for Jake, for friends and for their children for quite a long time now. I thought that you might like to see a selection of Jake’s birthday cakes over the years including the train that nearly turned me into a train wreck which I mentioned in my post on the Spiced Honey and Orange Cake. I have a star shaped pan that has come in very useful for celebration cakes in general and I have put it to good use over the years. Ambassador Cupcakes | Selma's Table Ambassador Cupcakes | Selma's TableFor these Ambassador Cupcakes, I was inspired by Michelle’s (Giraffes Can Bake) spectacular Ferrero Rocher Cupcakes but I was up against the clock so needed  to make something simpler and that would also travel well on public transport. So I had a quick trawl of the internet, found a recipe that looked quick and easy and tweaked it a little. Ambassador Cupcakes | Selma's TableThese Ambassador Cupcakes really are a special occasion cupcake. They require 48 Ferrera Rocher chocolates which really ratchets up the cost however, they look fabulous! If you are going to make these and don’t have a piping bag or nozzles, then please, do get some. You can buy a roll of disposable piping bags and a set of basic nozzles inexpensively from most large supermarkets and on-line too. Yes, of course you can scrape the icing on with a spatula or fill a sandwich bag, snip off a corner and squirt it on but if you are going to go to the expense and effort of making these, then for a few pounds more you can make them look really lovely too. I just wish that I had been more organised and ordered gold paper cases – that would have looked stunning and very in keeping with the Ferrero Rocher image!  Remember this TV commercial?

I don’t know about you but my icing techniques leave a lot to be desired. I made the cupcakes the night before and the Nutella buttercream early in the morning – I hurriedly iced a cupcake for Jake to take up to him in bed, with his cards and present and realised that I needed a crash course in icing techniques.

In My Kitchen Oct 2014 | Selma's Table

Jake’s early morning cake

I scoured YouTube and and thought I would share the best one with you! Below is a great video tutorial by Xanthe Milton on 4 icing techniques, including that rose swirl (which would have been too girly for Jake – sigh) which looks so fabulous on larger cakes.

Ambassador Cupcakes | Selma's Table I ended up using the last technique which she likens to an old fashioned swimming hat. My nozzles are quite small in comparison to Xanthe’s – larger ones are on my hit list – but I got a lovely effect, nonetheless! Ambassador Cupcakes | Selma's Table And a little tip; the easiest way to fill a piping bag is to fit the nozzle and coupler if you are using one, onto the piping bag, then set this inside a tall glass, peel back the bag over the glass and fill. Ambassador Cupcakes | Selma's Table

I am taking these to share with the Fiesta Friday revellers. Angie of the Novice Gardener is having a well deserved day off with strict instructions from most of us to not bring anything to the party!! Our co-hosts this week are both Canadians! Globe-trotter Julianna whose blog, Foodie on Board is full of the most delicious global recipes and gorgeous photographs too and Hilda of Along the Grapevine who makes foraging and living off the land aspirational and delicious!! We are in good hands!!

Ambassador Cupcakes | Selma's Table

Ambassador Cupcakes

  • Servings: 24 cupcakes
  • Difficulty: easy
  • Print
Adapted from  Ferrero Rocher and Nutella Cupcakes by Cookies, Cupcakes and Cardio INGREDIENTS For the cupcakes

  • 200g plain/AP flour
  • 300g caster sugar
  • 90 g unsweetened cacao powder, sifted
  • 1 Tbsp instant espresso powder
  • 1 ½ tsp baking powder
  • ¾ tsp baking soda
  • ¾ tsp fine salt
  • 3 Tbsp light olive oil
  • 180 ml buttermilk (or 180 ml milk plus 1 Tbsp of lemon juice – let this sit for 10 minutes)
  • 180 ml warm water
  • 2 large eggs at room temperature
  • 48 Ferrero Rocher chocolates (24 for inside the cupcakes and 24 to decorate them with)

For the Nutella Buttercream

INSTRUCTIONS Fot the cupcakes

  1. Pre-heat the oven to 180C/350F.
  2. Line a 24 cup muffin/cupcake tin with paper cases. Gold ones would look really stunning.
  3. Remove the wrappers from the chocolates.
  4. Hand whisk all the dry ingredients, from flour through to salt in a large mixing bowl to blend thoroughly.
  5. Make a well in the centre and add all the wet ingredients all at once. Blend on a low speed until well combined. The mixture will be quite liquid.
  6. Take the bowl over to the prepared tins and put one tablespoon of batter into each hole.
  7. Center a Ferrero Rocher chocolate in each one.
  8. Top with one tablespoon of batter – pour it over the Ferrero Rocher chocolate.
  9. Bake for 20 minutes – testing the sides with a toothpick or a piece of dry spaghetti after 18 minutes.
  10. Let them settle for 10 minutes then remove to a wire rack to cool completely before icing.

For the Nutella Buttercream

  1. Cream the Baking or butter until light and fluffy.
  2. Beat in the icing sugar (I start this off by hand to keep down the icing sugar cloud) until smooth..
  3. Beat in the Nutella. If the mixture is too stiff, add 1 Tbsp of milk. I didn’t need to.
  4. Fit a piping bag with an icing nozzle of your choice (I used a “star” nozzle ) and set it inside a tall glass. Peel back the bag around the glass and fill it with as much icing as you can comfortably handle. Twist the end closed and set aside in the fridge until you are ready to ice the cakes. You don’t want the icing to be too hard so don’t leave it in there too long.
  5. Ice the cakes and top each with a Ferrero Rocher chocolate.
  6. Store, covered in the fridge for at least ½ an hour, to set the icing.

© Selma Jeevanjee and Selma’s Table, 2013, 2014. Unauthorised use and/or duplication of this material, including photographs without express and written permission from this blog’s author and/or owner is strictly prohibited. Excerpts and links may be used, provided that full and clear credit is given to Selma Jeevanjee and Selma’s Table with appropriate and specific direction to the original content.

Plum and Cinnamon Cake

Plum and Cinnamon Cake | Selma's TableAs this blog has gathered pace and found it’s feet, so Jake has learned his place in the hierarchy – photos first, then he gets to eat. He always asks before cutting into a cake or digging into a casserole – well, until Sunday just gone. I baked this Plum and Cinnamon Cake, uploaded a quick snap to Instagram with a flippant remark about not being able to wait a day for it to settle and mature and woke up in the morning to find that there was a huge, messily cut piece missing from it!

Plum and Cinnamon Cake | Selma's TableJake had got in late, couldn’t resist the smell or the look of it, didn’t dare try to take the ring off the springform pan so cut it out the best he could. He said he thought I was sleeping which is why he didn’t ask. Well, I’m not one to get upset when it comes to food being eaten so I determined to do the best I could with it, when it came to the photos. A bit of crumb tidying, fruit prodding and a dusting of icing sugar took care of most of it but the missing slice is well and truly missing!!

This recipe was printed every autumn in the New York Times from 1983 until 1995 when Marian Burros, the food columnist (who got the recipe from Lois Levine, co-author of Elegant but Easy) said that it would not be re-printed, so this was the last chance to clip it out. I have seen it numerous times and in various versions around the web but Deb Perleman of Smitten Kitchen, who always manages to make me want to cook anything she makes, posted it recently and I caved.

Plum and Cinnamon Cake | Selma's Table
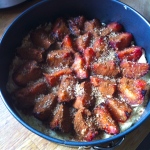
The batter is quite meagre and you will feel that it won’t be enough, once you spread it out and that maybe an additional egg or more baking powder or a smaller tin…don’t panic, don’t fiddle – it comes out perfectly. The original recipe calls for halved plums skin side up but I quartered mine so that some of flesh got the heat of the oven. And you want to go for tart, ripe ones for the best result. It does seem better the next day – the whole thing softens and the plums get jammy. And the smell – no wonder Jake couldn’t resist helping himself to a slice!!

Plum and Cinnamon Cake | Selma's TableThe cake rises just enough to cushion but not encase the plums and the combination of the sweet, tender, vanilla sponge, the tart juicy, jammy plums and the sugar and cinnamon dusted top is utterly heavenly! I am helping a friend host a Macmillian Coffee Morning fundraiser next week and this is definitely going to be served.

Plum and Cinnamon Cake | Selma's TableI’ve tweaked it a little – I’ve added vanilla to the batter and added less cinnamon to the top. Next time I may reduce the sugar a little too but if the plums are more on the tart side than the sweet sponge is the perfect foil for them. And it’s really easy to make. Quarter the plums and set aside. Whisk the flour, baking powder and salt in a small bowl and set aside. Cream the softened butter and sugar then add the eggs, one at a time, finally mix in the flour and scrape into the prepared tin. Arrange the plums over the top, sprinkle with cinnamon and sugar and bake!

Plum and Cinnamon Cake | Selma's Table

Today, Elaine the inspirational blogger behind Foodbod and I are co-hosting Fiesta Friday #34 which is held by the generous, creative and wonderful Angie @ The Novice Gardener. Do take a look at Angie’s latest post – I mean, can food from the garden look any prettier? You can also see who has been featured from last week’s submissions. And what can I say about Elaine – she makes the most delicious looking and sounding food all of which is dairy, wheat and meat free – she also makes and sells her flavour packed dips and goodness bars so do take a look at her blog.

Click on the Fiesta Friday badge below to join the party – you can submit a post (be sure to include a link to Angie  FF#34 post – it’s only polite and also ensures that you can be considered for a feature next week!)  or just take a look at others are up to!  If you are new to blogging, Fiesta Friday is a great way to gain exposure and make new friends too.

If you’re new to Fiesta Friday, please read the guidelines.

fiesta-friday-badge-button-click-to-join1

Plum and Cinnamon Cake

  • Servings: 8 generous -12 skinny slices
  • Difficulty: easy
  • Print

Adapted from Marian Burros’ Famous Purple Plum Torte  and Deb Perleman’s Smitten Kitchen Purple Plum Torte

INGREDIENTS

  • 140 g plain/AP flour
  • 1 tsp baking powder
  • pinch of table salt
  • 150 g of golden, unrefined caster/superfine sugar
  • 115 g softened unsalted butter
  • 2 large eggs
  • 1 tsp vanilla paste or extract
  • 8 medium ripe, tart plums
  • 1 tsp cinnamon powder
  • 2 Tbsp Demerara sugar

INSTRUCTIONS

  1. Pre-heat oven to 180 C/ 170C Fan assisted/ 350 F and prepare a 9 inch spring form pan by buttering the base and sides or using grease proof paper – see my tips and tricks page (Baking – tip 3) to read how to do this.
  2. Halve the plums and twist to remove the pits, then halve again and set aside.
  3. Place the flour, baking powder and salt in a cereal bowl and hand whisk to incorporate the 3 ingredients throughly.
  4. Place the butter and sugar in a medium sized mixing bowl and cream until light and fluffy, scraping down the sides of the bowl a couple of times.
  5. Beat in the eggs, one at a time until well incorporated – scrape down the sides after each addition. It may look curdled but if you add a spoonful of the flour mixture all will be well again.
  6. Add the flour mixture and the vanilla paste/extract and beat only just until incorporated. Using a rubber spatula, scrape under to make sure that there is no raw flour and mix in if there is.
  7. Scrape into the prepared tin and smooth it out to cover the base. It will seem very scant but don’t worry – it will be enough!
  8. Arrange the plums from the outside into the middle, keeping it quite tight.
  9. Scatter over the cinnamon and the Demerara sugar and place in the pre-heated oven.
  10. Bake for 40-50 minutes. Insert a tester (toothpick or a bit of dry spaghetti) into the cakey part – if no batter is left clinging to it then it’s done. If there is batter clinging to it then pop it back in for 5 mins increments and keep checking.
  11. Try and make this the night before to let it mellow, covered and at room temperature, when it will be at it’s best.

© Selma Jeevanjee and Selma’s Table, 2013, 2014. Unauthorised use and/or duplication of this material, including photographs without express and written permission from this blog’s author and/or owner is strictly prohibited. Excerpts and links may be used, provided that full and clear credit is given to Selma Jeevanjee and Selma’s Table with appropriate and specific direction to the original content.

Peach & Amaretti Crisp

Peach & Amaretti Crisp | Selma's TableWhen I first began baking, all those years ago in Canada, my Mum would always exhort me to to cut back on the amount of sugar that was called for. Invariably there was a lot of sugar in those recipes for cakes, cookies and bakes so reducing it was not too much of a hardship. It is something that I still do today. Even though I would like to think that modern recipes have dialled this down somewhat, I still find that I can usually cut back a little on sugar. I bake a lot but Jake has never needed a filling in his nearly seventeen years on this sugar mad planet. He doesn’t have a dentist phobia either!! When he was a baby, I used to make all his food – steaming, pureeing and freezing vegetables in ice cube trays – no added sugar, salt or preservatives! When he was a toddler, sweets were for Sundays and as he got older and developed a liking for fizzy drinks, they were reserved for occasions like restaurant meals or birthdays. I like to think he got off to a good start even though he does love a Mars bar!

Peach & Amaretti Crisp | Selma's TableTrying to cut back on sugar meant that I almost didn’t post this recipe for Peach and Amaretti Crisp. I didn’t think the squares of Crisp were sweet enough but Jake had a friend round for dinner on Monday and they both thought that the squares were perfect. I didn’t add any sugar to the base as I thought the sugar in the Amaretti was enough (I had a taste of the dry mix just to make sure – the things I do for you, dear Reader..) but when I tasted a square without the glaze I came to the conclusion that my quest had gone too far. But  once they were glazed, they were absolutely delicious – just sweet enough to bring out the flavours of the peaches and the almonds.

Peach & Amaretti Crisp | Selma's TableThe amaretti are such a visual treat. These ones come in such a pretty tin, wrapped in papery twists; some with fringed edges. When I was married, we used to frequent a local Italian restaurant and they used to serve these with the coffee. My husband, replete with excellent food and Saint-Emillion, would roll the paper into a column place it on the tablecloth and set it alight. I, heart in mouth, would watch with a combination of terror and childish delight, as it would rise, flaming, off the table and burn to an ash.

Peach & Amaretti Crisp | Selma's TableThis Peach and Amaretti Crisp is quite a simple thing to make. Blitz the base which is also the topping, together, reserving a cup full for the topping and pat the rest into the prepared cake tin and bake for 15 minutes. While it is baking, make the peach filling which is essentially whisked egg, sugar and almond meal into which you fold the chopped peaches. The hot base is covered with the peach filling and the reserved topping is sprinkled over with some flaked almonds. While that finishes baking, the glaze can be prepared to be drizzled over the Peach and Amaretti Crisp when it is cold. You end with a mouthful of crisp, gooey, crunchy fruity, almondy deliciousness that is perfect with an espresso. So make the most of the seasonal peaches as the summer segues into autumn and make these – they make a very nice after school snack too!

Peach & Amaretti Crisp | Selma's Table

Peach & Amaretti Crisp

  • Servings: 16 pieces
  • Difficulty: Easy
  • Print

Adapted from Peaches ‘n’ Cream Bars by Sally’s Baking Addiction

INGREDIENTS

For the base and topping:

  • 80 g amaretti biscuits (9 biscuits)
  • 190 g plain/AP flour
  • 50 g oats
  • 40 g ground almonds/almond meal/almond flour
  • 150 g cold, unsalted butter, cubed
  • 2 Tbsp flaked almonds

For the filling:

  • 3 tasty peaches
  • 1 large egg
  • 100 g caster sugar
  • 1 Tbsp ground almonds/almond meal

For the glaze:

  • ½ c icing/super fine sugar
  • 2 Tbsp crème fraîche
  • ½ tsp vanilla extract

INSTRUCTIONS

  1. Pre-heat oven to 180 C/350 F
  2. Line a 9 inch square tin with baking parchment so that the base and sides are covered – use a few dabs of butter to get the paper to stick to the pan.
  3. Place the amaretti biscuits in a food processor and blitz to a fine powder.
  4. Add the flour, oats and almond meal and pulse a couple of times to combine.
  5. Add the cold butter and pulse until the mixture looks like coarse, damp sand.
  6. Set aside 1 cup of this mixture for the topping and tip the rest into the prepared tin. Pat it level – don’t press down too hard or it will be tough – then bake for 15 minutes.
  7. While the base is baking, get the filling ready; peel, pit and chop the peaches into 1 cm chunks.
  8. Using an electric mixer and a medium sized bowl, whisk the egg and sugar until pale and creamy – about 2 minutes. Then add the almond meal and salt and whisk again. Fold in the peaches.
  9. After the base has been in the oven for 15 minutes, remove it and top with the filling – covering the hot base as evenly as you can with the peaches.
  10. Sprinkle over the reserved topping and scatter over the slivered almonds.
  11. Bake for 30-35 minutes until golden brown.
  12. Cool in the tin for 10 minutes, then using the lining paper as handles, lift out and place on a wire rack to cool completely before glazing.
  13. Combine glaze ingredients together until smooth and drizzle over the top.

Stores brilliantly, covered in the fridge for 4-5 days.

© Selma Jeevanjee and Selma’s Table, 2013, 2014. Unauthorised use and/or duplication of this material, including photographs without express and written permission from this blog’s author and/or owner is strictly prohibited. Excerpts and links may be used, provided that full and clear credit is given to Selma Jeevanjee and Selma’s Table with appropriate and specific direction to the original content.

Spiced Orange & Honey Cake – Sugar Free

Spiced Orange & Honey CakeMy friends’ adorable baby girl, Olive (just look at those cheeks!), turned 1 last week and her mother, Danna, asked me if I would make the birthday cake. Now, birthday cakes are something that I have made a lot of over the years for Jake as well as the children of friends and neighbours. There have been dinosaurs, ships, butterflies, bears, football pitches, stars, numbers….The most memorable and completely ridiculous year was when Jake turned 4 and I made one to take to his Nursery school, another for the birthday party at home and one for the children’s party in a church hall. Making and decorating 3 cakes is fairly deranged but one of them was a train with 2 wagons, made completely from scratch and which nearly gave me  nervous breakdown! I finished decorating it at about 4 am…utter madness even if it was rather spectacular!

Sugar Free, Spiced Orange & Honey Cake | Selma's TableDana asked me to make a sugar free cake as she has managed to keep Olive away from refined sugar thus far. Well, thank goodness for the trend in “naked” cakes – that took care of the icing, but what about the cake itself? A little research led me to birch sugar with the rather unfortunate and chemical sounding name of Xylitol – the name is actually derived from the Greek word for tree – “xyl”. It is a naturally occurring sugar, found in birch, berries and corn husks. Xylitol has a Glycemic Index of only 7 which is 10 times lower than sugar and 4 times lower than fructose; it has 40% less calories than sugar and 75% less carbs and looks and tastes just like sugar. It is used in exactly the same quantities as sugar.

So I planned to make a naked Honey Cake, layered with whipped cream and berries, but then realised that would be tricky to put together as the party was taking place in the gorgeous gardens of The Telegraph, a stylish country pub in Putney. So in the end, I used my patterned Bundt pan and served slices of the cake with organic ginger Greek yoghurt and blueberries.  Just before bringing it out, it was lightly dusted with a tiny amount of icing sugar and decorated it with edible butterfly wafers and flowers by Alex, a very sweet young chap who is 4 – didn’t he do a wonderful job?

Sugar Free, Spiced Orange & Honey Cake | Selma's TableThis recipe is an adaptation from Marcy Goldman’s Treasures of Jewish Holiday Baking and Deb Perlman’s Majestic and Moist Honey Cake. I have cut back on the sweetness and the spicing, adjusted the leavening and added orange zest to the batter for more flavour.  You could of course make the cake with regular caster and brown sugar if you wanted to. As an added bonus, the smell of this cake baking will make your house smell incredible!

I ended up having to make it twice. Disaster struck the first time as I didn’t grease the tin properly and the cake stuck to the pan and broke coming out of it. It was, however, really delicious and moist which I was really happy with and Spiced Orange & Honey CakeJake took it to a picnic he was going to so it wasn’t wasted. The second time, I not only greased the tin, but also floured it which highlighted the spots I had missed – easy to do on these patterned tins.

Sugar Free, Spiced Orange & Honey Cake | Selma's TableThe cake is so easy to make – mix together the flours, raising agents and spices, make a well, pour in the sugars and wet ingredients, beat, pour into the tin and bake. It couldn’t be simpler. Just make sure that you grease your tin properly!!

Sugar Free, Spiced Orange & Honey Cake | Selma's Table

This week, I am thrilled to be co-hosting Fiesta Friday #29 with my old partner in crime, Jhuls @ Not So Creative Cook. We are throwing a pool party over at Angie’s this week.  Come, dressed in your most glamourous poolside lounging gear and let’s celebrate the wonderful summer we have been having. I’m the one in the white linen, bejewelled caftan, huge floppy hat and the rhinestone flip flops!

If you have Fiesta’d then you know what to do. If you haven’t, it’s really easy;

  1. Write a post – it doesn’t have to be about food but it should be a new one for the party.
  2. Add the link from Angie’s Fiesta Friday #29 post (http://thenovicegardener.wordpress.com/2014/08/15/mille-crepe-cake-fiesta-friday-29/) to your post together with a line or two about the party.
  3. Finally click on the purple Fiesta Friday “click to join” button which will take you to the linky page so that you can add your link to the party page.

I’m probably not making much sense so read the guidelines here – http://thenovicegardener.wordpress.com/fiesta-friday/

Jhuls and I would be over the moon to see you at our Fiesta. If you are new to blogging, Fiesta Friday is a great way to gain exposure and make new friends too. So, put on your most fabulous pool party gear  and join the party!!! Mix and mingle with all the guests, follow and leave comments too – it is the friendliest party around! Click over to Angie’s post for FF#29 to join the party or click on the button below.

fiesta-friday-badge-button-click-to-join1


Sugar Free, Spiced Orange & Honey Cake

  • Servings: 12-16
  • Difficulty: easy
  • Print

INGREDIENTS

  • 235 ml warm strong black tea (I used 2 rooibos teabags)
  • 440 g  plain/AP flour
  • 1 tsp baking powder
  • 1 tsp baking soda
  • ½ tsp table salt
  • 3 tsp cinnamon powder
  • ½ tsp allspice
  • 235ml mild flavoured vegetable oil (I use Olivio)
  • 340g/1 jar of honey
  • 225 g Total Sweet (xylitol – a wood or birch sugar – replaces refined cane sugar)
  • 60 g coconut/palm sugar/jaggery  (brown sugar replacement)
  • 3 large eggs
  • 1 tsp vanilla extract
  • Zest of 2 oranges
  • 100-12o ml of orange juice (which is approximately the juice from one orange)

INSTRUCTIONS

  1. Make the tea and set aside to steep.
  2. Pre-heat oven to 180 C/350 F
  3. Grease a 25 cm/10 inch Bundt tin thoroughly especially if patterned. Pop into the fridge for a few minutes, then flour it, which will also highlight any spots you have missed. Grease the entire inside of the tin as this cakes rises magnificently. Leave in the fridge until you are ready to use it.
  4. Measure out the flour into a large mixing bowl, then add the baking powder and soda, the salt and the spices. Whisk really well to mix and aerate, then make a well in the middle of it.
  5. Pour/add in the rest of the ingredients (the oil, the honey, the tea (squeezing the teabags to extract as much flavour as you can out of them), the xylitol, the palm sugar, the eggs, the vanilla and the orange juice and zest).
  6. Set the hand mixer on the lowest speed and mix until really well blended. Scrape down the sides and the bottom of the bowl to ensure that all the dry ingredients have been incorporated.
  7. Pour this very liquid batter into the prepared baking tin.
  8. Set the tin onto 2 baking sheets (this ensures that the cake cooks evenly as the batter is so liquid)
  9. Place in the oven and set the timer for 50 minutes. Check to see how it is coming along and cover loosely with aluminium foil if it is starting to catch and burn – let your sense of smell guide you too.
  10. Set timer for 10 more minutes then use a wooden skewer to ensure that it is cooked all the way through. Both times, mine took exactly 60 minutes to bake.
  11. Let the cake set in the tin, on a wire rack for 15 minutes, then place a wire rack over the top of the tin and flip it over. Give it a gentle shake and the cake should detach itself easily from the tin.
  12. The cake tastes better the next day, after it has had a chance to mature.
  13. Serve with Honey or Ginger flavoured Greek yoghurt and some blueberries or enjoy a slice plain with a cup of tea.

© Selma Jeevanjee and Selma’s Table, 2013, 2014. Unauthorised use and/or duplication of this material, including photographs without express and written permission from this blog’s author and/or owner is strictly prohibited. Excerpts and links may be used, provided that full and clear credit is given to Selma Jeevanjee and Selma’s Table with appropriate and specific direction to the original content.


Flourless Chocolate and Raspberry Torte

flourless-chocolate-and-raspberry-torteIt’s Friday and time to head on over to the friendliest virtual party going –  Angie’s Fiesta Friday; to catch up with everyone and enjoy the offerings they bring to the party. It’s not just food you know, although admittedly, that is the main thrust – just look at what else we’ve had recently…

  • Pang@CircaHappy brought these utterly stunning floral arrangements – Pang is a talented dynamo; her food is equally as beautiful and her photography is fabulous.
  • Megan@Firebonnet brought these amazing old Ladies Home Journals full of glorious hats from the early 1900’s. Megan has a joyful blog full of happiness, hope and art.
  • Rakhi@BlissBook  told us how she and her brother threw a surprise 30th anniversary party  for their parents, pulling it off magnificently despite her mother’s honed detective skills – a touching post with photos of pure happiness and joy that did make me well up a bit! 
  • Justine@ElecticOddsnSods brought some music to cook by and asked us to share our favourites too. Justine is at heart a writer and has three, yes I said three blogs, written in her inimitable and witty style.
  • Loretta@SafariOfTheMind shared her glorious gardens with us and they are quite something – jaw droppingly spectacular. Loretta has started blogging quite recently and her post on her trip to Kenya is quite the read.

So it’s not all delicious food, decadent puds and glamourous cocktails. Pour yourself an ice cold tall drink enjoy Fiesta Friday #20 which is very ably  hosted this week by Fae@Fae’sTwistandTango and Suzanne@PugintheKitchen. Fae needs little introduction – the original blog mother hen, she has nurtured and encouraged so many whilst maintaing a truly international, inspirational and delicious blog. Suzanne is a very creative and prolific cook who creates recipes for Wholefoods and my favourite website Food52. And how adorable are her pugs? Thank you ladies – it is going to be a blast!

If you blog, please do join in, reading the the guidelines first to get you going.

flourless-chocolate-and-raspberry-torteI, of course, stay true to my nature and bring something for the table. A rather grown up and glorious Flourless Chocolate and Raspberry Torte. A torte is defined as

a sweet cake or tart; from German Torte, via Italian from late Latin torta ’round loaf, cake’. Compare with tortilla

Oh, I do like a little word-history…

flourless-chocolate-and-raspberry-torteInspired by The River Cafe’s Easy Chocolate Nemesis Cake and Nigella’s Chocolate Meringue (which is my dinner party pudding of choice) , this is a dinner party pudding cake. With a crisp meringue exterior and a rich, dense, raspberry studded interior, it is a rather decadent affair. The espresso powder intensifies the chocolate flavour and the tart raspberries offset the sweetness.

flourless-chocolate-and-raspberry-torteWhile the torte is straightforward enough to make, there are a few crucial points that would be remiss of me not to highlight;

  • Take some time to line the sides and base of the tin with waxed paper.
  • The eggs must be at room temperature – they will not whip up to the volume required otherwise.
  • Ensure that the bowl and beaters for the egg whites are scrupulously clean – any bits of grease or egg yolk and they will not whip up as voluminously. Unless you have 2 sets of beaters, start with the whites first and then move onto the yolks.
  • Use large bowls – the whites whip up to 4-5 times their original volume.
  • When you are whipping the whites, add the sugar a little at a time.
  • This is a great article on the various stages of whipping egg whites (and cream)
  • Use a large metal spoon to fold in the egg whites – rubber spatulas destroy the volume.
  • When folding the second and third batches of egg whites, be gentle – don’t knock out the air. The whites are the only leavening agent.

flourless-chocolate-and-raspberry-torte

flourless-chocolate-and-raspberry-torte

flourless-chocolate-and-raspberry-torte

IMG_8172

flourless-chocolate-and-raspberry-torte

Flourless Chocolate and Raspberry Torte

  • Servings: 10 - 12 slices
  • Difficulty: moderate
  • Print

INGREDIENTS

  • 50 g (3 Tbsp) butter
  • 200 g (7 oz) 70% cocoa, dark chocolate, broken up
  • 6 large room temperature eggs, yolks and whites separated into 2 large bowls
  • 225 g (1 cup) caster/superfine sugar, divided in half
  • 1 tsp balsamic vinegar
  • 2 Tbsp expresso powder
  • ¼ tsp salt (I used Maldon sea salt flakes)
  • 225g ripe raspberries
  • 1 x 23 cm/9″ springform baking tin, sides and bottom lined  with waxed paper

INSTRUCTIONS

  1. Place the butter and the chocolate in a heat proof bowl and set over a pan of simmering water. The water should not  touch the bowl – the steam will heat and melt the chocolate and butter. Stir it every so often until melted, amalgamated and smooth. Alternatively, place in a microwave safe bowl, cover loosely and heat on 50% power, stirring every 30 seconds until melted and smooth – this should take about 2 minutes. I used the microwave. Leave it to cool whilst getting the rest of the ingredients ready.
  2. Pre-heat the oven to 180C/350F.
  3. Line the base and sides of the tin with waxed paper using a little butter to help it stick to the tin.
  4. Whip the egg whites in a large grease free bowl until foamy on a medium setting.
  5. Add the balsamic vinegar and whisk briefly.
  6. Increase the setting to high and start adding half the sugar very gradually. The mixture will start getting glossy and increase greatly in volume. Keep going until you get to the stiff peaks stage – when you pull your beaters out, the mixture forms a peak that doesn’t flop over.  Set aside while you get on with the egg yolks.
  7. Whip the egg yolks with the other half the sugar for about 3 or 4 minutes scraping down the sides of the bowl from time to time – the mixture will turn from gloopy and bright orange to a pale, thick and creamy mass.
  8. Add the espresso powder and the salt and whip to incorporate.
  9. Add the cooled but still liquid chocolate/butter mixture and whip again until it is evenly mixed.
  10. Using a large metal spoon, fold in the egg whites to the yolk/chocolate mixture in 3 batches. The first batch is really to temper or loosen up and lighten the yolk/chocolate mixture; fold in the remaining whites carefully trying to keep as much of the volume as you can.
  11. Scrape  into the prepared pan and top with the raspberries, pushing them in slightly.
  12. Bake for 40-45 minutes or until a toothpick inserted into the middle of the cake comes out without any batter clinging to it.
  13. Cool in the pan, on a wire rack – it should collapse in the middle with a crisp meringue like shell and a fudgey centre, studded with raspberries.
  14. Serve in small slices with a little cream and a few fresh raspberries.

© Selma Jeevanjee and Selma’s Table, 2013, 2014. Unauthorised use and/or duplication of this material, including photographs without express and written permission from this blog’s author and/or owner is strictly prohibited. Excerpts and links may be used, provided that full and clear credit is given to Selma Jeevanjee and Selma’s Table with appropriate and specific direction to the original content.

Cook the Books – Demerara Lemon Cake

cook-the-books-demerara-lemon-cakeNigel Slater’s recipes seem to have a resonance that are simultaneously timeless and on trend. It was his ‘Real Fast Food’ to which I first turned when I would come home from a long day at work and it is his ‘Kitchen Diaries” today to which I will always flip through to get inspiration. The cake below is another syrup soaked affair, full of zingy lemon flavour and dense with almonds and eggs. It is perfect as a light pudding with a dollop of thick Greek yoghurt and some strawberries or raspberries.  I been making it since 2010, initially for Jake’s lunch box but now, to occasionally have for unexpected visitors as it also keeps extremely well.

cook-the-books-demerara-lemon-cake

cook-the-books-demerara-lemon-cake


cook-the-books-demerara-lemon-cake

It’s not a difficult cake to make as long as you get everything measured out and ready to go. The first thing to do is to make the topping which is merely a matter of  slicing a lemon and simmering it for 5 or 6 minutes in a little water and sugar. This cools as you get on with the cake. Beat the butter and the sugar, then add the eggs, one at a time, beating well after each addition. If the batter starts to look curdled you can either add a spoonful of the flour mix with every egg or just ignore it as it all comes together in the end.  Fold in the flour mixture and scrape it into a lined loaf tin. Top with the lemon slices and bake. While it is baking, make the syrup which is just a little water and sugar and pour it over the spiked cake while it is still warm out of the oven. This is the first time I have made it in a conventional oven (as opposed to a fan oven) and the lemon slices sank – this has happened with other bakes too so the next time I try a topped cake, I will be turning the fan on to see if it makes a difference…

cook-the-books-demerara-lemon-cake

Lemon slices after simmering

cook-the-books-demerara-lemon-cake

Ready for the oven

cook-the-books-demerara-lemon-cake

For those of you who have been asking about Demerara sugar, it is a golden, raw cane, large crystal sugar, similar to Turbinado sugar. This is what BBC Food have to say about it;

This pale-coloured and mild-tasting raw cane sugar is named after its place of origin – Demerara, in Guyana – but it is now imported from various other countries, such as Jamaica, Malawi and Mauritius. It has large sparkling golden crystals and a crunchy texture. Traditionally used to sweeten coffee, it’s perfect for sprinkling but can also be used for baking, particularly in things that need extra crunchiness such as crumbles, cheesecake bases, flapjacks and biscuits.

This is what Wikipedia has to say about brown sugar;

Brown sugar is a sucrose sugar product with a distinctive brown color due to the presence of molasses. It is either an unrefined or partially refined soft sugar consisting of sugar crystals with some residual molasses content, or it is produced by the addition of molasses to refined white sugar (so-called Molasses Sugar).

Brown sugar contains from 3.5% molasses (light brown sugar) to 6.5% molasses (dark brown sugar) based on total volume. Based on total weight, regular brown sugar contains up to 10% molasses. The product is naturally moist from the hygroscopic nature of the molasses and is often labelled as “soft.” The product may undergo processing to give a product that flows better for industrial handling. The addition of dyes and/or other chemicals may be permitted in some areas or for industrial products.

And finally, this is what Wikipedia has to say about white sugar;

White refined sugar is typically sold as granulated sugar, which has been dried to prevent clumping and comes in various crystal sizes for home and industrial use:

  • Coarse-grain, such as sanding sugar (also called “pearl sugar”, “decorating sugar”, nibbed sugar or sugar nibs) is a coarse grain sugar used to add sparkle and flavor atop baked goods and candies. Its large reflective crystals will not dissolve when subjected to heat.
  • Granulated, familiar as table sugar, with a grain size about 0.5 mm across.”Sugar cubes” are lumps for convenient consumption produced by mixing granulated sugar with sugar syrup.
  •  Caster (or castor) (0.35 mm), a very fine sugar in Britain, so-named because the grains are small enough to fit through a castor, a form of sieve. Commonly used in baking and mixed drinks, it is sold as “superfine” sugar in the United States. Because of its fineness it dissolves more quickly than regular white sugar and is thus especially useful in meringues and cold liquids. Castor sugar can be prepared at home by grinding granulated sugar for a couple of minutes in a food processor.
  • Powdered, 10X sugar, confectioner’s sugar (0.060 mm), or icing sugar (0.024 mm), produced by grinding sugar to a fine powder.

Demerara Lemon Cake

  • Servings: 8 slices
  • Difficulty: Easy
  • Print

INGREDIENTS

For the topping

  • 1 large lemon
  • 4 Tbsp water
  • 2 Tbsp demerara sugar

For the cake

  • 200 g soft unsalted butter
  • 200 g demerara sugar (I use 100g caster/superfine and 100g soft light brown)
  • 4 large eggs
  • 90 g plain flour
  • 90 g ground almonds or almond meal
  • ½ tsp baking powder
  • 1 large lemon, zested

For the syrup

  • The juice from the lemon that has been zested
  • 2 Tbsp demerara sugar

INSTRUCTIONS

For the topping

  1. Place water and sugar in a small pan.  Slice lemon thinly and add to the pan. Bring to the boil and let simmer for about 5 minutes or until most of the water has evaporated.
  2. Set aside to cool while you get the cake ready.

For the cake

  1. Pre-heat the oven to 160C/ 325F and line a loaf pan with paper.
  2. Beat the butter and sugar together until light and fluffy. This will take longer with demerara sugar as it is a larger crystal.
  3. Add the eggs, one at a time, beating well after each addition. The mixture may look curdled but it will be fine once the dry ingredients are added.
  4. Combine the rest of the (dry)  ingredients in a bowl and whisk to make sure that the mixture is well blended
  5. Fold the dry ingredients into the batter with a large metal spoon to preserve as much of the air as possible.
  6. Scrape into the lined loaf tin and overlap the reserved lemon slices down the middle of the batter.
  7. Bake for 45 minutes.
  8. In the mean time, make the syrup by combing the lemon juice and sugar in a pan (I use the one I have cooked the slices in) and leave to dissolve while the cake bakes.
  9. Check the cake, using a skewer or toothpick – if it comes out clean then it is done – if there is some batter clinging to the then it will need a little  extra time.
  10. Remove the cake from the oven and spike all over with a toothpick. Pour the syrup (not all of the sugar will have dissolved) over the cake slowly and evenly.
  11. Leave to cool in the pan.
  12. Serve with a thick dollop of  yoghurt, cream fraiche or double cream and possibly some fruit such as raspberries or strawberries to make it more of a pudding course.

This damp cake keeps very well for a few days if it lasts that long.


Rhubarb Buttermilk Cake with Ginger Streusel

rhubarb-buttermilk-cake-with-ginger-streuselI have been meaning to make Karinna @ The Cheesy Biscuit’s Bramley Apple, Rhubarb and Marzipan Cake for some time now. I finally got my hands on some gloriously red stalks of rhubarb and settled in to make her cake when I realised that I didn’t have any marzipan. A fairly important component of this delicious sounding cake as the title will attest. So I put the rhubarb in the fridge  made a note to get some the next day. Except that neither my local Sainsbury’s nor the Aladdin’s cave of a Mediterranean grocery shop had any.  I needed to get to a larger store but I am so out of the habit now that it just didn’t happen. I turned to one of my favourite sites, Food52, and had a little rummage around and found a recipe for Rhubarb Buckle and Ginger Crumb. I had everything that was needed to make it so ploughed on. I will make Karinna’s cake as soon as I can lay my hands on some marzipan and more rhubarb!

rhubarb-buttermilk-cake-with-ginger-streuselGinger and rhubarb is a marriage made in heaven – last year I made the most delicious ginger ice-cream which I served with roasted rhubarb and orange zest but that is a recipe for another day. For this cake, I’ve adapted it a little by using Demerara sugar and almonds in the topping. I found that the rhubarb settled in the bottom half of the cake making it very moist but this was a nice contrast to the very cakey top half. The streusel didn’t stay on top either but tasted really gorgeous in the cake. This is a nice full batter that rises beautifully so make sure that you use a high sided tin rather than a shallow sandwich tin other wise you will have a cake lava situation on your oven floor! I used a 9 inch springform tin.

rhubarb-buttermilk-cake-with-ginger-streusel

I picked up this pretty tablecloth in a French market in Aix-en-Provence a few years ago. It is the perfect backdrop for afternoon tea!

rhubarb-buttermilk-cake-with-ginger-streusel

A printable recipe follows the photo tutorial so scroll down to print.

rhubarb-buttermilk-cake-with-ginger-streusel


rhubarb-buttermilk-cake-with-ginger-streusel

rhubarb-buttermilk-cake-with-ginger-streusel

Rhubarb Buttermilk Cake with Ginger Streusel

  • Servings: 8 - 10 slices
  • Difficulty: easy
  • Print

Adapted from Food52 – Rhubarb Buckle with Ginger Crumb

INGREDIENTS

For the Streusel

  • 75 g Demerara sugar
  • 30 g flour
  • 70 g finely chopped crystallised ginger (not the ones in syrup)
  • 30 g sliced almonds
  • 40 g melted butter

For the cake

  • 220g flour
  • 1 tsp baking powder
  • 1 ½ tsp ground ginger
  • ½ tsp baking soda
  • ½ tsp salt
  • 85 g very soft butter
  • 200 g caster sugar
  • 2 eggs at room temperature
  • 180 ml buttermilk at room temperature (or add 1 tsp lemon juice or vinegar to milk and let it thicken – 10 minutes or so)
  • 500 rhubarb, sliced finely

INSTRUCTIONS

For the Streusel

  1. Combine the sugar, flour, ginger and almonds and rub together until the ginger is both separated and coated with the flour.
  2. Stir in the melted butter and place in the fridge.

For the cake

  1. Preheat the oven to 180 C/ 350 F. Butter the base and sides of a 9 inch cake tin with high sides – I used a springform which didn’t leak.
  2. Place the flour, ginger, baking powder, baking soda and salt in medium bowl and whisk to combine and aerate.
  3. In a mixing bowl, beat the butter and sugar until light an fluffy – this should take about 3 or 4 minutes.
  4. Add the eggs, one at a time, beating well after each addition.
  5. Add a third of the flour mixture, then half the buttermilk, beating well. Add another third of the flour, then the rest of the buttermilk, finishing with the flour. Beat well after each addition.
  6. Fold in the sliced rhubarb and scrape into the prepared tin.
  7. Crumble the streusel all over the top of the cake and bake for 4o-50 minutes using a toothpick to test that the cake is done. You may even need to go to 60 minutes depending on your oven.
  8. Leave to cool in the pan. It tastes better the next day and is wonderful with a cuppa!

© Selma Jeevanjee and Selma’s Table, 2013, 2014. Unauthorised use and/or duplication of this material, including photographs without express and written permission from this blog’s author and/or owner is strictly prohibited. Excerpts and links may be used, provided that full and clear credit is given to Selma Jeevanjee and Selma’s Table with appropriate and specific direction to the original content.

rhubarb-buttermilk-cake-with-ginger-streusel

Ugly Duckling Carrot and Oatmeal Cake

Ugly Duckling Carrot and Oatmeal CakeOne of my earliest memories of baking is making coconut fingers with my grandmother. She would lay out a dish of shredded coconut and one of condensed milk, trim the crusts off white bread and slice them into fingers. I would carefully dip the fingers into the sticky sweet milk and then the coconut and lay them on a baking tray. We would both watch them through the glass door of the oven, pulling them out when they were toasty and golden. They were delicious – crunchy, sweet and chewy.

Ugly Duckling Carrot and Oatmeal Cake

Ugly Duckling Carrot and Oatmeal Cake

I was instantly transported back to my childhood kitchen when I tasted the caramelised topping of this cake.  It’s not going to win any awards for its looks but, my goodness, it is delicious. The cake itself is dense and moist with the soaked oats but redolent with the flavours of  a carrot cake. I have developed it from the retro Lazy Daisy Cake that was popular in America in the 30’s and 40’s. There are some wonderful stories in the blogosphere about people’s memories of their grandmother making this cake and you know how I love a little history! This is a one bowl cake that just needs a brisk stirring with wooden spoon to bring it together. For a lighter crumb, you could make this in a more traditional way by not soaking the oats, creaming the sugar and butter, then the eggs and finally adding all the dry ingredients but that would take away from the “lazy” aspect of it. I do plan to make it in a more traditional manner to compare.

I left the cake under the grill/broiler for a little too long and burnt some of the topping – I scraped off the worst of it and put it back for another 30 seconds but really was not enamoured of how it looked. Jake came home from school and asked if he could try some, to which I replied, “Not until I’ve photographed it.” The next morning, (I know, I am so mean keeping him waiting that long but in my defence the light was terrible by the time he got home and this cake needed all the help it could get to look even remotely appetising!) I reluctantly tipped it out of  the tin and set it up for the camera, not feeling very inspired at all. It was an ugly, brown, lumpen slab not doing much, so I decided to slice it up into squares. I tried a  bit and was really taken aback at how gloriously tasty it was. I called Jake down to try some and he absolutely loved it – said the base tasted like a carrot cake and that the topping was amazing. A proper ugly duckling! Felt like I had snatched victory from the jaws of defeat…

I have developed this recipe from one I saw on Serious Eats but have cut back a huge amount on the sugar and added carrots, sultanas and spices to make it a little more nutritious. This is my version:

Ugly Duckling Carrot and Oatmeal Cake Measure the oats into the mixing bowl and stir in the milk and water – leave to soak for 20 minutes – also soak the sultanas in a separate bowl at the same time. In the meantime, grate the carrots and measure out and ensure the butter is really soft  (see my Tips and Tricks page for a few ways to achieve this if the butter too hard). Place the bowl back on the scales and add the sugar. Then add the salt, vanilla, carrots, butter and drained sultanas and stir really well to combine. The residual heat from the oats and sultanas will help to break up and distribute the butter. Beat in the eggs and coconut until combined.

Ugly Duckling Carrot and Oatmeal CakePlace the bowl back on the scales and measure in the flour. Add the spices and baking powder and mix well. Scrape into the prepared baking tin and level out. Bake for 30 minutes.

Ugly Duckling Carrot and Oatmeal CakePlace the same (unwashed) mixing bowl on the scales and measure in the two types of coconut, the sugar, the walnuts , the milk and the very soft butter. Stir really well to make a coarse mixture. When ready, remove the cake from the oven, turn on the grill/broiler and top the hot cake with the coconut mixture, spreading it as evenly as possible. Place under the grill/broiler just until the topping turns golden and caramelises – this should only take a minute or two – don’t walk away like I did as it does burn very quickly.

Ugly Duckling Carrot and Oatmeal Cake

Ugly Duckling Carrot and Oatmeal Cake

  • Servings: 16 squares
  • Difficulty: easy
  • Print

Adapted from Lazy Daisy Oatmeal Cake by Yvonne Ruperti on Serious Eats

INGREDIENTS

  • 100 g rolled oats
  • 150 ml just boiled water
  • 100 ml milk
  • 75 g sultanas
  • ½ tsp salt
  • 115 g butter – very soft
  • 150 g light brown sugar
  • 1 tsp vanilla
  • 100 g shredded carrot (2 medium ones)
  • 2 large eggs
  • 50g sweet shredded coconut
  • 180 g all purpose flour
  • 1 tsp baking powder
  • 1tsp cinnamon
  • ½ tsp nutmeg
  • ½ tsp allspice

For the topping

  • 85 g butter – very soft
  • 75 g light brown sugar
  • 3 Tbsp/45ml milk
  • 150 g sweet shredded coconut
  • 50 g coconut flakes
  • 75 g walnuts, chopped

INSTRUCTIONS

  1. Stir together the oats, water and milk and leave for 20 minutes.
  2. Place the sultanas in a bowl and cover with just boiled water.
  3. Pre-heat oven to 175C/ 350F and grease or paper a 9″ square pan.
  4. Drain the sultanas.
  5. Mix the salt, butter, shredded carrots, sultanas, sugar and vanilla into the oats and blend with a wooden spoon or rubber spatula.
  6. Beat in the eggs and coconut blending well.
  7. Add the flour, baking powder, cinnamon, allspice and nutmeg and stir until just mixed.
  8. Pour into the prepared baking tin and bake for 30 mins or until just set.
  9. In the meantime, make the topping by combining all the ingredients.
  10. When the cake is ready, turn on the grill (broiler).
  11. Spread the topping as evenly as you can over the warm cake.
  12. Grill/broil for about a minute or two until it is lightly golden…the topping burns very easily so don’t walk away like I did (to write up this post!).
  13. Cool in the tin on a wire rack.


Iced Lemon Squares

iced_lemon_squaresCan we talk about Facebook for a moment?  Do you think it’s Lucifer’s own handiwork or do you embrace  it with open arms? I have a friend who doesn’t go near it or Twitter because she doesn’t want to have her identity accessible or stolen or to have to read inane tweets like “Ima in the shops innit” and the like! Personally, I find Facebook invaluable for keeping up with my large and far flung family, though ironically, not my brother who is social media averse and prefers to communicate by rather more conventional means, such as the telephone. Facebook has allowed me to connect (awful, awful word, only marginally better than ‘reach out’…) with aunts, uncles, distant and not so distant cousins, nieces and nephews and watch as they grow up, get married, have children and continue that wonderful circle that is life. I have been able to stay in touch with friends who have moved away, colleagues who have moved on and teachers and parents from prep school, long after our children have  moved on to their separate senior schools. You know, the sort of people with whom it was once so easy to loose touch. I cheer along as milestones are reached, champion business endeavours and comment on birthday, wedding and holiday pictures. I have found and been found by old school friends, discovered by one of my mother’s best friends from our Kenya days and  stumbled upon family members that I would never have known otherwise. It is important not to post personal details like the year of birth, to remove geo tagging from home photos and to keep an eye on the privacy settings but in general, Facebook really works for me.

When I started this blog, I set up a Facebook ‘Page’ for it (you have ‘liked’ it, haven’t you?) and have been overwhelmed at the support. Posts have been shared, photos commented on and best of all, recipes have been made and photos posted on the timeline. Last week, my niece who lives in Toronto, messaged  me (on Facebook!) to say that she had a couple of days in London and wondered if we could meet up. It turns out that we last saw each other about 25 years ago, when she and her brother were just young ‘uns. I took them strawberry picking at Garson’s Farm in Esher and we made strawberry ice-cream when we got back. She is as sweet and gorgeous now as she was then and it was an absolute delight to spend time with her and her lovely friend. She says that she doesn’t cook very much but has made my Couscous Stuffed Red Peppers and sent me a photo. Now, of course, none of this would have happened without Facebook…

I knew I wanted to take her a little treat, something that would be light, easy to carry and easy to eat and I remembered these Iced Lemon Squares. The original recipe compares them to brownies (and called them ‘lemonies’) but I never saw the correlation. It is a slender bake – more of a bar than a cake but is dense with a lot of lemon flavour.  I have added ground almonds and tweaked the measurements a little too.

I am taking these over to Angie at The Novice Gardener‘s Fiesta Friday as the party is still going strong and I think that those die-hard revellers may just need a little hit of sugar to keep them going!

Click on the link to be taken to Angie’s blog The Novice Gardener and join the party! Mix and mingle with the the guests – who knows who you might meet! http://thenovicegardener.wordpress.com/2014/04/04/fiesta-friday-10/

If you blog and would like to join the party, here are the guidelines http://thenovicegardener.wordpress.com/fiesta-friday/

iced_lemon_squares

Mix the dry ingredients, then beat in the butter which should be really soft. Nuking it for 15 or 20 seconds may help things along and don’t worry if some melts completely. At this stage the batter will be lumpy. Then, in a separate bowl,  (and without cleaning the beaters), give the eggs and lemon juice a bit of a whisking. Pour this onto the lumpen flour mix, beat and watch it transform into a smooth, creamy batter. Pour it into the prepared tin, spread it out  and bake for 25 minutes. It will be lightly golden rather than deeply tan.

iced_lemon_squares

Let it cool in the tin for 10 minutes then, using the lining paper as handles, lift carefully and place onto a wire rack to cool. If you don’t have paper, make sure to butter the tin very well and also flour it, then when the cake is ready, run a knife round the sides, shake it a few times and flip it out onto a plate then back onto a rack to finish cooling.

iced_lemon_squares

While the bake is cooling, make the icing. First, zest the second lemon and set this aside. Then sift the icing to get rid of any lumps. I have. in the past, tried to skip this step because the ‘dust’ that this process generates really gets my OCD to go into overdrive but this results in bumpy icing so what I do instead is put the icing sugar in a sieve, sit it on top of a bowl and use a spoon to stir and push it through – this really keeps the mess down to a minimum. Add the lemon juice and vanilla extract to the sifted icing sugar and whisk away until all the icing sugar has been absorbed. Keep going – it will happen! If the paste is too thick, add a teaspoonful of milk to loosen it. It should be thick but spreadable. Scrape it onto the middle of the bake and spread it out evenly. Scatter over the lemon zest and leave the icing to set before slicing.

iced_lemon_squares

iced_lemon_squares

To slice, cut the bake in half then slice each half in half so that you have 4 long slices. Spin the bake a quarter turn and do the same again.

iced_lemon_squares

iced_lemon_squares

iced_lemon_squares

Iced Lemon Squares

  • Servings: 16 squares
  • Difficulty: easy
  • Print

Adapted from Rita’s Recipes

INGREDIENTS

  • 125g plain/AP flour
  • 60g almond meal/flour/ground
  • 170g caster sugar
  • ¼ tsp salt
  • 115g unsalted butter, softened
  • 2 large eggs
  • finely grated zest of one lemon
  • 2 Tbsp lemon juice

Icing

  • 70g icing sugar
  • 1 Tbsp lemon juice
  • 1-2 tsp of milk if necessary
  • ½ tsp of vanilla extract
  • zest from 1 lemon

INSTRUCTIONS

  1.  Preheat the oven to 180C/350F.
  2. Line an 8 inch square tin (mine is a 9 inch) with non-stick foil or grease proof paper. See my Tip and Tricks page, tip no 18 for an easy way to do this.
  3. Zest the lemon then juice it, keeping both separate and set aside.
  4. Hand whisk the flour, almond meal, sugar and salt to blend.
  5. Beat in the butter using an electric mixer until the butter has been incorporated – it will be quite lumpy.
  6. Whisk the eggs and the lemon juice for about 30 seconds.
  7. Pour it onto the flour mix together with the lemon zest. Beat until creamy – about 30 seconds to 1 minute. I always try to handle the batter as little as possible so as not to overwork the gluten which can result in a tough crumb.
  8. Scrape into the tin and spread out evenly using a spatula. It will seem like there isn’t enough batter but  don’t worry, there is.
  9. Bake for 25 minutes – it will have coloured a little on top. Place the tin on a wire rack for 10/15 minutes to cool, then using the foil or paper as handles, carefully lift out the cake , place on the rack and peel back the paper from the sides. Let the cake cool completely before icing.

To make the icing:

  1. Zest another lemon and set aside.
  2. Sift the icing sugar into a small bowl to get rid of any  lumps.
  3. Whisk in the lemon juice and vanilla extract and keep whisking until it has all been absorbed.
  4. If resulting paste is too thick, add a tsp of milk and whisk in. The icing should be thick enough stay put yet spreadable.
  5. Pour onto the middle of the cake and spread it out as evenly as possible.
  6. Sprinkle over the zest and leave to set for at least 10 minutes before slicing.

I find that the best way to slice these sort of bakes is as follows:

  1. Using a long sharp knife slice the bake in half.
  2. Then  slice each half into two equal slices so you now have 4 long equal slices.
  3. Spin the paper a quarter turn and do the same again – slice in half and each half in two.  You should have 16 fairly equal squares.

You can substitute oranges or limes for the lemons. You can double up the recipe to make in a larger pan.

© Selma Jeevanjee and Selma’s Table, 2013. Unauthorised use and/or duplication of this material, including photographs without express and written permission from this blog’s author and/or owner is strictly prohibited. Excerpts and links may be used, provided that full and clear credit is given to Selma Jeevanjee and Selma’s Table with appropriate and specific direction to the original content.

Glazed Blood Orange and Brown Sugar Buttermilk Pound Cake

blood_orange_buttermilk_pound_cake

Another citrus cake – I know, but I do rather love making them. I love the bright, sharp flavours and that both the zest and juice can be integrated into such a flavourful and comforting slice. And buttermilk again too!  I’ve said in an earlier post how I always have it and/or sour cream in the fridge just because I find them both so useful and both have a relatively long shelf life too. Buttermilk is wonderful in bakes and does a fabulous job of tenderising meat and poultry. Since I have discovered that you can buy 1L cartons of buttermilk from the many Eastern European grocery stores that have popped in this part of London, I always seem to have some the fridge.

When my son had just started senior school, I went through a phase of baking a cake every Sunday so that he could take a slice to have at break rather than buying something full of trans fats and preservatives from the tuck shop. Banana cakes, carrot cakes, date and fig cakes, lemon and almond cakes, fruit and oatmeal muffins  – it was always something chock full of good things as well as eggs and butter! He quite often asked if he could take some for his friends which, obviously, I was delighted to accommodate! Now, alas, he is further up the school chain and has no room in his bag which is absolutely stuffed with school books, to take food of any kind in with him. That also means no more packed lunches – not something that I am sorry to see the back of. Now I seem to bake a cake at the start of the weekends, just so that there is a slice of something to offer with a cup of tea if someone (his friends or mine) were to drop by. I do write a food blog after all and it’s probably expected!

So to use up the last of the blood oranges, I have adapted a basic recipe for Pound Cake of which I have many fond memories from my teenage years. A slice of pound cake topped with sliced and macerated strawberries and a squirt of Cool Whip was the finale to many a summer picnic and barbecue when I lived in Canada. If you are unable to lay your hands on buttermilk, you may substitute yoghurt instead. And instead of blood oranges, you could use normal ones or even lemons. You can also use white caster sugar rather than the golden and muscovado sugars. Just keep the proportions the same and you will have a lovely, dense, aromatic cake which will keep for quite a few days in the cake tin.

blood_orange_buttermilk_pound_cake

blood_orange_buttermilk_pound_cake

Messing about with a new app on my phone – Waterlogue

This is one recipe which requires the butter to be really soft in order to cream well with the sugars. Once that is done, whisk in the eggs, one by one and then stir in the grated zest. Juice the orange and add to the buttermilk along with the vanilla.

blood_orange_buttermilk_pound_cake

Blend in a third of the flour mixture, then half the buttermilk mixture alternating until everything is used up but keeping a light touch throughout this part of the process. Scrape the batter into a prepared loaf tin and bake!

blood_orange_buttermilk_pound_cake

blood_orange_buttermilk_pound_cake

Prepare the glaze by starting with 30ml of juice – I made mine much too runny by over confidently adding all the juice of half an orange. Glazes should be quite thick, I feel. Once cooled, glaze, slice and enjoy!

blood_orange_buttermilk_pound_cake

Glazed Blood Orange Buttermilk and Brown Sugar Pound Cake

  • Servings: 8-10 slices
  • Difficulty: easy
  • Print

INGREDIENTS

  • 230g plain flour
  • 1 tsp baking soda
  • ¼ tsp salt
  • 115 g unsalted, very soft, butter
  • 150 g golden caster sugar
  • 50 g light muscavado sugar
  • 2 large eggs
  • zest of 2 blood oranges
  • 120 ml butter milk
  • Juice of one orange which was approx 50-60 ml
  • 1 tsp of vanilla extract/paste or the seeds of one pod

Glaze

  • 30 – 45 ml blood orange juice
  • 60g icing sugar

INSTRUCTIONS

  1. Pre-heat the oven to 170 C/325F and paper or butter a 2lb loaf tin
  2. Aerate and mix the flour, baking soda and salt with a whisk and set aside
  3. Cream together the soft butter and sugar
  4. Add the eggs, one at a time and mixing well between each. Add a spoonful of the flour if it looks as though it’s going to curdle – not that it make any difference to the end product.
  5. Stir in the zest.
  6. Mix together the milk, the  juice and the vanilla in a jug and set aside.
  7. Blend in a ⅓ of the flour mix into the batter using a light touch.
  8. Stir in half the buttermilk/orange juice mix and so on – you should finish with the flour mix. Don’t over beat.
  9. Scrape the batter into a loaf pan and bake for an hour. It will be quite dark from the brown sugar and when you insert a toothpick in the middle, it should come out clean.
  10. Leave to cool in the tin for 10 mins, then remove to a rack to cool completely
  11. Mix the glaze ingredients together to a fairly thick consistency and pour over the cooled cake.

Cardamom & Orange Syrup Loaf Cake

Cardamom-Orange-Syrup-Loaf-CakeThe other day I got a little excited to see bags of blood oranges in store and put one in my basket to make a salad with mint, beetroot and fennel. I got home to dejectedly realise that I had picked up a bag of normal oranges. I made the salad anyway as I was craving something crunchy, juicy and light and decided to bake a cake to use up the oranges.

Cardamom-Orange-Syrup-Loaf-Cake

I have been making versions of  this rustic Cardamon & Orange Syrup Loaf Cake for many years. The measurements are easy to memorise, all the ingredients are placed in the bowl and mixed in one go – no creaming, no whipping, no sink full of dirty dishes! The proportion of ingredients are based on the classic sponge cake (equal weights of eggs, flour, sugar and butter) even if the method isn’t. You can substitute limes or lemons for the orange; saffron for the cardamom; sprinkle the top with cinnamon sugar before it goes in and use an apple juice syrup – the possibilities are endless. It emerges risen and golden with that characteristic  of Madeira cakes – a crack along the middle which is the perfect place to drizzle the syrup.

Cardamom-Orange-Syrup-Loaf-Cake

Cardamom-Orange-Syrup-Loaf-Cake

Cardamom-Orange-Syrup-Loaf-Cake

Cardamom & Orange Syrup Loaf Cake

  • Servings: 8-10 slices
  • Difficulty: easy
  • Print

Makes one loaf (in a 900g/2 lb tin)

INGREDIENTS

  • 1 ½ tsp baking powder
  • Pinch of salt
  • 175 g of plain flour
  • 175 g of golden  caster sugar
  • 175 g of unsalted butter (melted and cooled)
  • 2 large eggs
  • 75ml milk (5 Tbsp)
  • 1 large orange – zested

For the syrup

  • Juice of the large orange
  • 75 g caster sugar
  • 6 cardamom pods

INSTRUCTIONS

  1. Preheat oven to 180C/350F
  2. Melt the butter – see my Tips and Tricks page for easy ways to do this – tips 11 and 12.
  3. Prepare the loaf tin with a paper liner or butter the sides and lay a strip of parchment paper to cover the bottom and run up the short sides as handles.
  4. Place your mixing bowl on the scales and measure in the flour and sugar. Add the baking powder and the salt and mix  with a hand whisk to blend and aerate. Zest the orange straight into the bowl.
  5. Add the milk to the melted butter and stir – it also helps to cool the butter down.
  6. Crack the eggs into the bowl, pour in the milk and butter and mix for about 3 or 4 minutes with an electric mixer. It takes no time at all to combine. Do not over beat unless you want a tough crumb!
  7. Scrape into the prepared loaf pan and bake for 35 – 45 minutes. Poke with a wooden skewer at 35 minutes to be on the safe side.
  8. Give each cardamom pod a gentle bash with something heavy – it will crack open, revealing the seeds inside. In a pestle and mortar pound the seeds to a coarse powder. Or using the bottom of a sturdy glass, press on the seeds to break them down.
  9. Juice the orange and add to the sugar and cardamom seeds in a pan. On a low flame, heat until the sugar dissolves and the liquid reduces somewhat – about 3 or 4 minutes. Take off the heat to infuse and cool. If the seeds are a bit on the chunky side, strain the syrup before using.
  10. When the cake is ready, let it cool in the tin for 10 minutes, then take it out and place on a rack. Gently prise away the sides of the loaf paper so that if the syrup runs down the sides it will be contained inside the wrapper and soak back into the cake.
  11. Poke 15 or so holes in the cake using a toothpick; then slowly and gently, pour over the syrup.
  12. Put it back inside the loaf tin until cold.
  13. Slice and enjoy with a cup of tea or glass of fizz!

Cardamom-Orange-Syrup-Loaf-Cake

Marmalade and Sour Cream Loaf Cakes with Poppy Seeds

Marmalade and Sour Cream Loaf Cakes with Poppy SeedsThese Marmalade and Sour Cream Loaf Cakes with Poppy Seeds are brilliant to make for the  bake sale table at school fetes, which is what I first made them for. The addition of sour cream makes them incredibly tender and light. They were so good that I got an email from a dad who had bought one, asking for the recipe.

I do miss those school fetes now that J is at senior school. There was so much good will and pulling together to raise money for the scholarship fund as well as other charities. The Christmas fetes used to be spectacular themed events with parents, the Art department, the children and the maintenance department working in tandem to transform the school. One year the theme was Willie Wonka and the Chocolate Factory with the full size bed and a paper mache family in it, in the entrance hall and Santa’s grotto awash with giant (cardboard) colourful sweets and candy canes. Probably the most spectacular was the Narnia theme, with a wardrobe complete with fur coats as the entry into the grotto and the school walls covered in white sparkly batting with thousands of hand made and decorated snowflakes and decorations hanging from the ceiling and on the walls. There was even a lamppost positioned outside the school doors. The fetes were really very special and I feel so privileged to have been a part of those happy times.

These Marmalade and Sour Cream Loaf Cakes with Poppy Seeds can be made with a hand mixer or in a food processor but either way, don’t take long to come together. A slice is wonderful with a cuppa and the cakes are also good to take in to work or as a hostess gift – delicious home made cakes are ALWAYS appreciated!

Marmalade and Sour Cream Loaf Cakes with Poppy Seeds

Marmalade and Sour Cream Loaf Cakes with Poppy Seeds

Marmalade and Sour Cream Loaf Cakes with Poppy Seeds

Marmalade and Sour Cream Loaf Cakes with Poppy Seeds

Marmalade and Sour Cream Loaf Cakes with Poppy Seeds

Marmalade and Sour Cream Loaf Cakes with Poppy Seeds

Marmalade and Sour Cream Loaf Cakes with Poppy Seeds

Marmalade and Sour Cream Loaf Cake with Poppy Seeds

  • Servings: 2 loaf cakes
  • Difficulty: easy
  • Print

Adapted from Jane Hornby’s Bitter Orange and Poppy Seed Cake for BBC Good Food

Each loaf cake cuts into 8 slices

INGREDIENTS

  • 3 Tbsp thick cut marmalade
  • 150g sour cream
  • 175g soft butter
  • 175g golden caster sugar
  • 3 large eggs at room temperature
  • 200g  flour
  • 2½ tsp baking powder
  • ½ tsp baking soda
  • ¼ tsp salt
  • zest of one orange
  • 2 tsp toasted poppy seeds

Topping:

  • 5 Tbsp marmalade
  • Juice of ½ an orange

INSTRUCTIONS

  1. Preheat the oven to 160 C/320F
  2. Prepare 2 x 2 lb  loaf tins with paper liners or butter the sides and lay a strip of parchment paper to cover the bottom and run up the short sides as handles.
  3. Gently heat the marmalade  – you can do this on a medium setting in the microwave or in a pan on the hob.  Off the heat, stir in the sour cream . Let mix cool.
  4. Place the butter in a bowl or food processor and beat/blend until smooth. Add the sugar and beat/blend for a couple of minutes. Add the eggs, one by one, beating/blending well each time. The mix will look curdled but it will all be ok in the end.  Scrape down the sides and beat/blend again.
  5. In a separate bowl, measure out the flour, baking powder and soda, salt, poppy seeds and grate in the orange zest. Mix well with a fork or whisk; add the wet mix and beat in.
  6. Stir in the sour cream/marmalade mixture.
  7. Pour into the prepared tins  and place in the oven. I find it quite useful to divide up the batter by eye, leaving some behind in the mixing bowl and then weighing each tin to see where the remaining batter should go.
  8. Bake for 1 hour. Check at 30 minutes and  if they are colouring too much, cover loosely with baking parchment.  The cakes are done when a skewer inserted into the cake comes out clean. Give the cakes another 5 or 10 minutes if necessary. Mine were ready in 30 minutes but I have a very hot oven.
  9. While they are in the oven, prepare the glaze; heat the orange juice and marmalade until reduced but still runny. It will take about 5 minutes or so. Set aside to cool.
  10. Cool the cakes for 10 minutes on a rack in their tins.
  11. Turn them out and spoon over the glaze while the cakes are still warm

Loaf cakes will keep for 3-4 days if wrapped. Use baking paper to cover the top and foil to overwrap with.

Lemon and Saffron Semolina Cake

I don’t know about you but I can’t get used to these early evenings especially after the gorgeous summer we’ve had. As much as I love cold weather cooking I am finding myself drawn to sunny colours and citrus flavours in an effort to stretch out that summer feeling. Sunshine and light in a slice is what this Lemon and Saffron Semolina Cake is and long may it shine!

Lemon Saffron and Semolina Cake

Lemon Saffron and Semolina Cake

It is a damp, dense, sticky cake redolent with intense lemon and warm saffron flavours. Don’t be put off by the soaking-it-in-syrup stage – it is supremely easy and lends itself to all sorts of riffs (a dash of limoncello or amaretto or some thyme leaves…)  and is just utterly delicious! I tend to have a little bag of fine semolina in the cupboards for dusting when I make pasta. It is really easy to find in even the smallest of ethnic (Indian or Mediterranean) food provision shops. This could also be made with 1 large juicy orange instead of 2 lemons.

To make it gluten free, use fine polenta or cornmeal instead of semolina and a gluten free baking powder too.

It is not a difficult cake to make and because of it’s weighty ingredients is quite forgiving.

Lemon Saffron and Semolina Cake

Beat the butter and sugar until it is light and fluffy

Lemon Saffron and Semolina Cake

Soak the saffron threads in a tablespoon of kettle hot water

Lemon Saffron and Semolina Cake

Zest the unwaxed lemons finely

Lemon Saffron and Semolina Cake

Syrup soaked cake

Lemon Saffron and Semolina Cake

Lemon Saffron and Semolina Cake

Lemon Saffron and Semolina Cake

Lemon Saffron and Semolina Cake

Lemon Saffron and Semolina Cake

Lemon Saffron and Semolina Cake

Lemon Saffron and Semolina Cake

Lemon Saffron and Semolina Cake

Lemon Saffron and Semolina Cake

Lemon Saffron and Semolina Cake

Lemon and Saffron Semolina Cake

  • Servings: 12 slices
  • Difficulty: easy
  • Print

Adapted from Nigella Lawson’s Lemon and Polenta Cake

INGREDIENTS

For the cake:

  • 200 g soft preferably unsalted butter (and a little smidgen  for greasing)
  • 200 g caster sugar
  • 200 g ground almonds
  • 100 g fine semolina  polenta or cornmeal will make it gluten free)
  • 1 ½ tsp baking powder
  • 3 large eggs
  • zest of 2 unwaxed lemons (save lemons to juice for the syrup)
  • pinch of saffron threads dissolved in 1 Tbsp of hot water

For the syrup:

  • juice of 2 lemons (put the whole, zested lemons in a microwave for about 75-90 seconds to maximise the juice output!)
  • 125 grams icing sugar

INSTRUCTIONS

  1. Preheat oven to 180°C/160°C Fan/ 350°F and put the kettle on.
  2. In a little bowl/saucer (I used one one those tiny soy dipping dishes) place the saffron threads giving them a bit of a rub together as you do so. Pour over about 1 Tbsp of hot water from the kettle and leave to steep while you get on with the rest of the recipe.
  3. Line the base of a 23cm / 9inch springform cake tin with a circle of baking paper and grease its sides lightly with butter.
  4. Beat the butter and sugar till light and fluffy – this will take about 5 minutes depending on how soft the butter is. Don’t skimp on this step as this not only helps to aerate but also serves to somewhat dissolve the sugar.
  5. Mix together the almonds, semolina and baking powder in a medium sized bowl and beat 2 heaped Tbsp of it into the butter-sugar mixture, followed by 1 egg. Then alternate with ⅓ of the dry ingredients and the 2 remaining eggs, finishing with the dry ingredients. Beat well after each addition.
  6. Beat in the lemon zest and saffron water and threads.
  7. Scrape the thick batter into the prepared tin and smooth it out evenly.
  8. Bake in the oven for about 40 minutes, checking after 30. Mine was done at 30 minutes but I have a very hot oven. The cake is done when a cake tester  comes out quite clean and the edges of the cake have begun to shrink away from the sides of the tin even if it seems a bit tender.
  9. Place onto a wire cooling rack, but leave it in its tin.
  10. Make the syrup by boiling together the lemon juice and icing sugar in a small saucepan. When the icing sugar’s dissolved into the juice, it’s ready. Let it cool for 5 minutes or so.
  11. Prick the top of the warm cake all over with a cake tester or toothpick – don’t use anything too big like a skewer as it will punch too-large holes in the cake.
  12. Slowly pour the warm syrup over the cake, and leave to cool before taking it out of its tin.
  13. Eat as is or serve as a pudding with a spoonful of creme fraiche and a pretty dusting of icing sugar.
© Selma Jeevanjee and Selma’s Table, 2013, 2014. Unauthorised use and/or duplication of this material, including photographs without express and written permission from this blog’s author and/or owner is strictly prohibited. Excerpts and links may be used, provided that full and clear credit is given to Selma Jeevanjee and Selma’s Table with appropriate and specific direction to

Lemon Saffron and Semolina Cake

Lemon Saffron and Semolina Cake

Rustic Plum and Blueberry Tart

Rustic Plum and Blueberry TartA couple of times a year a four of us meet up at one of London’s food markets to browse the stalls, refreshments in hand, to decide on a menu for that evening, depending on what is available.

Broadway Market, East London

Broadway Market, East London

Broadway Market, East London

Broadway Market, East London

Bread cubes, sometimes dipped in olive oil, are nibbled, cheese is greedily sampled, vegetables are gently prodded, seafood is admired and appraised, meat is pondered and sometimes a little matchmaking is attempted. But that is another story!

Over more refreshments, the menu is finalised, purchases are made, wine is bought and we repair to one of our homes, usually M & B’s, to spend the rest of the afternoon prepping and cooking to produce a tasting menu of 6 – 8 dishes. One of my favourites is a seared scallop on small disc of crispy black pudding with a mustard and creme fraiche sauce. I think that N has made this every time now – it’s a regular on our “menu”.  We all have some idea of what we would like to cook before we get to the market and I usually bring something pre-made with me. Once I made pasta dough and brought my pasta roller because I wanted to make a ravioli – medley of mushroom as it turned out and once I made a mustard and rhubarb relish which I wanted to serve with mackerel but there were none to be had in the market that day. Sometimes we invite friends who arrive in the evening together with our family members and it is always a warm, convivial day finishing late into the night.

We never make a pudding as we would all much rather have a cheese course but once (3 years ago according to my notes), I made this Rustic Plum and Blueberry Tart to have just incase anyone felt like a sliver of something sweet and I have been making it ever since.

Rustic Plum and Blueberry Tart

Rustic Plum and Blueberry Tart

It takes minutes to blitz the pastry base and slice the plums and then it spends 3/4’s of an hour or so in the oven, with an irresistible smell wafting out of the kitchen for the duration.

Blitz until mixture resembles damp sand

Blitz until mixture resembles damp sand

Tip into baking tin

Tip into baking tin

Pat very gently to form an even layer

Pat very gently and lightly to form an even layer

Plum carnage

Plum carnage…

Sliced plums laid on the base

Sliced plums laid on the base

Scattering of blueberries

Scattering of blueberries

Cooling on a rack

Cooling on a rack

For this tart to work, it is desirable to have a contrast of sweet biscuit-like pastry base and the sour plums – Victoria plums (the oval purplish ones) won’t work. Because the pastry base has a higher sugar content, it will colour to a gorgeous golden brown. I am battling with a really horrible oven – though not for much longer – which scorches everything so the fruit does look a little singed but this contrasts beautifully with the tart jammy interior of the fruit and the crumbly, nutty biscuit like base.  In the past I have added a few drops of almond extract to the base to boost the flavour and I have also added cinnamon to it. Once I didn’t have enough ground almonds and added flaked ones to bolster up the quantity. All were successful additions. There are lots of plums around at the moment so this is the perfect time to try this easy recipe.

Rustic Plum and Blueberry Tart

Rustic Plum and Blueberry Tart

Rustic Plum and Blueberry Tart

Rustic Plum and Blueberry Tart

Rustic Plum and Blueberry Tart

Rustic Plum and Blueberry Tart

  • Servings: 8 slices
  • Difficulty: easy
  • Print

adapted slightly from the wonderful blog, Orangette by Molly Wizenberg

INGREDIENTS

  • 150g flour
  • 150g golden caster sugar
  • 85g ground almonds
  • 1/2 tsp baking powder
  • 1/8 tsp salt
  • 1 large egg, lightly whisked
  • 45g cool butter, cubed
  • 4-6 juicy slightly tart, juicy plums
  • 100g of blueberries (a handful really)

You will also need a 22 cm loose bottomed  or springform tin, the bottom lined with a parchment circle.

INSTRUCTIONS

  1. Preheat oven to 190C/170C fan/375F
  2. Using a food processor; Place the flour, sugar, ground almonds, baking powder and salt in the bowl of a food processor and pulse to blend. Pour in the egg and butter cubes and process until it looks like damp sand. It takes about one minute!
  3. If you are making it by hand, place the  flour, sugar, ground almonds, baking powder and salt in a bowl and mix well to combine. Add the egg and butter and using a pastry blender, two knives or a fork, cut the mixture together until it starts to clump and there is no flour showing.
  4. Tip the mixture into the baking tin and gently pat down to even out into one layer – you mustn’t compact it and nor should you pat it up the sides. it should just be one even layer.
  5. De-stone 4 of the plums by cutting in half and twisting. Depending on the size of the plums, slice each half into 3 or 4 slices and lay in two circles on top of the pastry. Leave a little margin of pastry between the edge of the tin and the fruit.  If you need more fruit then use the additional plums.  Scatter over the blueberries.
  6. Bake for 50-55 minutes, checking after 40 minutes.
  7. The tart is ready when the pastry has puffed up a little around the fruit and has taken on a golden hue with a deeper colour to the edges.
  8. Cool in the tin, on a rack for 10 minutes and then remove the sides to finish cooling.
  9. Can be served warm or cold with a spoonful of creme fraiche or a scoop of ice-cream.
© Selma Jeevanjee and Selma’s Table, 2015. Unauthorised use and/or duplication of this material, including photographs without express and written permission from this blog’s author and/or owner is strictly prohibited. Excerpts and links may be used, provided that full and clear credit is given to Selma Jeevanjee and Selma’s Table with appropriate and specific direction to the original content.

Rustic Plum and Blueberry Tart

Rustic Plum and Blueberry Tart