Crustless Cardamom & Blood Orange Milk Tart

Crustless Cardamom and Blood Orange Milk Tart |Selma's TableBrowsing through Woolworths’ South African website, I came across this intriguing recipe for Milk Tart, which is apparently, the ultimate braai recipe. It’s very unusual in that it is a really liquid batter but it does work and is absolutely delicious.

Crustless Cardamom and Blood Orange Milk Tart |Selma's TableAs a bonus, the house smelt amazing too – cardamom and cinnamon baking together is just such a wonderful smell! I think that this would be a lovely alternative to a chocolate dessert for easter lunch – it can be made a couple of days ahead and refrigerated so is absolutely perfect for entertaining.

Crustless Cardamom and Blood Orange Milk Tart |Selma's TableI must admit that my heart stopped when I realised how much liquid I was dealing with and I gingerly put it in the oven not expecting it to work at all but it did. “Folding” the egg whites into so much liquid was not easy.

Crustless Cardamom and Blood Orange Milk Tart |Selma's TableI think it would work better if the egg whites were folded in to only half the liquid and the rest stirred through. I used the last of the blood oranges to make this but you could of course, use conventional oranges.

Crustless Cardamom and Blood Orange Milk Tart |Selma's TableNot wanting any waste, I made a lovely syrupy orange sauce to go with it using sweet dessert/pudding wine, sugar and orange segments. If you don’t want to use a sweet wine, then just add a little orange juice instead.

Crustless Cardamom and Blood Orange Milk Tart |Selma's TableI am thrilled to be co-hosting Fiesta Friday #61 with the incredibly talented  Margy @La Petite Casserole for Angie of The Novice Gardener. In case you missed it, Fiesta Friday has a new home now – http://www.fiestafriday.net.

If you are new to blogging, please do join the party, we would love to see you. Fiesta Friday is a great way to gain exposure and make new friends too. Be sure to comment, like and follow – Angie has such a friendly crowd at this party that you will come away with lots of new followers (as long as you interact) as well as a lot of inspiration!

Submit a post (please be sure to include the link and a mention, in your post, to Angie’s   Fiesta Friday #61 post – it’s only polite and also ensures that you can be considered for a feature next week!)  or just take a look at others are up to! If you’re new to Fiesta Friday, please do take a minute to read the guidelines.

Click on the purple button below to be taken to the party – you can take a look at what everyone has brought or join in with a post of your own. Enough nattering – let’s fiesta!

fiesta-friday-badge-button-click-to-join1

Crustless Cardamom and Blood Orange Milk Tart

  • Servings: 6-8
  • Difficulty: moderate
  • Print

Adapted from Woolworths South Africa

Ingredients

  • 700ml / 3 cups milk
  • 1 tsp vanilla paste
  • 1 tsp ground cardamom
  • 1 orange, zested (1 large or 2 small) and segmented
  • 4 large free-range eggs, separated
  • 200 g soft brown sugar
  • 3 Tbsp soft butter
  • 140 g plain/AP flour
  • 1 tsp baking powder
  • 1/2 t salt
  • cinnamon sugar, for dusting
  • Sugar
  • Sweet pudding wine

Instructions

  1. Preheat the oven to 160°C. Line a deep, 25 cm baking tin with baking paper. If it is a springform pan, you may want to also cover the outside with some foil to protect against seepages.
  2. Measure out the milk in a jug then stir in the vanilla paste, cardamom and orange zest and set aside.
  3. In a small bowl, sift or hand whisk together the flour, baking powder and salt to mix it all together and set aside
  4. Beat egg whites until stiff and set aside.
  5. Beat the egg yolks, sugar and butter until pale and creamy.
  6.  Fold the flour mixture into the egg mixture with a enough of the flavoured milk to make a loose batter.
  7. Gently fold in the stiffly beaten egg whites.
  8. Then slowly stir in the rest of the milk.
  9. Set your prepared pan onto a rimmed baking sheet – it’s easier to move and safe guards against oven disaster.  Pour the very liquid batter into the prepared pan. Sprinkle with a good dusting of cinnamon sugar, then bake for 1 hour, or until almost set – it should have a lovely golden crust. A quick poke with a wooden skewer will tell you if it is done.
  10. Remove from the oven and leave to cool, then refrigerate until set.
  11. Segment the oranges and place in a pan. Squeeze over any juice from the membranes and sprinkle with a little sugar. Add a splash of booze. Heat until syrupy. Cool and serve with the slices of the tart and a small glass of the remainder of the pudding wine!
© Selma Jeevanjee and Selma’s Table, 2015. Unauthorised use and/or duplication of this material, including photographs without express and written permission from this blog’s author and/or owner is strictly prohibited. Excerpts and links may be used, provided that full and clear credit is given to Selma Jeevanjee and Selma’s Table with appropriate and specific direction to the original content.

Fruited Cinnamon Sourdough Loaf

Fruited Cinnamon Sourdough Loaf | Selma's TableYou can’t rush sourdough bread making. The physical time spent on making the bread is minimal however the proofing takes time; time to develop the wild yeast and those coveted bubbles, to develop the gluten strands  and  to develop that unique flavour. I like to think of it as nurturing. And it’s so inherently satisfying, almost on a primal level, to be able to produce the staff of life, using ancient methods – made with wild yeast, additive free ingredients and with a pedigree. My starter, Twinkle, comes from Celia’s starter, Priscilla, which is nearly 8 years old.  Since I got my starter from Celia of the fabulous blog Fig Jam and Lime Cordial, last month, I have been baking bread – getting to know and learning how to handle Twinkle just like a would a baby! So it’s all about setting out a time plan starting with when you want to bake or eat the bread and working back from that. I tend to start on a Saturday afternoon, to bake a basic sourdough loaf on the Sunday morning but this Fruited Cinnamon Sourdough Loaf takes a little longer because it goes in the fridge for the yeast and flavours to develop slowly and more fully.

Fruited Cinnamon Sourdough Loaf | Selma's Table
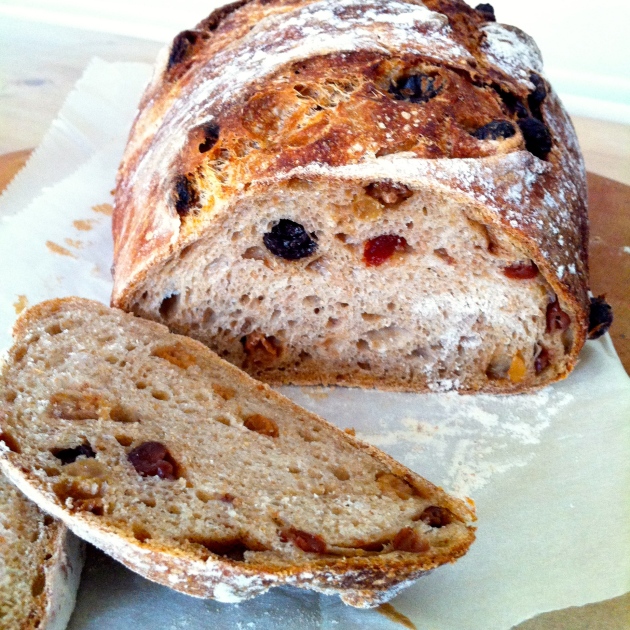
Over on Twitter, there is a small group of us who started baking our Pricilla originated sourdoughs at the same time. Led by Celia, we have the most hilarious, informative and inspiring conversations. This Fruited Cinnamon Sourdough Loaf was inspired by Annie’s efforts and has also led Celia to bake the most gorgeous looking fruit loaf too!  Other people dip in and out of our conversations, commenting, offering advice or asking questions. Oh, and it’s mostly on Australian time so when I’m getting up, they may or may not have had a glass or two!! Fruited Cinnamon Sourdough Loaf | Selma's Table

Start the Fruited Cinnamon Sourdough Loaf a couple of days before you want to bake. I started the process on Friday afternoon and baked the loaf on Sunday morning. The full, printable recipe with some links is below but in a nutshell, this is what I do. I start by feeding Twinkle to make a poolish. Then I add the rest of the ingredients to make the dough and squelch the lot together for a minute. After half an hour, I stretch and fold the dough a few times. This goes into a lightly oiled bowl and sits out on the counter to bulk prove overnight. The next morning, I incorporate the dried fruit using the stretch and fold method, place the dough back in the cleaned and oiled bowl and leave it in the fridge until the next morning. The photo below is what I woke up to! Fruited Cinnamon Sourdough Loaf | Selma's Table 
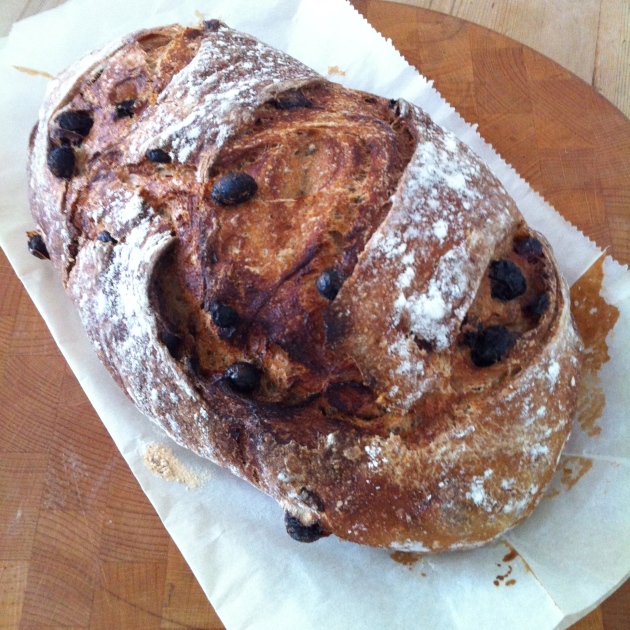
At this point, I incorporate the cinnamon sugar and shape the loaf. This sits out on the counter to proof once more for 30-45 minutes, while the oven heats up and then goes into a lidded casserole dish, gets slashed and bakes for 20 minutes with the lid on. After another 30 minutes with the lid off, this is what it looks like…go on – you know you really want to give this a try! Fruited Cinnamon Sourdough Loaf | Selma's Table 
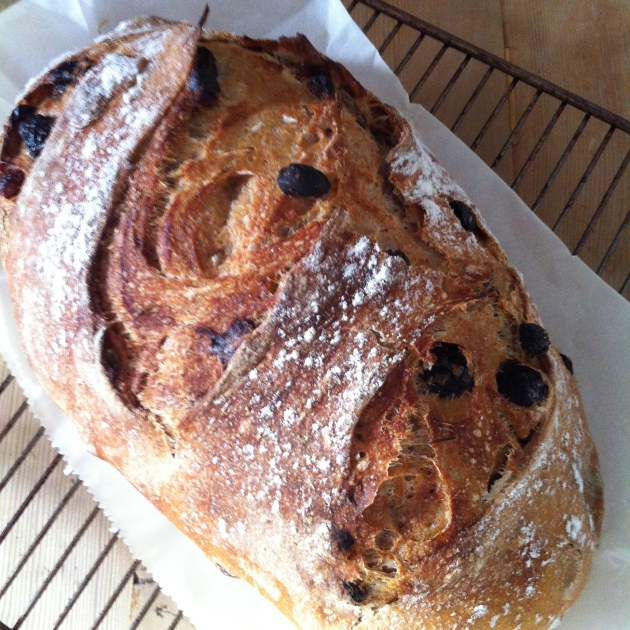
If you’ve had starter from Celia or from me, give this Fruited Cinnamon Sourdough Loaf a go once you are comfortable with baking Celia’s Overnight Sourdough.

Some resources – Emilie of the Clever Carrot, who got her starter from Celia a year ago, has this brilliant beginners guide to sourdough on her blog. She has been baking the most gorgeous looking breads – bakery worthy!  The Weekend Bakery have a couple of great videos on how to fold and stretch dough and also how to shape the loaves. I have added the video links to the recipe below, in the appropriate places.

Fruited Cinnamon Sourdough Loaf

  • Servings: 1x approx 750 g loaf
  • Difficulty: moderate
  • Print

For the sourdough poolish

Day 1At 1 pm –  Remove ¼ cup of starter from the fridge and feed her ¼ cup each of bread flour and filtered water, followed by ½ cup of each at about 4pm. By 8pm your poolish will bubbly and ready to incorporate into a dough.

For the fruit soak

Day 1At 8 pm – Soak 200 g dried fruit of your choice – my mix included cherries, cranberries, sultanas and raisins with 100 ml strong hot black tea and leave out overnight. Drain well before using.

For the Fruited Cinnamon Sourdough Loaf

  • 200 g bubbly sourdough poolish
  • 300 – 320g filtered water
  • 250g organic white bread flour
  • 250g organic wholemeal bread flour
  • 9g fine sea salt
  • fruit soak, well drained
  • 1 tsp cinnamon mixed with 2 Tbsp sugar

INSTRUCTIONS

  1. Day 1At about 8 pm – Pop a large mixing bowl on the scales and reset the scales to zero.
  2. Measure in 200g of the poolish and reset the scales to zero.
  3. Pour in 300g of filtered water and reset the scales to zero.
  4. Measure in the flours and the salt.
  5. With a clean hand, squelch everything together for about a minute or so. If it is really dry, add a little more water – wholemeal flour can be very thirsty. Scrape off all the bits on your fingers, into the bowl, cover the bowl with cling film and leave it to rest for ½ an hour. (The first time I made bread, I wanted to protect my manicure and popped on a disposable latex glove to squelch. Not much sticks to the latex so I have carried on using one every time I make a loaf.)
  6. If your bowl is large enough, you can “knead” in it. Otherwise, scrape the dough out onto a lightly floured surface and spread it out a little. Start to stretch the dough (which will be sticky but just persist without adding any extra flour) by pulling it and folding it over on it self. Do this several times until the dough starts feeling a little more elastic. This is called the stretch and fold method.
  7. Clean your large bowl, and lightly oil it and place the dough inside. Cover it with cling film or a shower cap and leave it out overnight. This is called the bulk prove.
  8. Day 2 – The next morning, you will find the the bowl is pretty well full of bubbly dough. Scrape it out again on a lightly floured surface and gently pull and stretch it out into a rough rectangle. Spread with the well drained fruit soak. Fold the dough over it in thirds, (like an A4 letter), then do the same again. Gently stretch it out into a rectangle and repeat the folding once again, as best as possible.
  9. Lightly oil the bowl and place the dough inside. Cover with cling film and put the bowl in the fridge to prove. (Putting it in the fridge, slows down the rise you can leave it in the fridge for a couple of days if you need to.)
  10. Day 3 – The next morning, the dough will be doubled in size and full of bubbles; somewhat resembling an alien life form!
  11. Pre-heat your fan oven to as high as it will go.
  12. Gently scrape the dough out onto a very lightly floured surface, and gently pull into a rectangular shape. Scatter over the cinnamon sugar and fold in thirds, stretch and fold into thirds again.
  13. Shaping the dough – Seam side down, drag and pull the dough towards you, cupping it with your hands and keeping the seam on the bottom, Make a quarter turn and repeat until you have a nice tight gluten coat on the top. I pulled mine into an oval shape as I was doing this. Cover with some oiled cling film and leave out to warm up and rise for 30-45 minutes.
  14. Line a lidded casserole dish with parchment paper and flour the paper. Transfer the dough into the dish and slash the top as you wish – I made 3 diagonal cuts to the top.
  15. Cover the dish and place in the oven. Turn down the heat to 220C fan and bake for 20 minutes.
  16. Remove the lid, turn down the heat to 190C and bake for 30 minutes. Check that the bread is cooked by tapping on the bottom to see if it sounds hollow. Otherwise, put it straight onto the oven rack and bake for 5 more minutes.
  17. I know it’s difficult, but let it cool for at least 30 minutes before slicing into it!

You can of course bake this on a pizza stone or on a baking sheet. If you do, put a few ice cubes or some water into a muffin tin or small tin and place on the floor of the oven to generate steam.

© Selma Jeevanjee and Selma’s Table, 2013 – 2015. Unauthorised use and/or duplication of this material, including photographs without express and written permission from this blog’s author and/or owner is strictly prohibited. Excerpts and links may be used, provided that full and clear credit is given to Selma Jeevanjee and Selma’s Table with appropriate and specific direction to the original content.

In My Kitchen – December 2014

I was MIA from this series last month, but it’s been a busy couple of months in my kitchen – come and take a look..

In My Kitchen December 2014 | Selma's Table

Blue and White serving dishes

In my kitchen, I have scored some bargains! I love scouring charity and thrift shops for tableware – most of the time there is nothing but sometimes, there be gold… The first two dishes in the top row,  I spotted locally for a grand sum of £4 and the last one I found on eBay – starting price £1.99 and no one else bid!

In My Kitchen December 2014 | Selma's Table

Silver servers

Another eBay find – I was looking for salad servers and came across these, being sold as a pair of salad servers. Obviously they aren’t – I think that they are most probably cake or pie servers – what do you think? Both are silver plate from the 1920’s, the ivory handle is bone and the brown handle is bakelite. Again, no-one bid for them so I got the pair for the starting price of £3.99! I just love the detail on them.

In My Kitchen December 2014  | Selma's Table

Elaine of foodbod’s spice blends

In my kitchen, I’ve had some incredibly generous gifts from my fellow bloggers. Elaine of foodbod sent  me a a selection of her homemade spice blends. I recently used her foodbod #1 blend in scrambled eggs, which turned out quite delicious!

In My Kitchen December 2014  | Selma's Table

Tina of Madamoiselle Gourmande’s cutlery wrap

Then, Tina of Mademoiselle Gourmande sent me the most stylish cutlery wrap (for picnics, said her note!) which she made herself. Isn’t it lovely? What a thoughtful and clever thing to make and send me – I am very touched.

In My Kitchen December 2014  | Selma's Table
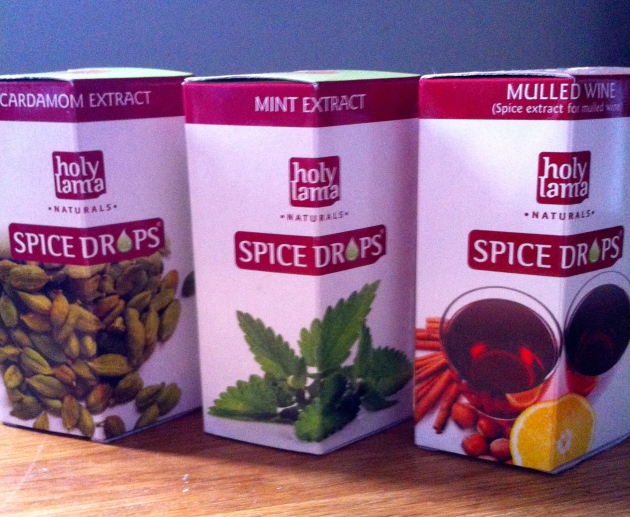
I’ve been sent some wonderful Tetley’s Green Tea to try out – I had no idea how involved the whole process of tea blending is. I’ve written a post about it with information that is sure to surprise you! These green teas are just lovely – for me, the trick is not to let the teabags steep for too long otherwise the resultant tea is just too bitter. The fruity Peach and Apricot Green Tea is also fantastic for steeping dried fruit for bakes and the Mint is very refreshing.

In My Kitchen December 2014  | Selma's Table

Barber’s 1833 Vintage Reserve Cheddar and Wookey Hole Goats Cheese

Elaine and I went to the BBC Good Food Show as guests of Barber’s 1833, England’s oldest cheesemaker who use live cultures to make their cheeses.  I’ve written a post about their cheese making process which is steeped in history and tradition; their fabulous cheese which can be bought in Australia as well as the States and really shouldn’t be missed if you get the opportunity to get your hands on some.

In My Kitchen December 2014  | Selma's Table

Holy Lama Spice Drops

While we were at the show, I picked up a few things – of course! These Spice Drops were actually samples from the press room (we had press passes – swanky or what?). The Mulled Wine is very nice in a cuppa and I am looking forward to using the cardamom in baking and in rice too.

In My Kitchen December 2014  | Selma's Table

Lime Leaves

I bought a bag full of lime leaves – the dried ones – which are just so lovely in any Thai style dish, especially anything with coconut or shellfish in it. I pull out the central rib or stem and finely slice the leaves before stirring them in to the sauce to simmer and impart that gorgeous perfume.

In My Kitchen December 2014  | Selma's Table

Dakos from the Olive Branch

I also stopped by the Olive Branch stand to say hello and got my hands on a bag of Dakos – these are the hard rye biscuits that Ottolenghi loves and uses in his salads.

In My Kitchen December 2014  | Selma's Table

Win a copy of Plenty More by Yotam Ottolenghi

Speaking of Ottolenghi, I’ve been sent a copy of his eagerly awaited and much coveted book, Plenty More for one of my readers to win. It is full of the most wonderful recipes; inventive and so full of flavour that you don’t even realise that they’re vegetarian.  The competition ends on Tuesday Dec 09  – take a look at the post for more details on how to enter the draw.

In My Kitchen December 2014  | Selma's Table

Dried Limes

One of the ingredients Ottolenghi uses is dried limes – you cook them whole in sauces where they lend and musky deep lime flavour to the dish. I found a bagful in my local Mediterranean shop and I just wish you could smell them – absolutely gorgeous. I can see how Jo Malone was inspired to come up with the fragrance for her iconic Lime Basil and Mandarin Cologne, to which I am addicted!

In My Kitchen December 2014 | Selma's Table

Vietnamese Cinnamon

In my kitchen and very appropriate for this time of year, I have a large bottle of Cinnamon – and this is one of my favourites. It just has such a lovely flavour. I stock up on it whenever I see it at TK Maxx as I do get through quite a bit with all the baking I do.

In My Kitchen December 2014  | Selma's Table
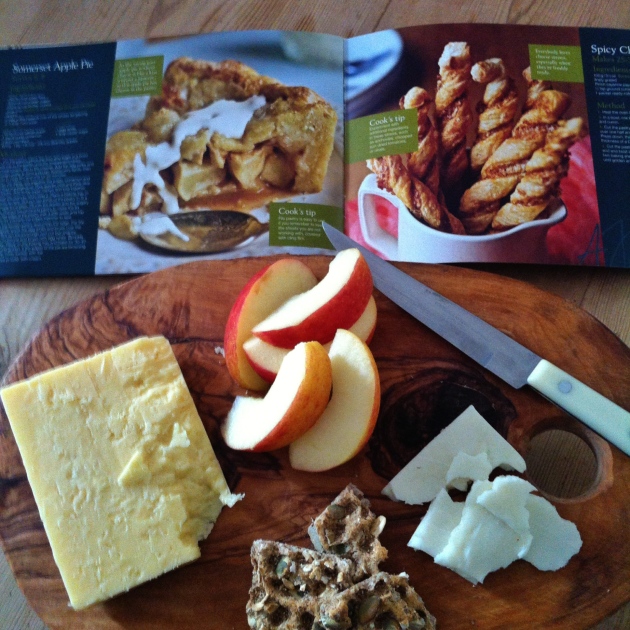
In my healing kitchen…..I may have arthritis in my ankle – I will find out next week what the results of all the tests and scans are but in the meantime, I have taken matters into my own hands to effect a cure. Years ago, I was told that drinking a mug of hot water into which had been stirred a spoonful of organic apple cider vinegar (ACV) and a little honey was a fantastic remedy for arthritis. In those days, my finger joints used to get achy especially if the weather was changing. I started to drink a mug of this every morning and I have never suffered from achy fingers since. Even Ralph Fiennes, the intrepid explorer, champions this drink. I did stop drinking this at some point but the minute I heard that my foot may be affected, I hunted down a bottle of organic ACV and have started to drink this again.

In My Kitchen December 2014  | Selma's Table

In Wholefoods the other day, they had some fresh turmeric root in which I bought. This is meant to be an anti-inflammatory and since my ankle has been swelling up as well as aching I’ve been making Turmeric Tea which consists of 1 tsp of grated turmeric root and 1 tsp of grated ginger simmered in 1 cup of water for 10 minutes. Strained into a cup with a little honey and a splash of ACV, it is actually really delicious! And it has done an incredible job in keeping the swelling down. My fingernails look like I smoke 4 packs a day – grating turmeric will do that but it is well worth it!

A little round up of some of the food I’ve made, remembered to snap but haven’t blogged….I made some delicious spicy Butter Beans – recipe on Instagram if you are interested!  I bought a happy chicken from our local Streatham Farmer’s Market and we had it simply, stuffed with thyme and lemon and roasted surrounded by potatoes and garlic – a recipe of sorts is on Instagram – good ingredients just need to be cooked simply to let their flavours shine. These mussels are a bit of a favourite – cook the spaghetti for a couple of minutes less than you would normally and let it finish cooking in the mussel juices. I used some Elaine’s  Creole blend to spice it up and they were delicious! I made a dairy and egg free chocolate cake but didn’t like the texture enough to blog about it – this one needs some tinkering but doesn’t it look gorgeous?! A lovely way to enjoy tomatoes at this time of year, is to slow roast them so that their tomato flavour intensifies. I made a second batch the other day for sandwiches and salads – they are gorgeous in a toasted cheese too!

Well, that is it from my kitchen – huge thanks to the lovely Celia of Fig Jam and Lime Cordial who hosts this monthly event – peeking into everyone’s kitchens all over the world is so inspiring!  Make yourself a cuppa and have a little browse – all the links to the participating blogs are on the right hand side of Celia’s post. I have linked her post to  her blog name so click on it and take a little tour!

Have a wonderful December, everyone!


Homemade Pumpkin Pie Spice Mix

Homemade Pumpkin Pie Spice Mix | Selma's Table
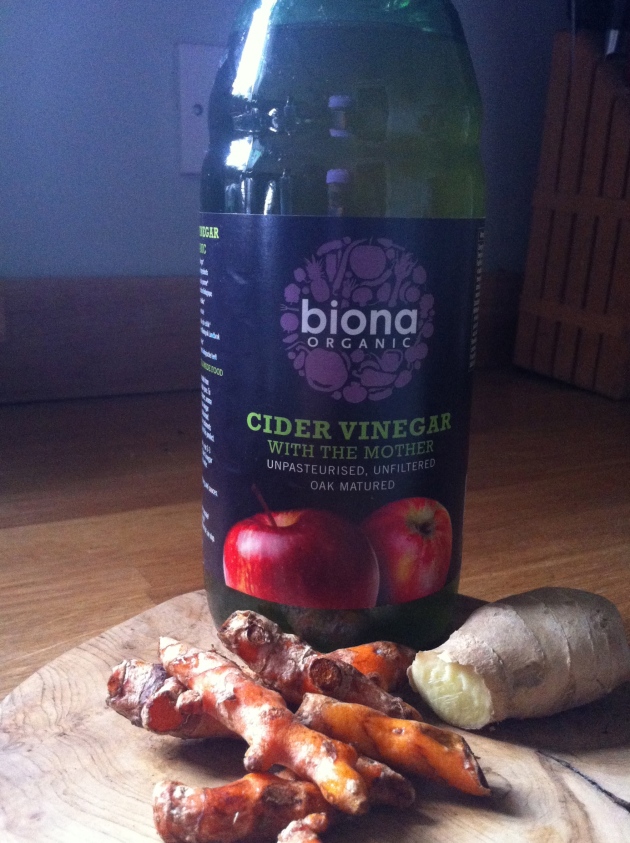
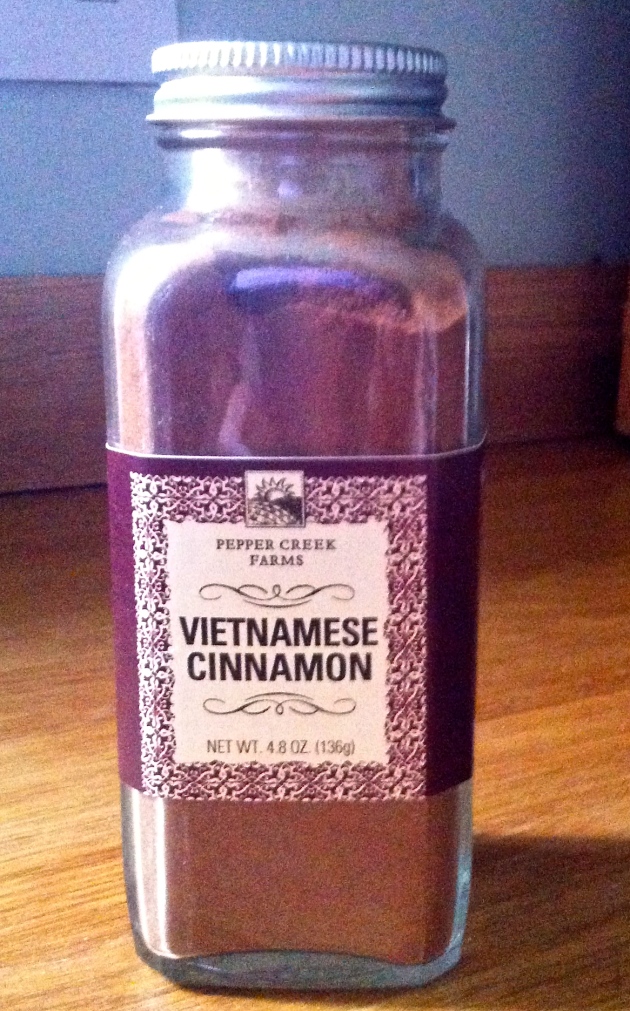
I have been fascinated by the furore that surrounds the Pumpkin Spice Latte from a well known coffee shop chain. You know, the one which claimed that it didn’t make any profit in the UK so didn’t pay any tax. The latest in the drama that seems to surround this business is that there is no pumpkin in their lattes. Cue media outrage and more sales as apparently, all publicity is good publicity. My understanding is that the latte is all about the flavour of the pumpkin pie spice mix and not the actual pumpkin itself.

In the UK pumpkin pie is not a part of our national food history so canned pumpkin puree and pumpkin pie spice blends are not easily found on the shelves of our grocery stores. So for those of you wishing to recreate a Pumpkin Pie or a  Pumpkin Spice Latte at home, this spice mix is for you. You can easily make pumpkin puree by roasting wedges of pumpkin or squash, pureeing and sieving the result, freezing in ice cube trays and storing the cubes in bags in the freezer.

Homemade Pumpkin Pie Spice Mix | Selma's Table

Cinnamon, Ginger, Allspice, Cardamom & Nutmeg

The spice mix is so easily made with ingredients you will most probably have in your cupboards, that you will wonder why you left it so long to make your own. It is generally a blend of ground cinnamon, ginger, nutmeg and cloves, in varying quantities. I am not keen on cloves as they can be overpowering in a blend so I use allspice instead. And I have also added cardamom as I love the smell and flavour of it – so comforting, don’t you think? In the interest of full disclosure, I have to admit to asking Jake to crush the cardamom seeds in the pestle and mortar. He did a magnificent job; much better than I ever could. He is now the official pestle and mortar man at Selma’s Table!

There are many uses for the Pumpkin Pie Spice Mix – in ravioli, cheesecakes, biscuits, cakes and pies – there are a plethora of recipes that celebrate this festive mix. My favourite thing to do though, is to sprinkle a teaspoon of pumpkin spice mix into a carved pumpkin before lighting at tea light and letting that delicious and seasonal aroma waft around the house!!

Homemade Pumpkin Pie Spice Mix | Selma's Table
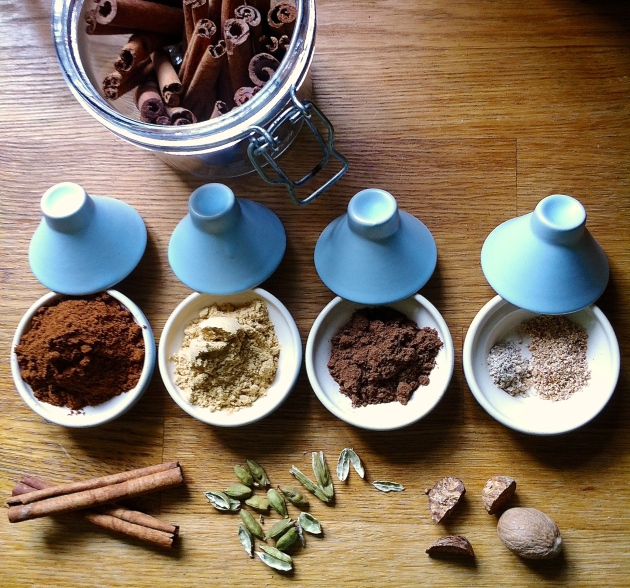
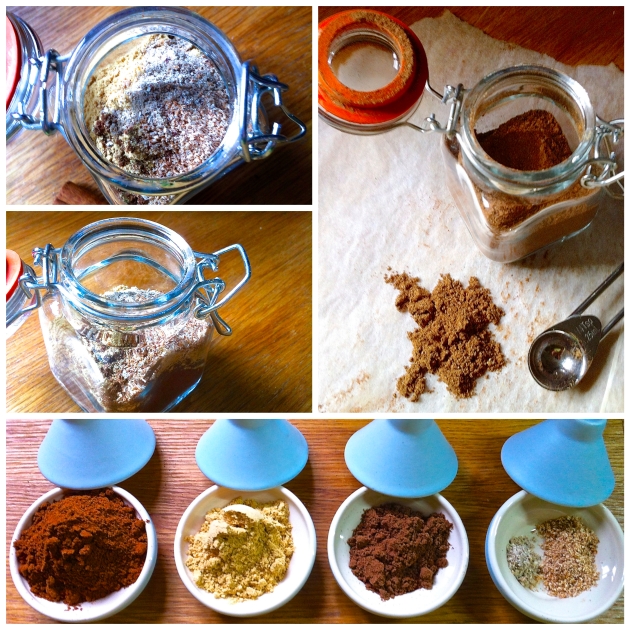
I used a 70 ml Kilner Spice Jar to store the mix in and it was half full. If you want to give this as a gift, double the quantities to fill a bottle of that size. I find that the easiest way to fill the little jar is to place the measured ingredients on a piece of baking paper and then use the paper to funnel it into the jar.

I am sharing my Pumpkin Pie Spice Mix with the Fiesta Friday revellers. Generously hosted by Angie of the Novice Gardener who this weekend is celebrating her birthday! Just take a look at her fabulous Naked Cake – it is gorgeous!!

And a huge thanks to our fabulous  co-hosts; Suzanne of A Pug in the Kitchen and Sue of Birgerbird. Both very talented and prolific cooks with blogs that you will not be able to stop scrolling through…

Homemade Pumpkin Pie Spice Mix

  • Servings: Makes 35 ml or or just over 2 Tbsps
  • Difficulty: Easy
  • Print

INGREDIENTS

  • 1 Tbsp ground cinnamon
  • 2 tsp ground ginger
  • 1 tsp ground allspice
  • ½ tsp grated nutmeg
  • ¼ tsp cardamom powder

INSTRUCTIONS

  1. Measure out and place the spices in small airtight jar.
  2. Shake well to mix.

I used a 70 ml Kilner Spice Jar to store the mix in. If you want to give this as a gift, double the quantities to fill the bottle and add a gift tag with the instructions: “For pumpkin pie, add 1 – 1 ½  teaspoons of spice mix to your other ingredients.”

© Selma Jeevanjee and Selma’s Table, 2013, 2014. Unauthorised use and/or duplication of this material, including photographs without express and written permission from this blog’s author and/or owner is strictly prohibited. Excerpts and links may be used, provided that full and clear credit is given to Selma Jeevanjee and Selma’s Table with appropriate and specific direction to the original content.


Carrot & Apple Cake Cheesecake

Carrot & Apple Cake Cheesecake  | Selma's TableA few weeks ago my friend Rupert held a fundraising ‘coffee’ morning, taking part in an event which is billed as ‘The world’s biggest Coffee Morning for Macmillan Cancer Support”.  My understanding is that it’s a bit like a bring and buy bake sale, so that you can take cakes home as well as indulging in a slice or two while you are there, with a cuppa. Well, Rupes was having none of “that buying thing” – he thought that a donation would be more in keeping with what he had in mind. And he was certainly not thinking of a lot of cakes and biscuits either. He organised the event for between 11 – 2 on a Saturday to give people plenty of time to either lie in, go to the gym or get Saturday chores or shopping done. Well beforehand, he made the phone calls to invite people and he collected money from people who were not able to attend. In true Rupert style, his flat gleamed and was filled with flowers and burning Diptique candles. We sipped  Bucks Fizz from crystal flutes, gorged on delicious savoury nibbles, including crispy prawns, stuffed vine leaves, chicken tikka bites and prosciutto wrapped figs with goats cheese. He served jasmine tea in beautiful Coalport porcelain tea cups  and individual tea pots from a tea service which had been part of his mother’s wedding trousseau. His sister donated a box of Jordanian pastries which were stuffed with dates and walnuts and a friend brought some Matcha macaroons which she had made. I brought this Carrot & Apple Cake Cheesecake which I had made the evening before, because I always have to take something! It was a really lovely event, more like a cocktail version of a brunch party rather than a cake sale and everyone got a chance to mingle and catch up or finally meet. The donations were extremely generous and I am quite certain that the same  amount would not have been raised had people been buying cakes and biscuits in the more traditional manner.

Carrot & Apple Cake Cheesecake  | Selma's Table

Rupes doesn’t do sweet -he really does not have a sweet tooth so I wanted to make something that he would enjoy. I thought about doing a spicy, fruity, carrot cake topped with creamy cheesecake – an idea that I had seen in a magazine at some point and had written down in my notebook. I tweaked an old recipe for carrot cake that I’ve had for years, substituting butter for the oil as I thought that the batter should be fairly stiff to support the cheesecake topping. I have really enjoyed using ‘Dairy’ from Lurpak’s Cook’s Range – it really is a joy to use in baking as you can use it straight from the fridge. I reviewed it in my last IMK post.   I also realised too late that I didn’ have enough carrots so topped them up with apples. I used an old recipe for a baked cheesecake that I had found on the back of a Carnation Condensed Milk tin in Canada. I can tell you that I was quite nervous putting it in the oven and said a few words as it went in!

Carrot & Apple Cake Cheesecake  | Selma's Table

I got there a little early, taking it over whole and asked Rupes to cut up some of it into one inch pieces. He began to trim off the edges, and popped a shard of trimming into his mouth. He stopped and said “OMG this is gorgeous!” and then passed the trimmings round to a couple of others who had arrived in the meantime. I was so pleased and very relived that it worked out. Rupes gave me a portion of the left over slab to take home – he was keeping the rest for himself, which made me very happy! Happy that he liked it enough to keep and happy that Jake would have some as well. Jake likes a cheesecake and really enjoyed the combination of spicy cake and cheesecake so it got the thumbs up from him too.

Carrot & Apple Cake Cheesecake  | Selma's Table

I had some caramel sauce which I had intended to take with me to drizzle enticingly over the top but I am afraid that it got left behind. The slices would have looked much prettier with a few swirls of caramel sauce. Also an apology for the photos – food photos can be difficult to take at the best of times and these were difficult to photograph in an unfamiliar setting with people about, little time to faff and without my props. But you get the idea – they baked up really well!

Carrot & Apple Cake Cheesecake  | Selma's Table

Carrot & Apple Cake Cheesecake  | Selma's Table

At the end of the event, the last few of us remaining, (photo at the tip of the post) counted the money in the donation box and were delighted to find that there was a really good sum in there to send to Macmillan. A big thanks to everyone for such generous donations. Rupes has since had a lovely thank you letter from Macmillan too!

Carrot & Apple Cake Cheesecake

  • Servings: 24 pieces
  • Difficulty: easy
  • Print

INGREDIENTS

For the carrot & apple cake base:

  • 75 g soft brown sugar
  • 75 g caster sugar
  • 200 g plain/AP flour
  • 1 ½  tsp baking powder
  • ½ tsp baking soda
  • ¼ tsp table/fine salt
  • 2 tsp cinnamon powder
  • ¼ tsp grated nutmeg
  • ¼ tsp allspice powder
  • 75 g golden raisins (or just use normal ones)
  • 45 g desiccated coconut
  • 75 g grated carrot (about 3 medium carrots – weigh them out before grating them)
  • 75 g grated apple (about 3 medium apples – weight them out factoring in an additional 5 g per apple for the core)
  • 1 large egg at room temperature
  • 115 g Baking  (Lurpak’s Cook Range) (or unsalted butter at room temperature)

For the cheesecake:

  • 560 g (2 large tubs) full fat cream cheese at room temperature
  • 397 g (1 tin) of condensed milk
  • ¼ c sour cream
  • ⅛ tsp salt
  • ½ tsp vanilla
  • 2 large eggs at room temperature

INSTRUCTIONS

For the carrot & apple cake base:

  1. Pre-heat oven to 180C/350F. Line a 8″ x 12″ tin with grease proof paper leaving enough up the sides so that it can easily be used as handles to pull the cake out. (See my Tips and Tricks page for an easy way to do this.)
  2. Measure all the dry ingredients (from sugar through to coconut) into a mixing bowl and whisk well to combine.
  3. Peel and grate the apples and carrots, cover closely with cling film and set aside.
  4. Beat the egg and Dairy/butter until light and fluffy.
  5. Stir in the dry ingredients until combined then stir in the grated carrots and apples and whisk until the batter is well combined.
  6. Scrape batter into the tin and level it as well as you can. One of those offset spatulas would come in very handy here!

For the cheesecake:

  1. Beat the cream cheese until light and fluffy
  2. Beat in the condensed milk until the mixture is smooth.
  3. Beat in the eggs, sour cream, salt and vanilla until well combined.
  4. Pour this over the carrot & apple cake base and level.
  5. Bake for 25 – 30 minutes, testing with a wooden toothpick or a piece of dry spaghetti to ensure that the cake base is cooked. The cheesecake top should be set but with a little wobble which will firm up when it cools.
  6. Cool in the tin then cover and refrigerate until serving. Can be sliced into 24 x 2 inch squares or larger pieces if preferred.

© Selma Jeevanjee and Selma’s Table, 2013, 2014. Unauthorised use and/or duplication of this material, including photographs without express and written permission from this blog’s author and/or owner is strictly prohibited. Excerpts and links may be used, provided that full and clear credit is given to Selma Jeevanjee and Selma’s Table with appropriate and specific direction to the original content.


Plum and Cinnamon Cake

Plum and Cinnamon Cake | Selma's Table
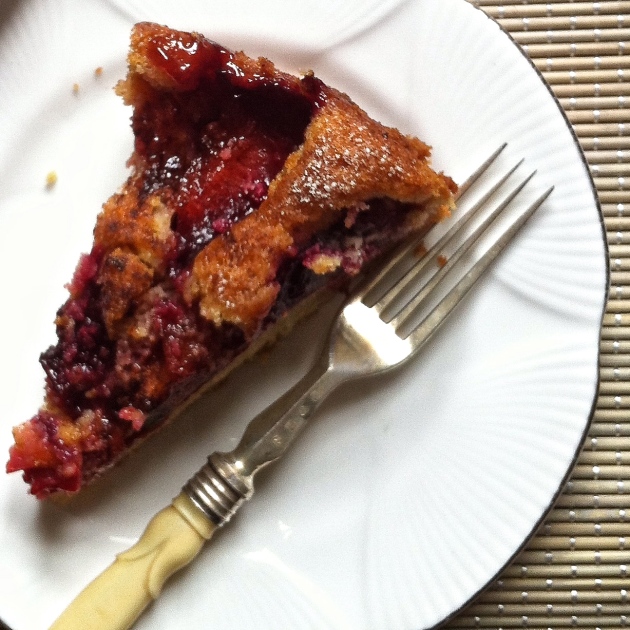
As this blog has gathered pace and found it’s feet, so Jake has learned his place in the hierarchy – photos first, then he gets to eat. He always asks before cutting into a cake or digging into a casserole – well, until Sunday just gone. I baked this Plum and Cinnamon Cake, uploaded a quick snap to Instagram with a flippant remark about not being able to wait a day for it to settle and mature and woke up in the morning to find that there was a huge, messily cut piece missing from it!

Plum and Cinnamon Cake | Selma's Table
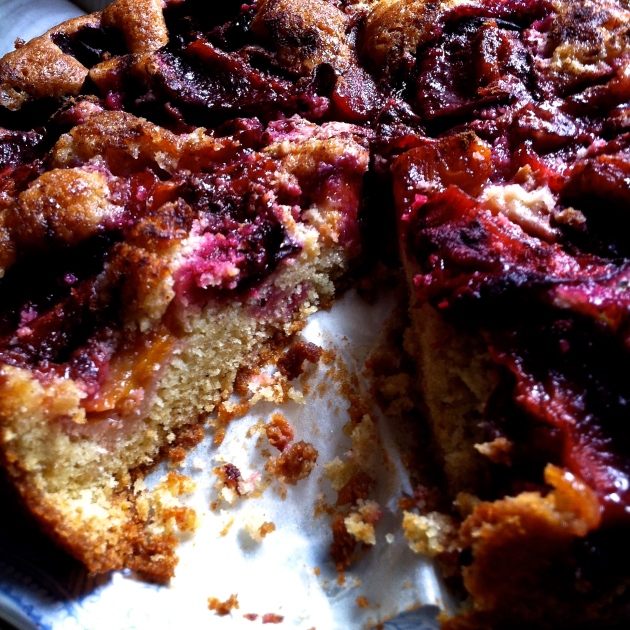
Jake had got in late, couldn’t resist the smell or the look of it, didn’t dare try to take the ring off the springform pan so cut it out the best he could. He said he thought I was sleeping which is why he didn’t ask. Well, I’m not one to get upset when it comes to food being eaten so I determined to do the best I could with it, when it came to the photos. A bit of crumb tidying, fruit prodding and a dusting of icing sugar took care of most of it but the missing slice is well and truly missing!!

This recipe was printed every autumn in the New York Times from 1983 until 1995 when Marian Burros, the food columnist (who got the recipe from Lois Levine, co-author of Elegant but Easy) said that it would not be re-printed, so this was the last chance to clip it out. I have seen it numerous times and in various versions around the web but Deb Perleman of Smitten Kitchen, who always manages to make me want to cook anything she makes, posted it recently and I caved.

Plum and Cinnamon Cake | Selma's Table
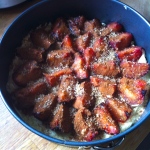
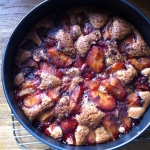
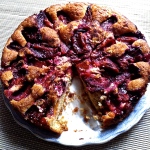
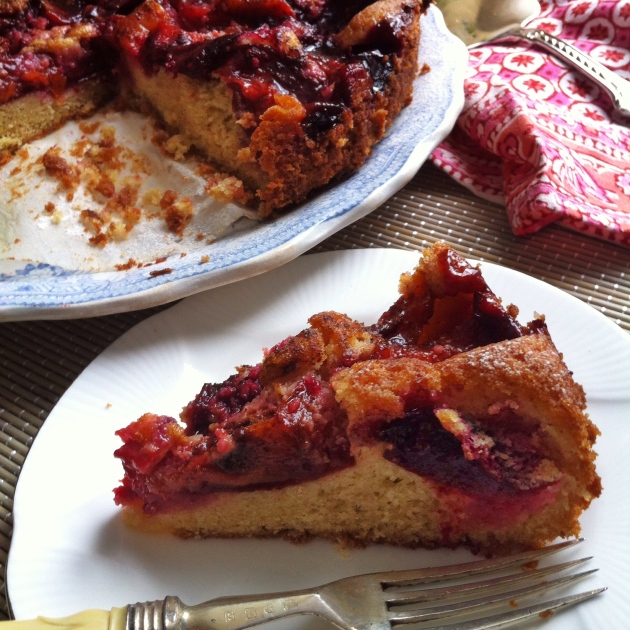
The batter is quite meagre and you will feel that it won’t be enough, once you spread it out and that maybe an additional egg or more baking powder or a smaller tin…don’t panic, don’t fiddle – it comes out perfectly. The original recipe calls for halved plums skin side up but I quartered mine so that some of flesh got the heat of the oven. And you want to go for tart, ripe ones for the best result. It does seem better the next day – the whole thing softens and the plums get jammy. And the smell – no wonder Jake couldn’t resist helping himself to a slice!!

Plum and Cinnamon Cake | Selma's Table
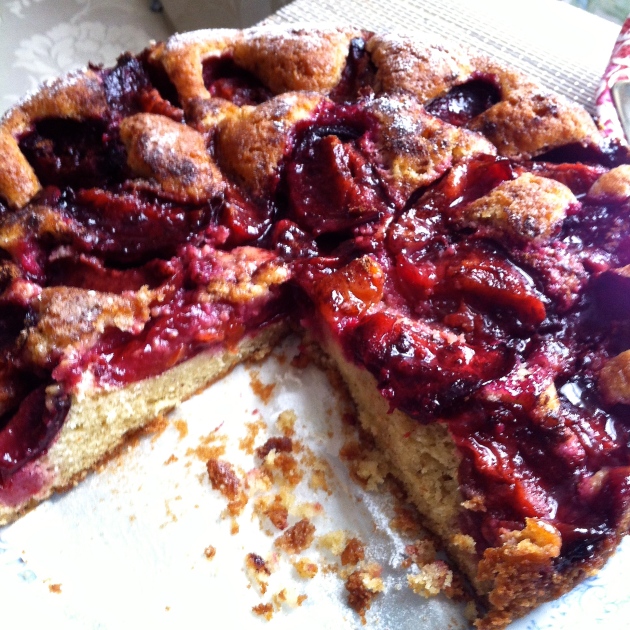
The cake rises just enough to cushion but not encase the plums and the combination of the sweet, tender, vanilla sponge, the tart juicy, jammy plums and the sugar and cinnamon dusted top is utterly heavenly! I am helping a friend host a Macmillian Coffee Morning fundraiser next week and this is definitely going to be served.

Plum and Cinnamon Cake | Selma's Table
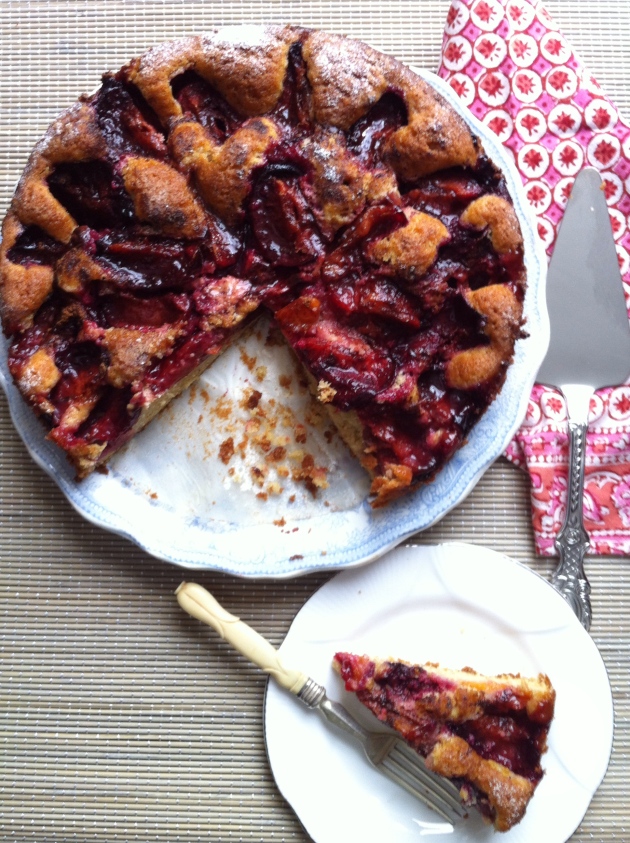
I’ve tweaked it a little – I’ve added vanilla to the batter and added less cinnamon to the top. Next time I may reduce the sugar a little too but if the plums are more on the tart side than the sweet sponge is the perfect foil for them. And it’s really easy to make. Quarter the plums and set aside. Whisk the flour, baking powder and salt in a small bowl and set aside. Cream the softened butter and sugar then add the eggs, one at a time, finally mix in the flour and scrape into the prepared tin. Arrange the plums over the top, sprinkle with cinnamon and sugar and bake!

Plum and Cinnamon Cake | Selma's Table

Today, Elaine the inspirational blogger behind Foodbod and I are co-hosting Fiesta Friday #34 which is held by the generous, creative and wonderful Angie @ The Novice Gardener. Do take a look at Angie’s latest post – I mean, can food from the garden look any prettier? You can also see who has been featured from last week’s submissions. And what can I say about Elaine – she makes the most delicious looking and sounding food all of which is dairy, wheat and meat free – she also makes and sells her flavour packed dips and goodness bars so do take a look at her blog.

Click on the Fiesta Friday badge below to join the party – you can submit a post (be sure to include a link to Angie  FF#34 post – it’s only polite and also ensures that you can be considered for a feature next week!)  or just take a look at others are up to!  If you are new to blogging, Fiesta Friday is a great way to gain exposure and make new friends too.

If you’re new to Fiesta Friday, please read the guidelines.

fiesta-friday-badge-button-click-to-join1

Plum and Cinnamon Cake

  • Servings: 8 generous -12 skinny slices
  • Difficulty: easy
  • Print

Adapted from Marian Burros’ Famous Purple Plum Torte  and Deb Perleman’s Smitten Kitchen Purple Plum Torte

INGREDIENTS

  • 140 g plain/AP flour
  • 1 tsp baking powder
  • pinch of table salt
  • 150 g of golden, unrefined caster/superfine sugar
  • 115 g softened unsalted butter
  • 2 large eggs
  • 1 tsp vanilla paste or extract
  • 8 medium ripe, tart plums
  • 1 tsp cinnamon powder
  • 2 Tbsp Demerara sugar

INSTRUCTIONS

  1. Pre-heat oven to 180 C/ 170C Fan assisted/ 350 F and prepare a 9 inch spring form pan by buttering the base and sides or using grease proof paper – see my tips and tricks page (Baking – tip 3) to read how to do this.
  2. Halve the plums and twist to remove the pits, then halve again and set aside.
  3. Place the flour, baking powder and salt in a cereal bowl and hand whisk to incorporate the 3 ingredients throughly.
  4. Place the butter and sugar in a medium sized mixing bowl and cream until light and fluffy, scraping down the sides of the bowl a couple of times.
  5. Beat in the eggs, one at a time until well incorporated – scrape down the sides after each addition. It may look curdled but if you add a spoonful of the flour mixture all will be well again.
  6. Add the flour mixture and the vanilla paste/extract and beat only just until incorporated. Using a rubber spatula, scrape under to make sure that there is no raw flour and mix in if there is.
  7. Scrape into the prepared tin and smooth it out to cover the base. It will seem very scant but don’t worry – it will be enough!
  8. Arrange the plums from the outside into the middle, keeping it quite tight.
  9. Scatter over the cinnamon and the Demerara sugar and place in the pre-heated oven.
  10. Bake for 40-50 minutes. Insert a tester (toothpick or a bit of dry spaghetti) into the cakey part – if no batter is left clinging to it then it’s done. If there is batter clinging to it then pop it back in for 5 mins increments and keep checking.
  11. Try and make this the night before to let it mellow, covered and at room temperature, when it will be at it’s best.

© Selma Jeevanjee and Selma’s Table, 2013, 2014. Unauthorised use and/or duplication of this material, including photographs without express and written permission from this blog’s author and/or owner is strictly prohibited. Excerpts and links may be used, provided that full and clear credit is given to Selma Jeevanjee and Selma’s Table with appropriate and specific direction to the original content.

Spiced Orange & Honey Cake – Sugar Free

Spiced Orange & Honey Cake
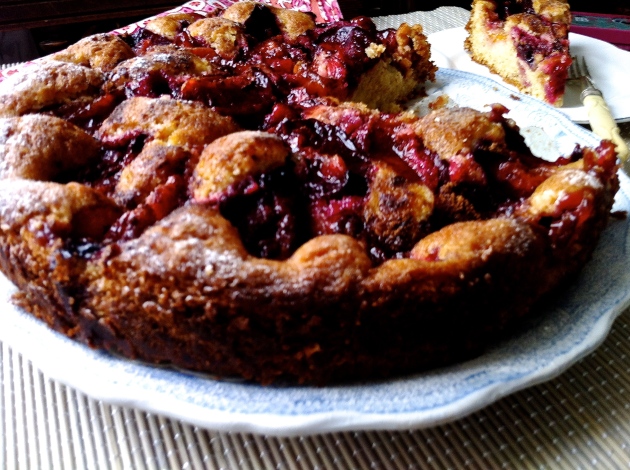
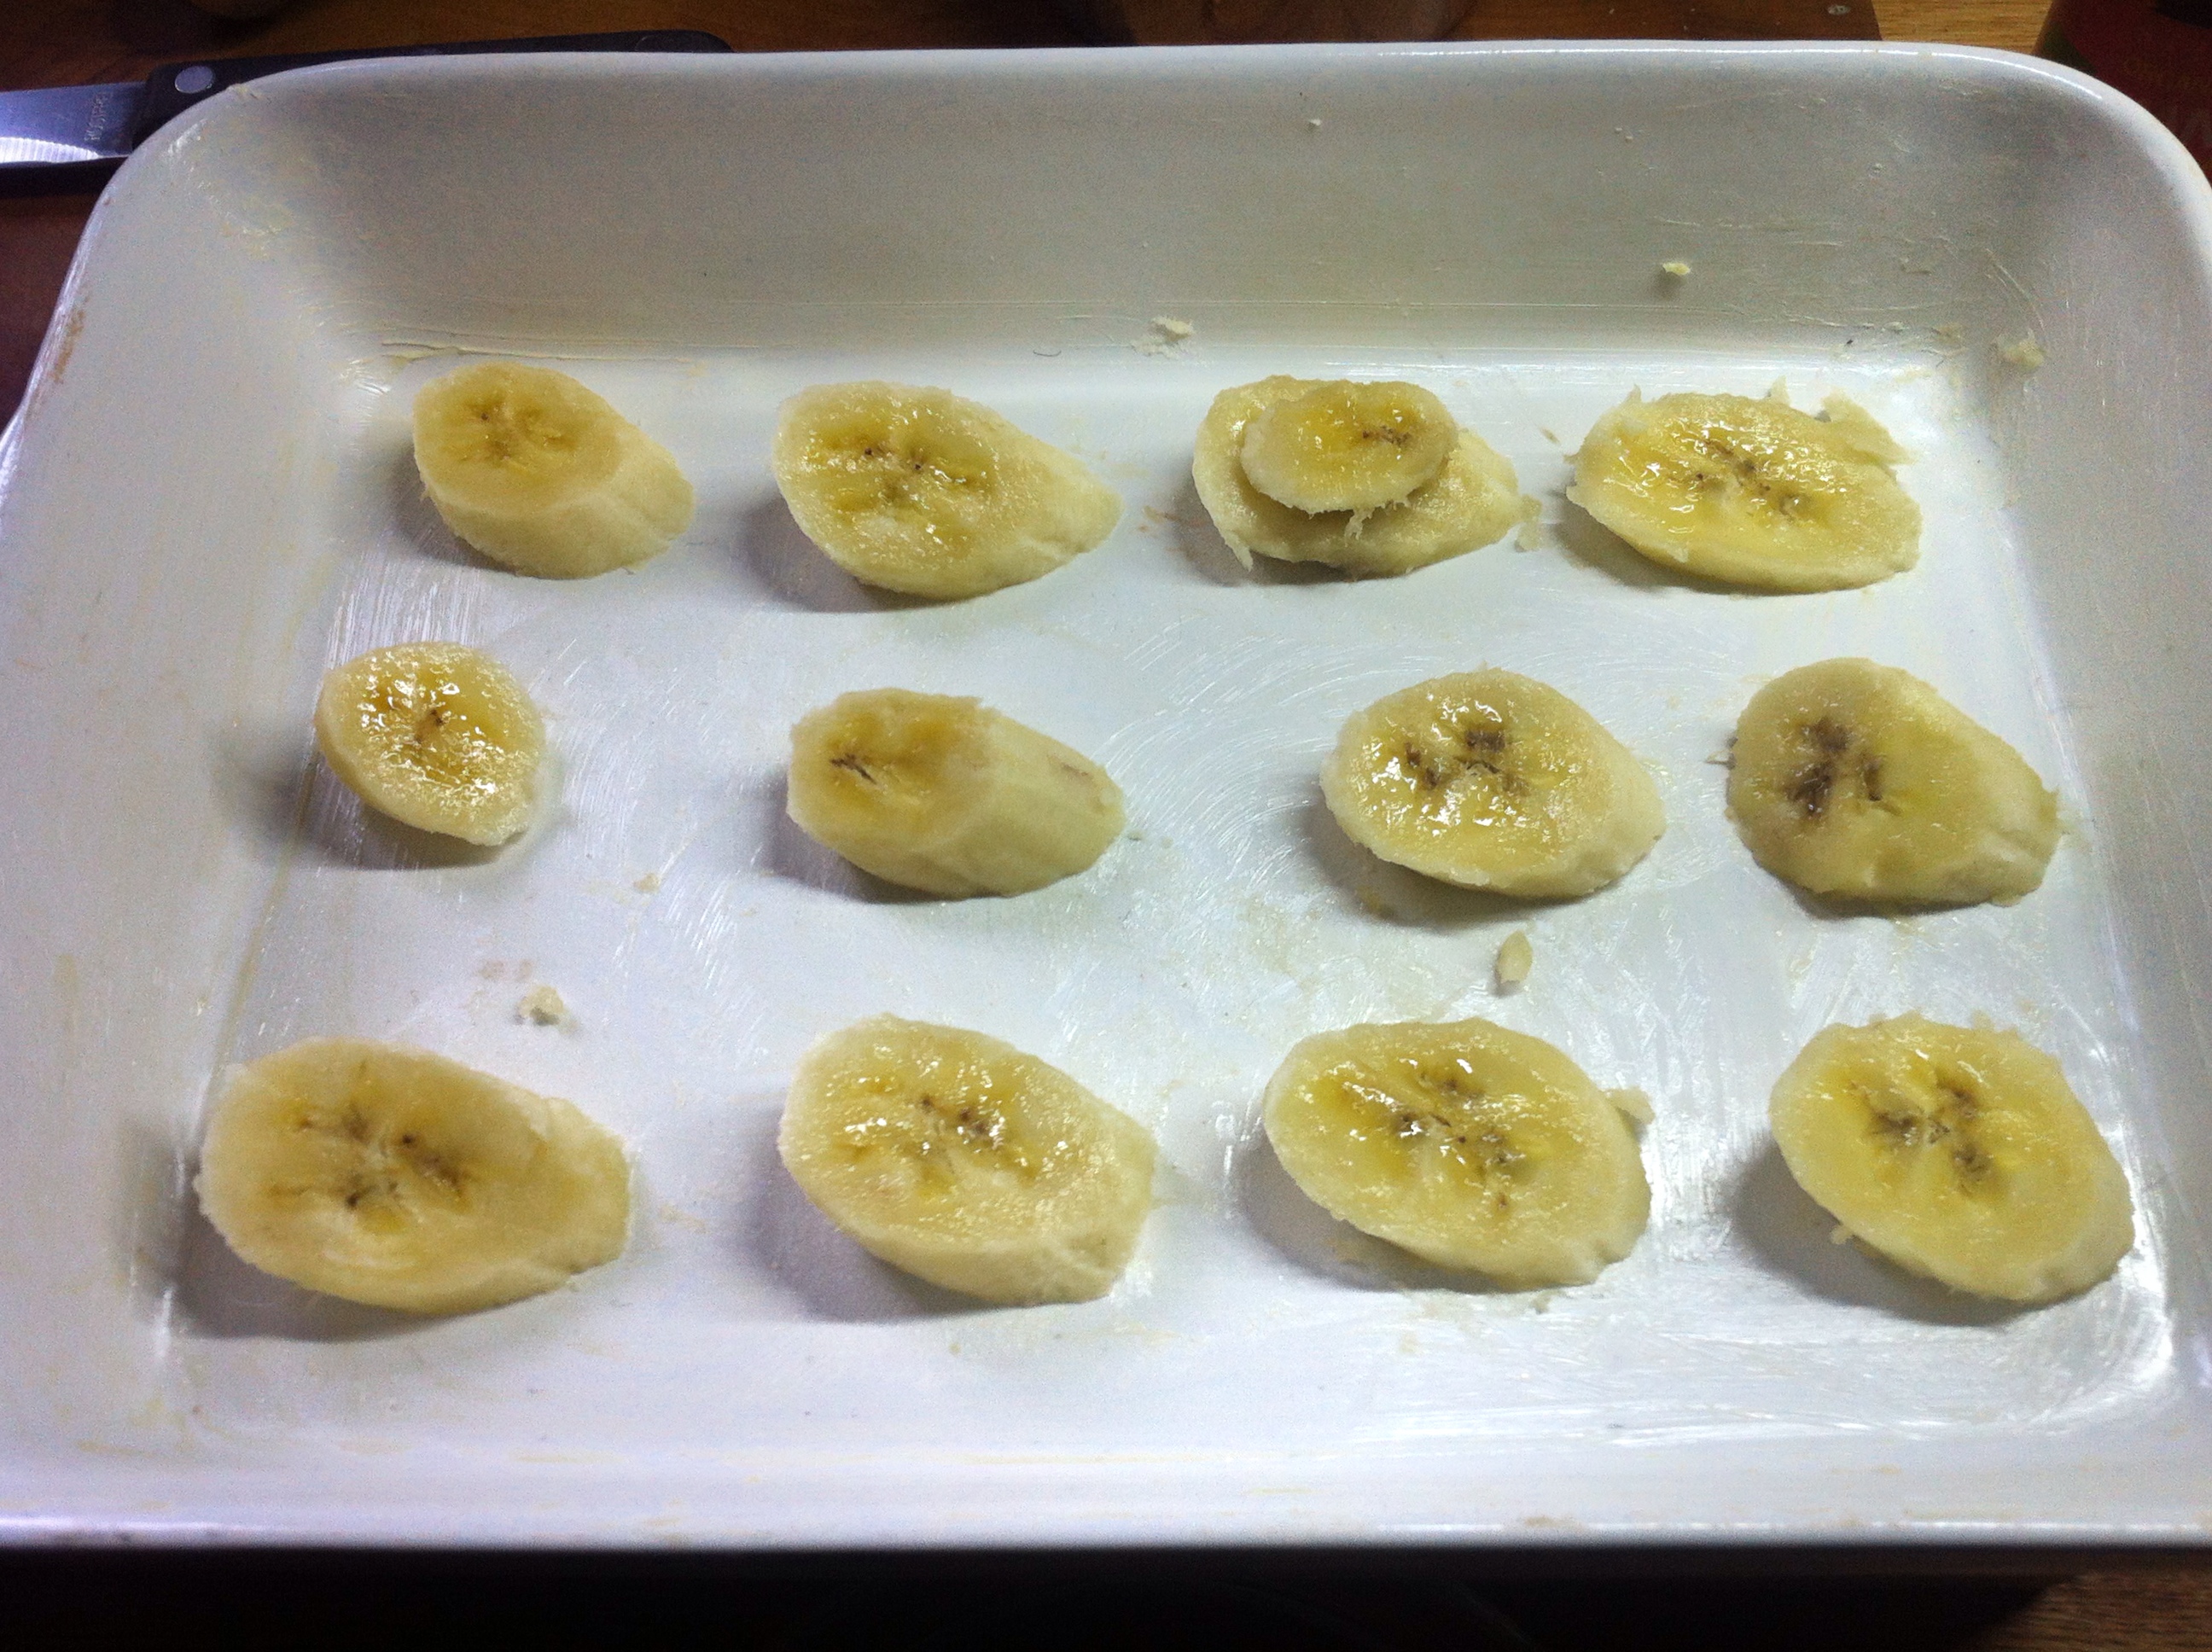
My friends’ adorable baby girl, Olive (just look at those cheeks!), turned 1 last week and her mother, Danna, asked me if I would make the birthday cake. Now, birthday cakes are something that I have made a lot of over the years for Jake as well as the children of friends and neighbours. There have been dinosaurs, ships, butterflies, bears, football pitches, stars, numbers….The most memorable and completely ridiculous year was when Jake turned 4 and I made one to take to his Nursery school, another for the birthday party at home and one for the children’s party in a church hall. Making and decorating 3 cakes is fairly deranged but one of them was a train with 2 wagons, made completely from scratch and which nearly gave me  nervous breakdown! I finished decorating it at about 4 am…utter madness even if it was rather spectacular!

Sugar Free, Spiced Orange & Honey Cake | Selma's Table
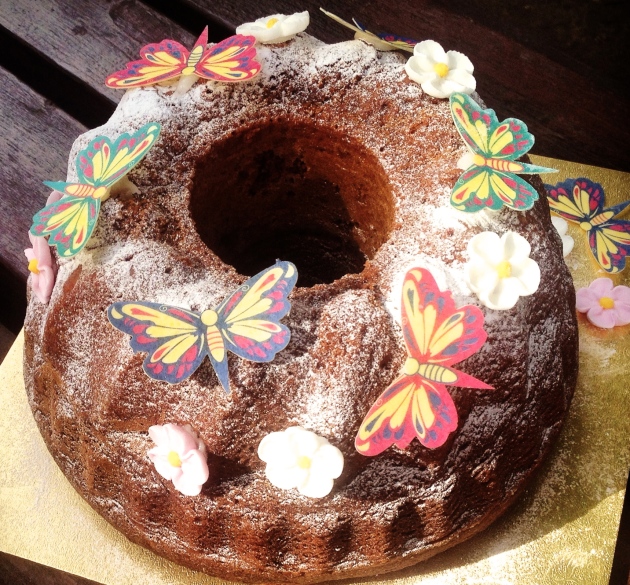
Dana asked me to make a sugar free cake as she has managed to keep Olive away from refined sugar thus far. Well, thank goodness for the trend in “naked” cakes – that took care of the icing, but what about the cake itself? A little research led me to birch sugar with the rather unfortunate and chemical sounding name of Xylitol – the name is actually derived from the Greek word for tree – “xyl”. It is a naturally occurring sugar, found in birch, berries and corn husks. Xylitol has a Glycemic Index of only 7 which is 10 times lower than sugar and 4 times lower than fructose; it has 40% less calories than sugar and 75% less carbs and looks and tastes just like sugar. It is used in exactly the same quantities as sugar.

So I planned to make a naked Honey Cake, layered with whipped cream and berries, but then realised that would be tricky to put together as the party was taking place in the gorgeous gardens of The Telegraph, a stylish country pub in Putney. So in the end, I used my patterned Bundt pan and served slices of the cake with organic ginger Greek yoghurt and blueberries.  Just before bringing it out, it was lightly dusted with a tiny amount of icing sugar and decorated it with edible butterfly wafers and flowers by Alex, a very sweet young chap who is 4 – didn’t he do a wonderful job?

Sugar Free, Spiced Orange & Honey Cake | Selma's TableThis recipe is an adaptation from Marcy Goldman’s Treasures of Jewish Holiday Baking and Deb Perlman’s Majestic and Moist Honey Cake. I have cut back on the sweetness and the spicing, adjusted the leavening and added orange zest to the batter for more flavour.  You could of course make the cake with regular caster and brown sugar if you wanted to. As an added bonus, the smell of this cake baking will make your house smell incredible!

I ended up having to make it twice. Disaster struck the first time as I didn’t grease the tin properly and the cake stuck to the pan and broke coming out of it. It was, however, really delicious and moist which I was really happy with and Spiced Orange & Honey CakeJake took it to a picnic he was going to so it wasn’t wasted. The second time, I not only greased the tin, but also floured it which highlighted the spots I had missed – easy to do on these patterned tins.

Sugar Free, Spiced Orange & Honey Cake | Selma's Table
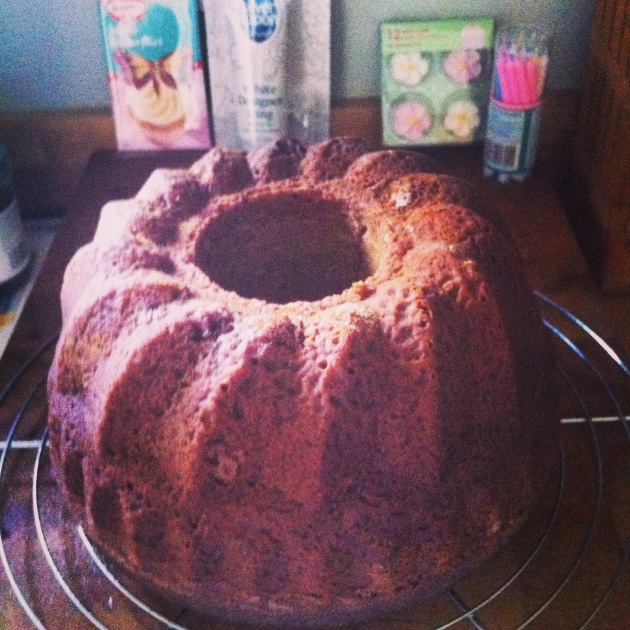
The cake is so easy to make – mix together the flours, raising agents and spices, make a well, pour in the sugars and wet ingredients, beat, pour into the tin and bake. It couldn’t be simpler. Just make sure that you grease your tin properly!!

Sugar Free, Spiced Orange & Honey Cake | Selma's Table

This week, I am thrilled to be co-hosting Fiesta Friday #29 with my old partner in crime, Jhuls @ Not So Creative Cook. We are throwing a pool party over at Angie’s this week.  Come, dressed in your most glamourous poolside lounging gear and let’s celebrate the wonderful summer we have been having. I’m the one in the white linen, bejewelled caftan, huge floppy hat and the rhinestone flip flops!

If you have Fiesta’d then you know what to do. If you haven’t, it’s really easy;

  1. Write a post – it doesn’t have to be about food but it should be a new one for the party.
  2. Add the link from Angie’s Fiesta Friday #29 post (http://thenovicegardener.wordpress.com/2014/08/15/mille-crepe-cake-fiesta-friday-29/) to your post together with a line or two about the party.
  3. Finally click on the purple Fiesta Friday “click to join” button which will take you to the linky page so that you can add your link to the party page.

I’m probably not making much sense so read the guidelines here – http://thenovicegardener.wordpress.com/fiesta-friday/

Jhuls and I would be over the moon to see you at our Fiesta. If you are new to blogging, Fiesta Friday is a great way to gain exposure and make new friends too. So, put on your most fabulous pool party gear  and join the party!!! Mix and mingle with all the guests, follow and leave comments too – it is the friendliest party around! Click over to Angie’s post for FF#29 to join the party or click on the button below.

fiesta-friday-badge-button-click-to-join1


Sugar Free, Spiced Orange & Honey Cake

  • Servings: 12-16
  • Difficulty: easy
  • Print

INGREDIENTS

  • 235 ml warm strong black tea (I used 2 rooibos teabags)
  • 440 g  plain/AP flour
  • 1 tsp baking powder
  • 1 tsp baking soda
  • ½ tsp table salt
  • 3 tsp cinnamon powder
  • ½ tsp allspice
  • 235ml mild flavoured vegetable oil (I use Olivio)
  • 340g/1 jar of honey
  • 225 g Total Sweet (xylitol – a wood or birch sugar – replaces refined cane sugar)
  • 60 g coconut/palm sugar/jaggery  (brown sugar replacement)
  • 3 large eggs
  • 1 tsp vanilla extract
  • Zest of 2 oranges
  • 100-12o ml of orange juice (which is approximately the juice from one orange)

INSTRUCTIONS

  1. Make the tea and set aside to steep.
  2. Pre-heat oven to 180 C/350 F
  3. Grease a 25 cm/10 inch Bundt tin thoroughly especially if patterned. Pop into the fridge for a few minutes, then flour it, which will also highlight any spots you have missed. Grease the entire inside of the tin as this cakes rises magnificently. Leave in the fridge until you are ready to use it.
  4. Measure out the flour into a large mixing bowl, then add the baking powder and soda, the salt and the spices. Whisk really well to mix and aerate, then make a well in the middle of it.
  5. Pour/add in the rest of the ingredients (the oil, the honey, the tea (squeezing the teabags to extract as much flavour as you can out of them), the xylitol, the palm sugar, the eggs, the vanilla and the orange juice and zest).
  6. Set the hand mixer on the lowest speed and mix until really well blended. Scrape down the sides and the bottom of the bowl to ensure that all the dry ingredients have been incorporated.
  7. Pour this very liquid batter into the prepared baking tin.
  8. Set the tin onto 2 baking sheets (this ensures that the cake cooks evenly as the batter is so liquid)
  9. Place in the oven and set the timer for 50 minutes. Check to see how it is coming along and cover loosely with aluminium foil if it is starting to catch and burn – let your sense of smell guide you too.
  10. Set timer for 10 more minutes then use a wooden skewer to ensure that it is cooked all the way through. Both times, mine took exactly 60 minutes to bake.
  11. Let the cake set in the tin, on a wire rack for 15 minutes, then place a wire rack over the top of the tin and flip it over. Give it a gentle shake and the cake should detach itself easily from the tin.
  12. The cake tastes better the next day, after it has had a chance to mature.
  13. Serve with Honey or Ginger flavoured Greek yoghurt and some blueberries or enjoy a slice plain with a cup of tea.

© Selma Jeevanjee and Selma’s Table, 2013, 2014. Unauthorised use and/or duplication of this material, including photographs without express and written permission from this blog’s author and/or owner is strictly prohibited. Excerpts and links may be used, provided that full and clear credit is given to Selma Jeevanjee and Selma’s Table with appropriate and specific direction to the original content.


Basic Buttermilk Muffins with Variations

basic-buttermilk-muffins-with-additions
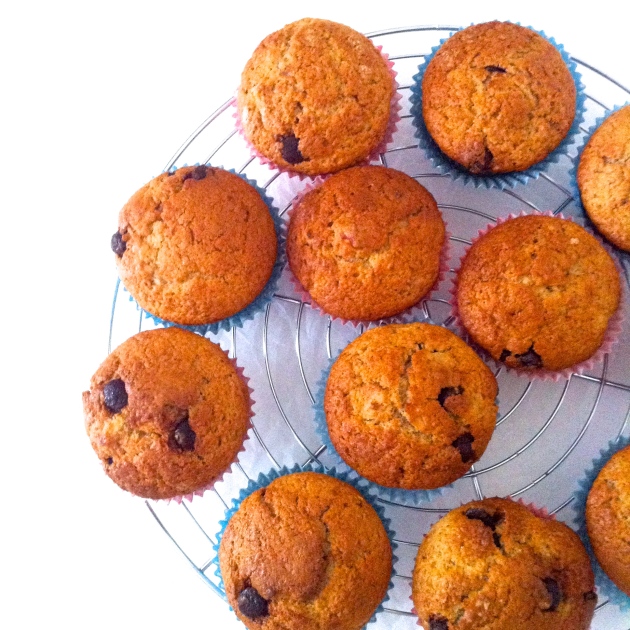
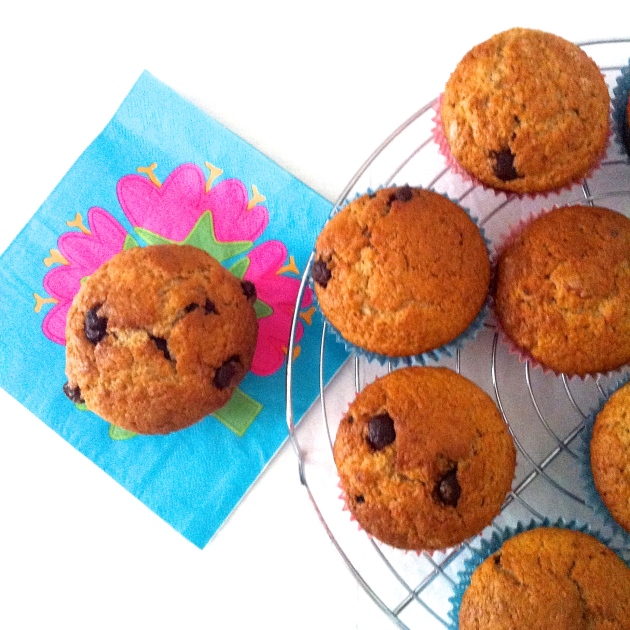
I am always surprised at how many people buy those cakey muffins at coffee shops to take back to their desks, either in the morning or at break times. Or the people who buy them in packs from the supermarkets – you know the ones full of preservatives and correspondingly long sell by dates. Muffins are so easy to make with the added bonus of being fresh and with ingredients that you are able to control and can pronounce the names of. In less than 45 minutes you can be sitting down to a warm freshly baked muffin and a cuppa, smug in the knowledge that you have 11 more to pack into lunch boxes or dish up as an after school snack with a glass of milk for the kids. They can be as healthy or as sinful as you like. It’s entirely up to you and what you have in your larder/pantry. I haven’t tried to freeze them, mainly because they don’t last that long – I used to always pack extra for Jake to share with his lunchtime gang. If you try freezing them, let me know in the comments and I will edit this post to include your thoughts, with a credit to you of course!

basic-buttermilk-muffins-with-additionsI haven’t made muffins recently but I had three very ripe bananas that needed using up and found myself pulling out the muffin pan…these ones are banana, cinnamon and chocolate chip.

This recipe is one that I have been using for many years – I have tweaked it and tweaked it over time to suit all the ingredient changes that I have made. Adding buttermilk or the more easily available yoghurt keeps the crumb really moist.

All you need by way of kitchen equipment is;

  • a regular 12 hole muffin tray and cupcake liners
  • two mixing bowls plus a smaller heatproof one to melt the butter in
  • electronic scales – if you don’t have one, please, please add it to your wish list as it is the most accurate way to measure out ingredients, especially for baking. If you set your mixing bowl on the scales and set it to zero then you can just keep adding your dry ingredients to it (re-setting to zero each time) which keeps the washing up to a minimum too.
  • a small hand whisk
  • a measuring teaspoon
  • a rubber spatula
  • a large spoon to scoop out the dry ingredients with and then to fill the muffin cups with.

The basic premise is to put all the dry ingredients into the larger mixing bowl and whisk well to aerate and combine. I add any dried fruit or chocolate chips at this stage too as the flour coating helps them not to sink to the bottom. Use a smaller mixing bowl for the wet ingredients. I mash my very ripe bananas straight into this bowl after whisking the egg. The buttermilk comes in a 300ml carton, and if you decide to use a yoghurt pot then just use that to fill the milk up in it – no need for a measuring jug! Pour the wet ingredients onto the dry ingredients. Stir lightly – streaks (but not large pockets) of flour are desirable. Scoop into muffin cups. Top with seeds or nuts if using. Bake. Cool and enjoy!

basic-buttermilk-muffins-with-additions

I am taking these over to the friendliest party around – Angie’s Fiesta Friday #26. Today we have two talented co-hosts who are not only fabulous and creative cooks but who can also spin a yarn or two. Prudy @ Butter Basil and Breadcrumbs and Jess @ Cooking Is My Sport.  Let’s party!!

Basic Buttermilk Muffins with Variations

  • Servings: 12 Muffins
  • Difficulty: easy
  • Print

INGREDIENTS

  • 250 g plain/AP flour
  • 150 g golden caster/superfine sugar – you can just use the normal white version too
  • 2 tsp baking powder
  • ½ tsp baking soda
  • 1/4 tsp table salt
  • 1 large free range egg
  • 300 ml buttermilk (or 125 ml yoghurt/creme fraiche/ sour cream plus 125ml milk)
  • 80 g melted unsalted butter

Delicious variations- not ALL at the same time!!

General additions and subs:

  • sunflower seeds, walnuts, pecans- as a topping
  • 125 g blueberries/raisins/ chopped dried apricots/chopped dates etc
  • 25 g coconut flakes – reduce flour by 25 g
  • 100 g spelt or buckwheat flour – reduce flour by 100 g
  • 50 g jumbo oats – reduce flour by 50 g

Banana and Chocolate Chip Muffins

  • 1 tsp cinnamon
  • 3 very ripe bananas
  • 80 g chocolate chips

Blueberry, Lemon and Poppy Seed Muffins (Lovely with a little lemon and icing sugar glaze)

  • zest of 1 lemon
  • 1 Tbsp poppy seeds
  • 125 g blueberries

Carrot Cake Muffins (Delicious with a little honeyed cream cheese topping)

  • 125 g grated carrot
  • 80 g soaked and drained sultanas or raisins
  • ½ tsp cinnamon
  • ½ tsp mixed spice
  • Replace butter with 80 ml of oil

Coconut, Raspberry and White Chocolate Chip Muffins

  • 125 g raspberries
  • 25 g coconut flakes – reduce flour by 25 g
  • 80 g white chocolate chips

INSTRUCTIONS

  1. Pre-heat oven to 180C/350F/. Prepare a 12 hole muffin tin with liners or grease them well
  2. Pop the butter in a heat proof bowl and place in the oven for 5 minutes (set the timer!!) while it is heating up.
  3. In a medium mixing bowl, hand whisk the egg. If you are going to add bananas, add them now and mash with a fork – I like to leave them a little chunky . Add the buttermilk or yoghurt/creme fraiche/sour cream and milk mixture and whisk to combine everything.
  4. In a large mixing bowl, measure out the flour, the oats and or coconut if using, the sugar, the baking powder , the  salt and chocolate chips or raisins or cinnamon or lemon zest and poppy seeds if using. Whisk well to aerate and to combine all the ingredients. Make a well in it and set aside.
  5. Slowly pour in the melted butter onto the egg/buttermilk mixture, whisking all the while to mix in the butter evenly which will begin to solidify as it hits the cold liquid.
  6. Pour in the wet ingredients onto the dry and stir to mix. Do not over mix – leave some streaks of flour but not huge pockets of it!
  7. Stir in any delicate berries at this point.
  8. Divide the mixture between the 12 muffin cups and top with the seeds or nuts if using.
  9. Bake for 20-25 minutes until golden brown. Test with a wooden skewer (or a piece of uncooked spaghetti!) – if there is any batter clinging to it, pop the tray back in for a 2 or 3 minutes.
  10. Cool in the pan for 5 minutes then remove to a wire rack to cool off completely.

© Selma Jeevanjee and Selma’s Table, 2013, 2014. Unauthorised use and/or duplication of this material, including photographs without express and written permission from this blog’s author and/or owner is strictly prohibited. Excerpts and links may be used, provided that full and clear credit is given to Selma Jeevanjee and Selma’s Table with appropriate and specific direction to the original content.


Sour Cream and Cinnamon Pancakes with Blueberries

It’s Shrove Tuesday tomorrow aka Pancake day! Pick up some sour cream today and make up this batter tonight, then you will be all set for tomorrow!

Selma's Table

Sour Cream and Cinnamon Pancakes with Blueberries

I’ve been making pancakes at the weekends for as long as J can remember.  He loves them; his friends love them; my friends love them. I’ve made them with spelt flour, buckwheat flour, self raising flour, wholewheat flour; I’ve added coconut flakes to the mix and made all sorts of quick fruit compotes to go with them; I’ve cooked them in coconut oil. But in the end, I always return to these ones – they really are the nicest. Simple, straightforward with ingredients that I usually always have on hand.

Sour Cream and Cinnamon Pancakes with Blueberries

Sour Cream and Cinnamon Pancakes with Blueberries

The acid in the sour cream is what makes these so delicious – it produces tender pancakes that are light and moist. If you don’t have any sour cream, you can use buttermilk and if you don’t have buttermilk just add a spoonful of vinegar or lemon juice to milk and leave it to thicken for 15 minutes or so.

View original post 888 more words

Baked Fruit and Oatmeal

Baked-fruit-and-oatmealOatmeal is not something I enjoyed as a child. My memories of porridge is that it was quite thin and watery and not very tasty at all – which is quite at odds with the delicious food I grew up with. When I began baking in my teens, I found that oatmeal was brilliant to make chewy chocolate chip cookies with.  I also discovered those packets of flavoured instant oats which bolstered me up during what felt like endless sessions of binge revision. As a mother of a school age child, I knew how nutritious and sustaining porridge is for those dark, cold, wintery school mornings and set about making it delicious as well. I don’t know if this is how you make it but I put a cup of oats in a pan and toast them slightly, I then add 2 cups of milk and one of water and stir over a medium low heat until thick and creamy. I ladle a portion into a shallow rimmed bowl, shake over some cinnamon and sprinkle it with 1 dessert spoonful of Demerara  sugar which goes syrupy. I peel a tangerine or a clementine and arrange the segments around the lip of the bowl like chubby rays of sunshine. Sometimes, I add some frozen blueberries to the bottom of bowl before ladling in the porridge. By the time my son gets to the table, dressed for school, the porridge has cooled down sufficiently to not delay him and I am quietly smug in the knowledge that he’s not going to be experiencing that mid morning sugar crash AND that I’ve managed to get 1 or 2 portions of fruit in him already. At the weekends, breakfasts are a more leisurely affair; eggs and sausages or french toast or pancakes but oatmeal doesn’t figure.

Until now, that is. I saw a photo for Oatmeal Casserole (which sounds a little grim, don’t you think?) on Pinterest and then surfed through several recipes for Baked Oatmeal, many of which included chocolate. This is my version which is full of healthy ingredients and tastes absolutely delicious. It’s warm, fruity, nutty and chewy. It takes about 15 minutes to put together and needs half an hour in the oven, filling the kitchen with gorgeous aromas as it bakes. It is ideal for a weekend breakfast. Left overs can be taken into to work or frozen in portions and warmed up in the microwave. You can chop and change the fruit and nuts to suit your palate or take into account what is in your cupboards. This is also something that you could bake in the evening during the week, to effortlessly have ready for the following morning.

Baked-fruit-and-oatmealPlace the oats, sugar, baking powder, cinnamon, salt, walnuts, dried fruit and half the blueberries in a large bowl.

Baked-fruit-and-oatmealGrate in the orange zest and mix thoroughly.

Baked-fruit-and-oatmealSlice one banana and arrange on the bottom of the oven safe dish. Cover with the dried mixed ingredients (which I forgot to photograph!)

Baked-fruit-and-oatmealJuice the orange.

Baked-fruit-and-oatmealWhisk the wet ingredients together in the same mixing bowl you used for the dry ingredients. (If you want to substitute honey or agave syrup for the sugar, add it now, to the wet ingredients.) I find that it is best to “temper” melted butter by slowly whisking in a little cold milk into it and then adding it to everything else. Otherwise, the melted butter just solidifies into fat globules that float on top.

IMG_6150Slowly and gently, pour the wet mixture over the oatmeal mix.

Baked-fruit-and-oatmealScatter over the remaining blueberries and the coconut flakes. (If you wish to use desiccated coconut instead, mix it in with the dry ingredients.) Slice the second banana and arrange over the top and bake for half an hour. (A scattering of pumpkin or sunflower seeds would be nice too.)

Baked-fruit-and-oatmeal

Baked-fruit-and-oatmealServe warm with a dollop of yoghurt.

I have included some vegan options for the dairy and egg but these are untested by me. Thanks to Susan Edelman of watchhatchfly for the information!

Baked Fruit and Oatmeal

  • Servings: 6
  • Difficulty: easy
  • Print

INGREDIENTS

  • 2 cups oats (anything but instant or quick cook)
  • 1/4 cup muscavodo (or brown) sugar plus enough for a sprinkle later
  • 1 tsp baking powder
  • 1 tsp ground cinnamon
  • ½ tsp salt
  • zest of 1 orange
  • ½ cup walnut pieces – broken up to make them smaller
  • ½ cup dried mixed fruit like cranberries and cherries or apricots and raisins or dates
  • 1 cup of blueberries divided into two portions
  • 2 large ripe bananas
  • 3tbsp/45g  melted butter (or vegan soy spread/coconut oil)
  • 2 cups milk ( or soy milk/almond milk/rice milk)
  • 1 large egg ( or applesauce/mashed banana/vegan egg replacer/ground chia and flax seeds)
  • Juice of one orange
  • 1 tsp vanilla extract
  • ½ cup coconut flakes
  • yoghurt to serve (or coconut milk or soy milk yoghurt)

INSTRUCTIONS

  1. Pre-heat the oven to 190C/375F.
  2. Butter or oil an oven safe dish (mine is 28 x 20cm/11″x 8″).
  3. Thoroughly mix the first 9 ingredients (using only half the blueberries)  in a large bowl to distribute everything evenly.
  4. Slice one banana and arrange on the bottom of the dish.
  5. Cover with the dry mixed ingredients.
  6. In the same bowl that you used for the dry ingredients, lightly whisk the egg.
  7. Slowly whisk a a cup of milk into the cooled butter to amalgamate it and pour it and the second cup of milk onto the whisked egg together with the vanilla and the orange juice and whisk again.
  8. Slowly and evenly pour the wet mixture over the dry ingredients.
  9. Scatter over the remaining portion of blueberries and the coconut flakes (some seeds would be nice too).
  10. Top with the slices from the second banana.
  11. Bake for 30 – 40 minutes until bubbling and golden brown.
  12. Sprinkle a little more brown sugar over the top and leave to cool a little.
  13. Serve warm with yoghurt.

Festive Mini Mince Pie Pastries

 Festive Mini Mince Pie Pastries

I know, I know. I am a little late to the party with this one but as I have just made a batch for the second time this month, it struck me that these would be perfect to pass round if you are having people over for a New Years Eve gathering or to take with you if you are attending one. My son has just left to visit friends in Denmark and taken a tin with him as they went down a storm when he first took them to a Christmas party they were having in London a few weeks back.

 Festive Mini Mince Pie Pastries

 Festive Mini Mince Pie Pastries

I am not going to lie to you – these are time consuming to make, so if you can get someone or two, to help, then your mini production line will turn these out in no time at all. Or, if you have a ravioli attachment for your pasta machine, you can use that to speed things up. Otherwise, as with all things miniature, these can be a little tedious to churn out but let me assure you; they are totally worth it. A thin, crisp shortcrust base with a flaky, buttery, puff pastry top, encasing an orange scented little mouthful of fruity mince and dredged in cinnamon icing sugar – even those who dislike mince pies will like these.

 Festive Mini Mince Pie Pastries

Place filled pastry on a bit of parchment paper and use this to swivel the pastry round quickly as you crimp it.

 Festive Mini Mince Pie Pastries

 Festive Mini Mince Pie Pastries

 Festive Mini Mince Pie Pastries

Dredge with the cinnamon icing sugar

 Festive Mini Mince Pie Pastries

Remove to a wire rack to cool

 Festive Mini Mince Pie Pastries

Festive Mince Pie Pastries

  • Servings: approx 50
  • Difficulty: intermediate
  • Print

Adapted from BBC Good Food Sugar Dusted Mince Pie Parcels

INGREDIENTS

  • 1 x 375g sheet ready-rolled shortcrust pastry
  • 1 x  sheet of ready rolled puff pastry
  •  300g  jar of mincemeat
  • Zest of one orange
  • handful of dried cranberries and sour cherries
  • 1 egg, beaten
  • 100 g icing sugar sugar
  • 1 tsp cinnamon powder

INSTRUCTIONS

  1. Remove both pastry sheets from fridge about 15 mins before use
  2. Heat oven to 200C/180C fan/gas 6 and paper/prepare two baking sheets
  3. Tip the mincemeat into a bowl and grate in the orange zest and stir in the additional dried fruit
  4. Unfurl the shortcrust pastry sheet keeping it on it’s wrapper and roll out a little more thinly
  5. Using a 5 cm cutter, stamp out rounds for the base
  6. Remove the trimmings – you can re-use these – and leave the rounds on their wrapper
  7. Spoon on a good teaspoonful of  the mincemeat, heaping it on in a dome, but making sure to leave the base clear around the edge.
  8. Unfurl the puff  pastry and roll out quite thinly – more so than the shortcrust as you are going to be stamping out larger rounds to cover the filling
  9. Using a 5.5 cm cutter, stamping out slightly larger rounds.
  10. Pick up a circle of puff pastry and using your index finger, dip into the  beaten egg and brush around the edges of the puff.
  11. Place on top of the mince topped shortcrust rounds and shape around the filling.
  12. Carry on doing this until all the bases are covered
  13. Then, tear off a bit of parchment paper and  place one of the pastries on top of it.
  14. Use the paper to swivel it around as you crimp the edges quite firmly with a fork , to seal.
  15. Place on prepared trays; you can place them quite snugly as they don’t spread too much
  16. Egg wash them using a brush
  17. Bake for 18-20 mins , turning trays around and swapping them if necessary after 9 minutes, until golden and crisp.
  18. While the pastries are baking, mix the icing sugar and cinnamon in a bowl.
  19. At this point, you can re-roll the pastry trimmings and stamp out, fill, top, crimp and egg wash and bake when the oven is free.
  20. Once pastries are out of the oven and still hot, using a fine meshed sieve, heavily dredge with the cinnamon icing sugar and remove to a wire rack to cool.
  21. Pack into air-tight tins and sieve in some more of the icing sugar until ready to serve.

 Festive Mini Mince Pie Pastries

Sour Cream and Cinnamon Pancakes with Blueberries

Sour Cream and Cinnamon Pancakes with Blueberries

I’ve been making pancakes at the weekends for as long as J can remember.  He loves them; his friends love them; my friends love them. I’ve made them with spelt flour, buckwheat flour, self raising flour, wholewheat flour; I’ve added coconut flakes to the mix and made all sorts of quick fruit compotes to go with them; I’ve cooked them in coconut oil. But in the end, I always return to these ones – they really are the nicest. Simple, straightforward with ingredients that I usually always have on hand.

Sour Cream and Cinnamon Pancakes with Blueberries

Sour Cream and Cinnamon Pancakes with Blueberries

The acid in the sour cream is what makes these so delicious – it produces tender pancakes that are light and moist. If you don’t have any sour cream, you can use buttermilk and if you don’t have buttermilk just add a spoonful of vinegar or lemon juice to milk and leave it to thicken for 15 minutes or so.

Sour Cream and Cinnamon Pancakes with Blueberries

The addition of a little baking soda is really important here – when baking soda meets with an acid (like sour cream, buttermilk, vinegar, etc) there is a chemical reaction which results in the production of carbon dioxide, water and a salt. This reaction happens at room temperature before exposure to any heat and is what makes the pancake batter fluffy while still sitting in the bowl.  Joy the Baker has a really good explanation of baking powder vs baking soda here.

Sour Cream and Cinnamon Pancakes with Blueberries

I tend to buy punnets of blueberries in the height of summer and stash them in the freezer. I just pop them onto the pancakes frozen. By the time the pancakes have been flipped, the blueberries have not only thawed but have heated through completely.

Sour Cream and Cinnamon Pancakes with Blueberries

Because I make them so regularly, I bought a really wide 32 cm non-stick pan which I also use to make cocktail sized blinis for parties. The larger surface facilitates making a lot of pancakes in a shorter space of time.

Sour Cream and Cinnamon Pancakes with Blueberries

Left over pancakes are eaten standing at the fridge, when J comes home from school at the same time as asking when dinner will be ready…for the more civilised among you, these re-heat really well in a low oven or in the microwave.

Sour Cream and Cinnamon Pancakes with Blueberries

Sour Cream and Cinnamon Pancakes with Blueberries

  • Servings: 3-4
  • Difficulty: easy
  • Print

Adapted from Martha Stewart’s Best Buttermilk Pancakes Recipe

Makes about 18 x 4 inch pancakes – enough for 3 – 4 servings or double up the recipe for larger portions or more people.

INGREDIENTS

  • 1 cup/125 g plain flour
  • 2 tsp baking powder
  • 1/2 tsp baking soda
  • 1/2 tsp salt
  • 1/2 tsp cinnamon
  • 2 Tbsp caster sugar
  • 150 ml sour cream (or buttermilk or mix one teaspoon of vinegar into 150ml of milk and let it sit for 15 minutes until it thickens)
  • 150 ml milk
  • 1 large egg
  • 2 Tbsp/30g melted butter in a medium sized bowl and cooled slightly
  • Punnet of  blueberries
  • Butter for the pan
  • Maple syrup to serve

INSTRUCTIONS

  1. Measure out and place the first 6 ingredients (which are the dry ones) in a mixing bowl and give it a good whisking to evenly distribute the ingredients and aerate the mixture.
  2. Crack the egg into the cooled melted butter and whisk until it is a uniform creamy mass – I find that this helps the butter to be more evenly distributed.
  3. Loosen the sour cream by pouring in a little milk into it and whisking until smooth. Then pour this into the egg mix and whisk until there are no lumps left, finally add the rest of the milk and whisk thoroughly once more.
  4. Make a well in the dry ingredients and pour in the egg mixture. Using a circular stirring motion, gently stir to draw in the dry ingredients to the middle, being careful not to over mix – a few floury patches are fine. It should be quite thick and a bit lumpy.
  5. SET ASIDE for 1/2 an hour at room temperature or overnight in the fridge.
  6. Once the batter has rested the surface will be covered in holes and  bubbles – this is just how it should be. Don’t, whatever you do, stir the batter at this stage. You just want to scoop out tablespoonfuls, straight into the frying pan.
  7. Pre-heat the oven to 75 C or very low. Get an oven proof dish out and a piece of foil to cover it with.
  8. Put the widest non-stick fry pan  you have, on a medium low heat. If it is too high, the outside burns before the insides are cooked…Once the pan is hot, brush with a little butter (I stick a piece on the end of a table knife and swipe it around the pan, cringing whenever the metal touches the non-stick base).
  9. Using a tablespoon, scoop out and place the batter on the pan – I can get 4 to 5 pancakes going in mine but it is a rather large pan. The batter spreads so just try spacing 3 out to start with.
  10. Once the batter is in the pan, plop 3 or 4 blueberries on the top of each pancake. They will need to cook for 3 minutes or so. Keep checking and also keep an eye on the heat which you may have to keep adjusting. (Just have a peek under the pancake, by lifting a corner with a spatula, to see how it is colouring)
  11. When the tops of the pancakes have lots of holes in them, it is time to flip them over.  If a blueberry escapes, just push it back under. This side will not take as long to cook – about a minute – so keep an eye on them. When they are done, remove them to the ovenproof platter, loosely cover with foil and pop them in the oven. Carry on with the next round, lightly buttering the pan when you need to and keeping an eye on the heat.
  12. Serve with proper Canadian maple syrup.

Substitutions
Bananas. Don’t add the blueberries. After all the pancakes are done, wipe the pan clean with a paper towel and melt a little butter in it. Then slice up a couple of not too squishy bananas straight into the pan and let them caramelise, flipping over once. Serve on top of the pancakes with maple syrup.