Warm Blue Cheese Tartlets with Candied Walnuts

Warm Blue Cheese Tartlets with Candied Walnuts | Selma's TableIt’s hard to believe that a whole year has gone by since Angie dreamt up Fiesta Friday. I remember how she said that she wanted us all to mix and mingle with each other because it was a party. I must admit that I was sceptical – I had tried various linky parties which made me feel like a virtual wallflower – hardly anyone visited, and the few that did, never commented or liked what I shared. So, when Fiesta Friday started, I stood on the sidelines for a few weeks, popping by to see what was going on and couldn’t believe how fabulous Angie’s bash was. People were submitting gorgeous recipes and they were all mingling like mad! The comments were so supportive, encouraging  and some were very funny too. It quickly became apparent that some people were super bubbly and had to be kept away from the sweets – and I am not naming any names here! So, I really pushed the boat out and made a batch of Nutella Espresso Sticky Buns. Well, the WordPress app on my phone didn’t stop pinging all weekend – people were commenting, following my blog and generally doing exactly what should be happening at linky parties. I felt like the fabled swan when Angie featured my post the following week! So Angie, congratulations on such a successful event and a huge thank you for hosting a brilliant party and gathering these lovely bloggers to your fold.

Warm Blue Cheese Tartlets with Candied Walnuts | Selma's TableThese Blue Cheese Tartlets with Candied Walnuts are something that I have been wanting to make for some time. I watched one of the contestants on Masterchef making something similar with roasted tomatoes and basil oil and the idea of an individual savoury cheesecake really made an impression on me. Also, I bought half a dozen cute little fluted tart tins from the dollar store in Winnipeg when I was there last and keep looking for an excuse to use them. I thought that walnuts would be a much better flavour match for blue cheese so dressed my tarts with the candied walnuts and the walnut dressing.

Making a “crust” with buttery bread crumbs couldn’t be easier and the cheesecake filling comes together so easily with a little whizz in the food processor.

Warm Blue Cheese Tartlets with Candied Walnuts | Selma's TableThis recipe is worth it just for the candied walnuts alone – you will not be able to stop eating them so I suggest you make twice as many. Just sayin’.

Warm Blue Cheese Tartlets with Candied Walnuts | Selma's Table
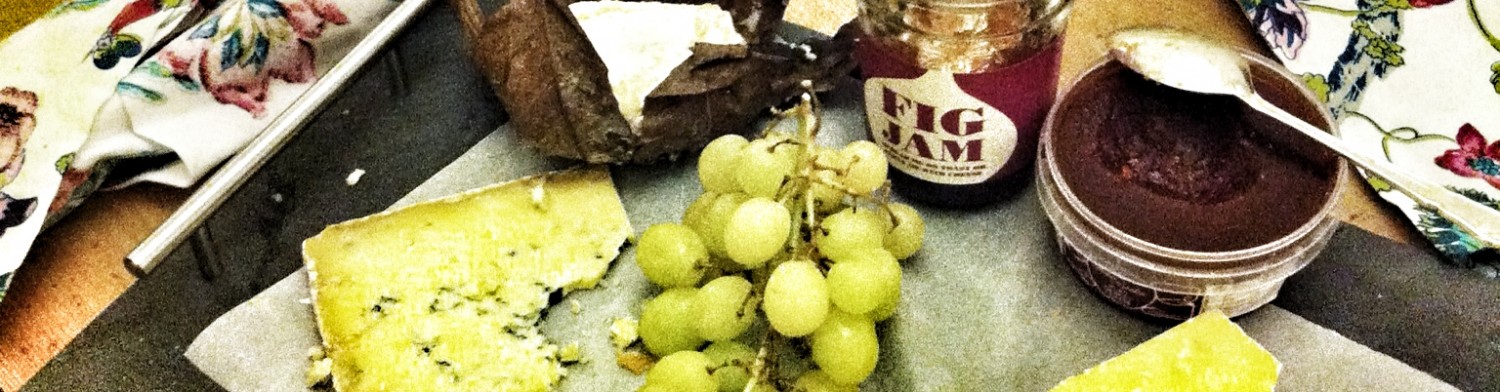
The tarts are gorgeous – the rich cheese filling with the crispy, crumbly breadcrumb crust, the peppery rocket leaves and the sharp nutty dressing topped off with the sweet and slightly spicy crunchy walnuts – perfect dinner party fodder if you ask me!

I am taking this over to Angie’s Fiesta Friday Anniversary Part 1 which this special week is being co-hosted by my two of my favourite Canadian bloggers,  Hilda @Along The Grapevine and Julianna @Foodie On Board – the original two co-hosts for the first few Fiesta Fridays.

If you are new to blogging, please do join the party, we would love to see you. Fiesta Friday is a great way to gain exposure and make new friends too. Be sure to comment, like and follow – Angie has such a friendly crowd at this party that you will come away with lots of new followers (as long as you interact) as well as a lot of inspiration! Submit a post (please be sure to include the link and a mention, in your post, to Angie’s Fiesta Friday Anniversary Part 1 post – it’s only polite and also ensures that you can be considered for a feature next week!)  or just take a look at others are up to! If you’re new to Fiesta Friday, please read the Fiesta Friday guidelines and invitation post for helpful hints.

It’s been my great pleasure to co-host Fiesta Friday several times and I am so honoured that Angie has asked me to co-host  the Fiesta Friday Anniversary Part 2 with  Nancy @ Feasting With Friends next week. The theme is mains and puddings/sweets next week, so best wear loose clothing! Jhuls, I will bring lots of camomile tea with me! I look forward to seeing what you lovely people bring this week and next. Happy Anniversary Fiesta Friday!

Blue Cheese Tartlets with Candied Walnuts

  • Servings: 4
  • Difficulty: easy
  • Print

Inspired by MasterChef

INGREDIENTS

For the Candied Walnuts

  • 150 g of walnut halves or pieces
  • 100 g of caster sugar
  • 15 g butter
  • a few shakes of cayenne pepper

For the Walnut Dressing

  • 1 Tbsp/15 ml white wine/apple cider vinegar
  • pinch of sea salt
  • 1 tsp French mustard
  • 2 Tbsp/30 ml walnut oil
  • 1 Tbsp/15 mi extra virgin olive oil

For the Blue Cheese Tartlets

  • 100 g white bread (trimmed of the crusts)
  • 50 g butter
  • salt and pepper
  • 100g full fat cream cheese
  • 75 g blue cheese
  • 1 egg yolk
  • 1 tsp flour
  • 1 Tbsp double cream/creme fraiche

To serve

  • Rocket leaves

INSTRUCTIONS

For the Candied Walnuts

  1. Place all the ingredients into a nonstick pan and stir over a medium heat.
  2. Keep stirring until the sugar turns to caramel and starts to coat the nuts. This takes between 3 to 5 minutes. Don’t let the caramel burn – just keep stirring it.
  3. Once the caramel is a toffee brown, pour the mixture onto a silicone sheet or parchment paper – be careful as the caramel is very hot – and using a rubber spatula or a wooden spoon, separate the nuts making sure that there is caramel on each one.
  4. Let cool, then store, out of sight, in a lidded jar to avoid eating the whole lot.

For the Walnut Dressing

  1. Place the vinegar and sea salt in a small bowl and whisk to dissolve the salt.
  2. Whisk in the mustard then slowly whisk in the oils. You can also just put the lot in a lidded container and shake hard but I like the rounded airy fullness that whisking gives to a dressing.
  3. Set aside.

For the Blue Cheese Tartlets

  1. Preheat the oven to 190C/375F. Butter/spray the bases and sides of 4 x 8cm/3in fluted, loose bottomed flan tins.
  2. Whizz the bread in a food processor to fine crumbs. Melt the butter and tip in the crumbs, stirring to combine. Season with a little salt and pepper.
  3. Divide into 4 then press the mixture on the base and up the sides of the prepared tins. Use the back of a teaspoon to even out the base.
  4. Place on a baking sheet and bake for about 10- 12 minutes or until the bases are golden but keep an eye on them as they can catch quite quickly.
  5. Beat the rest of the ingredients together and divide between the tins. I did this in the mini processor in which I whizzed the bread crumbs.
  6. Place on a baking sheet and bake for 10 – 12 minutes or until the tops are golden and just set – a little wobble in the middle is desired.
  7. Cool for a few minutes then remove carefully from the tins.
  8. Serve warm or at room temperature on a few rocket leaves, drizzling the dressing around the plate and garnishing with the candied walnuts.
© Selma Jeevanjee and Selma’s Table, 2013 – 2015. Unauthorised use and/or duplication of this material, including photographs without express and written permission from this blog’s author and/or owner is strictly prohibited. Excerpts and links may be used, provided that full and clear credit is given to Selma Jeevanjee and Selma’s Table with appropriate and specific direction to the original content.

Roast Pumpkin and Walnut Squares

Roast Pumpkin and Walnut Squares | Selma's Table

Did you know that 90% of the tea drunk in the UK is a blend of teas, and that tasting and blending tea, like blending whisky or champagne, is a fine art, and takes years of training?

When I read that, I sat up and took notice! Tea is something that I take for granted – I like a cup in the afternoon and I like drinking green tea after dinner. So when I received some Tetley Tea to sample along with a fact sheet, I began to look at tea in a new light. There are over 200 ways to describe tea! It takes 5 years of training to become a Tetley Tea Blender, fluent in the art of tea blending and the vocabulary that comes with it. There are 60 different tea blends sold by Tetley and each blend is taste tested 8 times before it can be judged good enough to called Tetley!  Phew – now that is something to consider as we get through the 165,000,000 cups of tea that are drunk daily in the UK!

These are the top 20 terms used by Tetley’s tea tasters, bearing in mind that there are many more…

  1. Aroma: an important consideration in cupping teas is the smell that is given off. A favourable aroma is most often associated with a flavourful taste.
  2. Black tea: the most commonly consumed tea in the world. One of three major types of tea, the others being Green and Oolong.
  3. Biscuity: a desirable trait usually referring to a well fired Assam.
  4. Bite: a very brisk and “alive” tea liquor.
  5. Blend: a mixture of teas from several different origins blended together to achieve a certain flavour profile.
  6. Body: describes a tea liquor possessing fullness and strength.
  7. Colour: indicates useful depth of color and strength.
  8.  Dust: a term which is used to describe the smallest particles of tea leaf.
  9.  Flat: not fresh. Tea tends to lose its characteristics and taste with age, unlike some wines which mature with age.
  10.  Hard: a desirable quality suggesting pungency, particularly applied to Assam teas.
  11.  Jasmine: a green tea to which Jasmine flowers are added.
  12.  Leaf: a tea where the leaf tends to be on the large or longish size.
  13.  Malty: desirable character in some Assam teas. A full, bright tea with a malty taste.
  14.  Nose: a term used to connote a good aroma of tea.
  15.  Powdery: ‘fine, light dust’ as the tea people say, meaning a very fine, light leaf particle.
  16.  Pungent: describes a tea liquor having marked briskness and an astringent effect on the palate without bitterness.
  17. Sparkle: clarity and purity of colour from grey to pure colour.
  18.  Toasty: a tea which has been slightly overfired during processing. It may be a desirable characteristic in some Darjeeling teas.
  19.  Woody: a characteristic reminiscent of freshly-cut timber. This trait is usually associated with teas processed very late in the season.
  20.  Zing: overall quality impression of the tea on the palette; the balance of character and taste in the tea.

Well, after all the hard work that has gone into producing your blend, you want to be sure to treat that tea with a little respect! Here are Tetley’s Master Blenders’ top tips for the perfect cup…

The tea should be made with boiling water ­ and only once-boiled water with a low mineral content if possible. This is because reboiling reduces oxygen levels and affects the taste, whilst water with a low mineral content allows the tea notes to come through better.

If you’re making black tea, stand by the kettle to ensure you pour as soon as it’s boiled. Black tea tastes best when brewed in water as close to boiling point as possible. That’s why your cuppa may taste different on a plane. In the reduced pressure environment, the boiling point is lowered to 90°.

But if you’ re making green tea, allow the kettle to cool for up to two minutes. This will make sure that your tea doesn¹t over-infuse and develop a bitter taste. Green teas are more delicate after all.

When using a tea bag in a cup, always add your milk after the water, otherwise the milk will cool the water down and hinder the all important infusion process. If using a tea pot, try adding the milk to the cup first. This traditional technique stopped the delicate porcelain cups from cracking.

We advise leaving the bag in for at least two minutes to provide sufficient time to let the flavour of the tea to infuse. This is more of a guideline though; the perfect brew is down to personal preference. But do not poke or prod the bag while it is infusing ­ be patient and let the process happen naturally!

After removing the bag, leave the brew to cool down for around two-three minutes. As the temperature reduces, the flavours will develop for a better quality taste.

If you would like to know more about the art of tea blending, take a look on Tetley’s website for a much more in-depth overview.

In My Kitchen December 2014 | Selma's TableMy recipe for Roast Pumpkin and Walnut Squares compliments and showcases the fruitiness of one of  one of Tetley’s latest blends – Green Tea with Peach and Apricot.

Roast Pumpkin and Walnut Squares | Selma's TableI soaked some sultanas in a very strong brew of the tea which absorbed the fruity flavours perfectly. I roasted the seasonal crown squash that was in my Sutton Community Farm  veg box along with some butter, brown sugar and my Homemade Pumpkin Pie Spice mix.

Roast Pumpkin and Walnut Squares | Selma's TableI whizzed up a buttery, oaty, nutty base & topping, layered up and baked it then drizzled the squares with a lemony yogurt glaze. The result reminded me a little of the flavours of a baklava – sweet, spicy and nutty! I found that it sets up best overnight and even tastes better as all the flavours mature.

Roast Pumpkin and Walnut Squares | Selma's TableI am taking these delicious Roast Pumpkin and Walnut Squares over to Angie’s to share with the revellers at her popular Fiesta Friday party – it’s the 45th one – can you believe it?! Our talented first-time co-hosts this week are  Michelle @Giraffes Can Bake (I don’t know about giraffes but Michelle is an extraordinary baker!) and MB @Bourbon & Brown Sugar (MB has some fantastic bakes on her blog but her savoury food is pretty fabulous too!) Welcome to co-hosting, ladies – it is quite the blast!

Roast Pumpkin and Walnut Squares

  • Servings: 16 pieces
  • Difficulty: Easy
  • Print

INGREDIENTS

For the roast pumpkin

  • 300 g crown squash diced into 1  cm pieces (about a ¼ of a squash)
  • 1 tbsp butter cubed
  • 1 tsp pumpkin pie spice mix

Mix and roast in a single layer  at 200C/400F for 20 minutes, stirring once or twice. The pumpkin pieces should be cooked through but still a little firm. Set aside to cool

For the sultanas

  • 75 g sultanas
  • 1 Tetley’s Peach and Green Tea teabag
  • 1 Tetley Redbush (Rooibos) teabag
  • 1 cup of just boiled water

Make a very strong brew with the two teabags, then remove and stir in the sultanas. Soak for 20 minutes at least. Drain when ready to use.

For the base and topping:

  • 125 g Digestive biscuits (about 8)
  • 20 g walnuts
  • 190 g plain/AP flour
  • 50 g oats
  • 20 g ground almonds/almond meal/almond flour
  • 1 ½  tsp Pumpkin Pie Spice Mix
  • 180 g cold, unsalted butter, cubed
  • 50 g chopped walnuts – reserve for the topping
  • 2 Tbsp pumpkin seeds – reserve for the topping

For the filling:

  • 1 large egg
  • 150 g light brown sugar
  • 1 tsp pumpkin pie spice mix
  • 300 g roast pumpkin
  • drained sultanas
  • 1 Tbsp ground almonds/almond meal

For the glaze:

  • ½ c golden icing sugar
  • 2 Tbsp vanilla yoghurt
  • 2 tsp Yuzu Citrus Seasoning

INSTRUCTIONS

  1. Pre-heat oven to 180 C/350 F. Line a 9 inch square tin with greaseproof paper so that the base and sides are covered – use a few dabs of butter to get the paper to stick to the pan.
  2. Place the walnuts and digestive biscuits in a food processor and pulse until finely chopped.
  3. Add the flour, oats, ground almonds and pumpkin pie spice mix and pulse a couple of times to combine.
  4. Add the cold butter and pulse until the mixture looks like coarse, damp sand.
  5. Set aside 1 generous cup of this mixture for the topping and tip the rest into the prepared tin. Pat it level – don’t press down too hard or the base will be tough – then bake for 15 minutes.
  6. While the base is baking, get the filling ready; combine the pumpkin and the sultanas.
  7. Using an electric mixer and a medium sized bowl, whisk the egg,  sugar and pumpkin pie spice mix until thick, coffee coloured and creamy – about 2 minutes. Fold in the pumpkin, sultanas and almond meal..
  8. After the base has been in the oven for 15 minutes, remove it and top with the filling – covering the hot base as evenly as you can with the pumpkin filling
  9. Sprinkle over the reserved topping, walnuts and pumpkin seeds.
  10. Bake for 30-35 minutes until golden brown.
  11. Cool completely before glazing.
  12. Combine glaze ingredients together until smooth and drizzle over the top.

Stores brilliantly, covered in the fridge for 4-5 days.

© Selma Jeevanjee and Selma’s Table, 2013, 2014. Unauthorised use and/or duplication of this material, including photographs without express and written permission from this blog’s author and/or owner is strictly prohibited. Excerpts and links may be used, provided that full and clear credit is given to Selma Jeevanjee and Selma’s Table with appropriate and specific direction to the original content.

Ginger Berry Nutty Crisp

Ginger, Berry, Nutty Crisp | Selma's TableI rather love September – not only because my favourite (!) son was born towards the latter end of the month but also because it’s full of new beginnings. A new school year begins with high hopes and  all the paraphernalia that goes with it – uniform, school shoes, pens and pencils, geometry sets, books, teachers and classmates. Only this year, as Jake enters what is known as Sixth Form (the last two years of school before University) there is no “uniform” other than the Sixth Form tie. All the boys must wear a suit (navy, charcoal or black), a white shirt and black shoes. He does go off to school looking terribly smart!

Ginger, Berry, Nutty Crisp | Selma's TableMeaning to make a crumble to showcase a pretty bowl (I know, how shallow am I?), I bought some lovely blackberries and raspberries from the market. But making a crumble seemed akin to admitting that the summer was over – which I am not quite ready to do! The weather has been warm in that September sort of way and the trees seem determined to hang onto their verdant hues though there are a few on the turn too.

Ginger, Berry, Nutty Crisp | Selma's TableIt didn’t seem right somehow to be making a winteresque pudding so I adapted the Peach and Amaretti Crisp I made last week to make a Ginger Berry Nutty Crisp. I used a spicy biscuit called Speculoo, added some ground ginger and walnuts to the base and topping and included that gorgeous Japanese citrus flavour called Yuzu in the icing. I used a golden icing sugar which is unrefined – it gives the icing a gorgeous caramel colour and flavour too. Any spicy biscuit will do – by spicy I mean with ginger or cinnamon – not chilli!! And if you can’t get ahold of Yuzu seasoning (please do look out for it – it is amazing in dips and with fish as well as cocktails) then use a couple of teaspoons of lemon juice along with some zest.

Ginger, Berry, Nutty Crisp | Selma's TableA quick word on preparing pans for baking. I don’t think that enough emphasis is placed on it but it is essential to do this well so that your delicious and lovingly prepared bakes are easy to turn out and present. If you bake frequently, it is completely worth buying pre-cut circles, strips and rolls of baking paper. In the UK, Lakeland and John Lewis are great resources as are eBay and Amazon. It’s not necessary to grease and paper the tins but do use a few dabs of butter so that the paper sticks to the tin and doesn’t move about.

How to line a baking tinAnd how to easily paper a square or rectangular tin? You can either cut out two long strips that are as wide as the tin so that they cover the base as well as the sides or you can do what I do which is to turn the tin over then drape and cut off enough paper to fit over it. Make a neat pleat at the corners- as if gift wrapping then turn the tin over and the paper should slip straight in. For a circular tin, cut out a strip which is a little longer than the length of the circumference. Then make a narrow fold along the length of it and snip along it at an angle. Dab a little butter along the sides of the tin and place the strip along it with the snipped section flat against the base of the pan. Place a circle of paper on the base on top of the snipped section and you are good to go.  I have lots of tips that you might find interesting on my TIps and Tricks page. If you go over and take a look, do leave your best tips in the comments box. I will include them with a credit to you.

Ginger, Berry, Nutty Crisp | Selma's TableI’m taking my Ginger Berry Nutty Crisp along to Angie of the Novice Gardener’s Fiesta Friday #32 – the weekly virtual get-together where we share fabulous stories and recipes from all over the world. Please do join in by seeing what is on offer or sharing a post. This week (as well as last week) Hilda from Along the Grapevine is helping Angie as a co-host. Hilda lives on a rather idyllic 7 acre property in Ontario, where she shares her stories and recipes of all the things she grows and forages on her land – this week it’s her incredible tomatoes – sigh! And Angie has brought a delicious Chilli con Carne – one of my favourite dishes! A huge thanks to both Angie and Hilda for hosting!!

Ginger, Berry, Nutty Crisp | Selma's TableClick on the Fiesta Friday badge below to join the party – you can submit a post (be sure to include a link to Angie and Hilda’s FF#32 posts – it’s only polite and also ensures that you can be considered for a feature next week!)  or just take a look at others are up to!

fiesta-friday-badge-button-click-to-join1

Ginger Berry Nutty Crisp

  • Servings: 16 pieces
  • Difficulty: Easy
  • Print

INGREDIENTS

For the base and topping:

  • 80 g Speculoo biscuits (a spicy biscuit)
  • 20 g walnuts
  • 190 g plain/AP flour
  • 50 g oats
  • 20 g ground almonds/almond meal/almond flour
  • 1 tsp ground ginger
  • 150 g cold, unsalted butter, cubed
  • 50 g chopped walnuts – reserve for the topping

For the filling:

  • 275 – 300 g mixed soft berries I used raspberries and blackberries
  • 1 large egg
  • 100 g light brown sugar
  • 1 Tbsp ground almonds/almond meal

For the glaze:

  • ½ c golden icing/super fine sugar
  • 2 Tbsp crème fraîche
  • 2 tsp Yuzu Citrus Seasoning

INSTRUCTIONS

  1. Pre-heat oven to 180 C/350 F
  2. Line a 9 inch square tin with greaseproof paper so that the base and sides are covered – use a few dabs of butter to get the paper to stick to the pan.
  3. While the oven is heating up, place the 20 g of walnuts on a tray and toast for 5 – 8 minutes. Cool, then place in a food processor and pulse until finely chopped. Don’t take it too far otherwise you will have a nut paste rather than a nut flour. Set aside.
  4. Place the Speculoo biscuits in a food processor and blitz to fine crumbs.
  5. Add the flour, oats, ground almonds, the ground walnuts and ginger and pulse a couple of times to combine.
  6. Add the cold butter and pulse until the mixture looks like coarse, damp sand.
  7. Set aside 1 cup of this mixture for the topping and tip the rest into the prepared tin. Pat it level – don’t press down too hard or it will be tough – then bake for 15 minutes.
  8. While the base is baking, get the filling ready; sort through the fruit and discard any mouldy ones.
  9. Using an electric mixer and a medium sized bowl, whisk the egg and sugar until coffee coloured and creamy – about 2 minutes. Then add the almond meal and salt and whisk again. Fold in the berries.
  10. After the base has been in the oven for 15 minutes, remove it and top with the filling – covering the hot base as evenly as you can with the fruit.
  11. Sprinkle over the chopped walnuts and the reserved topping.
  12. Bake for 30-35 minutes until golden brown.
  13. Cool in the tin for 10 minutes, then using the lining paper as handles, lift out and place on a wire rack to cool completely before glazing.
  14. Combine glaze ingredients together until smooth and drizzle over the top.

Stores brilliantly, covered in the fridge for 4-5 days.

© Selma Jeevanjee and Selma’s Table, 2013, 2014. Unauthorised use and/or duplication of this material, including photographs without express and written permission from this blog’s author and/or owner is strictly prohibited. Excerpts and links may be used, provided that full and clear credit is given to Selma Jeevanjee and Selma’s Table with appropriate and specific direction to the original content.

Walnut & Date Scones

Walnut & Date Scones | Selma's TableI was leafing through some magazines at the dentist’s the other day, more as a distraction than anything else, trying hard to quell the rising panic in my throat that this particular branch of health care seems to provoke in me. All I could think about as I nervously leafed through those pages was whether I was going to walk out or be brave and see the appointment through. Thankfully the drill was silent or I would have most probably left. You will laugh if I tell you that it was for a scale and polish but there is something about that clinical smell, the clang of sharp instruments, the sound of that God awful suction machine and that big bright overhead lamp that just makes my skin crawl and reduces me to a whimpering child. I got through it, of course I did, but not without a great deal of trepidation first. If anyone deserved a star, a sticker and obviously a gold medal, it was me, I can tell you.

Walnut & Date Scones | Selma's TableSomehow, despite the rising panic in that waiting room, I registered a picture of walnut topped pastries that popped back in my head when I got home. Well, Celia’s International Scone Week had got it’s hold on me so I had a rummage in the pantry and made these scones based on the Feta, Sun dried Tomato and Thyme Scones I posted last week. This time round, I separated the wedges which made them bake faster and added chopped walnuts and dates to the flour mixture. To heighten the walnut flavour, I also added a little walnut oil to the dough. They are really lovely with a soft cheese and quince or fig jam. The dates lend just enough of  a hint of sweetness that goes so well with walnuts. Remember to handle the dough as little as possible to ensure that you have a nice crumbly scone.

Walnut and Date Scones

  • Servings: 8 scones
  • Difficulty: easy
  • Print

INGREDIENTS

  • 225 g plain flour/AP flour
  • 1 Tbsp baking powder
  • pinch fine salt
  • 50 g chopped walnuts
  • 50 g chopped ready to eat dates
  • 30 ml Mrs Middleton’s rapeseed or a light olive oil
  • 20 ml walnut oil
  • 125 ml milk
  • a little extra milk to glaze
  • 8 walnut halves to decorate

INSTRUCTIONS

  1. Pre-heat oven to 225 C/ 440F. Line baking sheet with baking parchment and sprinkle over a little flour.
  2. Whisk together the flour, baking powder and salt really well to make sure that all the ingredients are well incorporated.
  3. Stir in the chopped walnuts and dates ensuring that all are well coated in flour. This stops them sinking to the bottom.
  4. Make a well in the dry ingredients and pour in the oils and the milk.
  5. Using the table knife and a light hand, mix in the bowl until the flour has been incorporated.
  6. Lightly flour or oil your fingers and push into a ball shape in the mixing bowl then turn out straight onto the prepared baking sheet.
  7. Pat down gently into a circular shape until it is 1 inch in height.
  8. Using a pizza wheel or a knife, cut into 8 triangles.
  9. Pull the wedges apart and brush the tops with a little milk. Set a walnut half on top of each one.
  10. Bake for 15 minutes until golden

Lovely served warm, with a little blue cheese and membrillo (quince paste) or brie/goats cheese and fig jam.

© Selma Jeevanjee and Selma’s Table, 2013, 2014. Unauthorised use and/or duplication of this material, including photographs without express and written permission from this blog’s author and/or owner is strictly prohibited. Excerpts and links may be used, provided that full and clear credit is given to Selma Jeevanjee and Selma’s Table with appropriate and specific direction to the original content.

Walnut, Herb and Anchovy Sauce

Walnut-Herb-and-Anchovy-SauceI came across this recipe which originates from Puglia, in the early 90’s, in a copy of Elle Decoration – a magazine I adored. The issue is long gone but I have never forgotten how wonderful this sauce tasted.  I can remember feeling genuinely surprised that something so simple and uncooked could have such depth of flavour. Well, that will be the anchovies – when blended like this, there is no fishy odour or taste – just a deep, satisfying undertone to a bright and summery sauce.

Now, I haven’t tried this but I am pretty sure that you can substitute tamari sauce for the anchovies – this would make it vegan/vegetarian and keep it wheat free too. Tamari and Soya sauces are both made with fermented soybeans but soy sauce includes wheat and is saltier.

The recipe does require a lot of herbs but these can be bought so easily nowadays – in the supermarkets, in the green grocers and in the ethnic food shops too and they add so much flavour and colour to other dishes that you won’t regret it. Trim the stalks and keep them in a vase/tumbler of water and they will last quite a while.

Walnut-Herb-and-Anchovy-Sauce

As daffodils and cherry blossom are coming into bloom, this bright, zingy sauce seems just the thing to herald the much anticipated Spring season. This Walnut, Herb and Anchovy Sauce would also be delicious slathered on fish or lamb.

29 May 2014 – I am really thrilled to say that this recipe is a Community Pick over on Food52 and that California Walnuts have asked to use it on their website!

Walnut-Herb-and-Anchovy-Sauce

Walnut, Herb and Anchovy Pasta Sauce

  • Servings: 6-8
  • Difficulty: easy
  • Print

INGREDIENTS

  • 1 cup of toasted walnuts
  • 6 anchovies preserved in oil (or substitute Tamari sauce starting with 1 Tbsp and adjusting the flavour to your palate)
  • 100 g flat leaf parsley including the stems
  • 40 g basil leaves
  • 40 g mint leaves
  • 20 g tarragon leaves
  • 1 large clove of garlic
  • 1 shallot
  • ¼ c olive oil
  • ¼ c water
  • lemon juice

INSTRUCTIONS

  1. Whiz the toasted nuts in food processor until coarsely chopped.
  2. Add the anchovies, herbs, garlic, shallot, water and pulse until it becomes a coarse puree.
  3. Then add the olive oil and whiz until combined.
  4. Stir in 1 Tbsp of lemon juice.
  5. Taste and adjust the flavour, stirring in additional lemon juice, salt and pepper to make the sauce sing.

Uses

  1. Toss into hot pasta, thinning with a little of the pasta water and finishing with a drizzle of good EVOO.
  2. Slash a whole fish and slather in the cavity and in the slashes; roast in the oven or cook on the barbecue.
  3. Top fish fillets or steaks with a spoonful of sauce and a dribble of wine; bake in parchment (thanks Tish!)
  4. Serve on the side with roast lamb or fish steaks.
  5. Spread baguette slices with a creamy goats cheese and top with a slice of roasted red pepper and little of the sauce; finish a drizzle of EVOO.

Baked Fruit and Oatmeal

Baked-fruit-and-oatmealOatmeal is not something I enjoyed as a child. My memories of porridge is that it was quite thin and watery and not very tasty at all – which is quite at odds with the delicious food I grew up with. When I began baking in my teens, I found that oatmeal was brilliant to make chewy chocolate chip cookies with.  I also discovered those packets of flavoured instant oats which bolstered me up during what felt like endless sessions of binge revision. As a mother of a school age child, I knew how nutritious and sustaining porridge is for those dark, cold, wintery school mornings and set about making it delicious as well. I don’t know if this is how you make it but I put a cup of oats in a pan and toast them slightly, I then add 2 cups of milk and one of water and stir over a medium low heat until thick and creamy. I ladle a portion into a shallow rimmed bowl, shake over some cinnamon and sprinkle it with 1 dessert spoonful of Demerara  sugar which goes syrupy. I peel a tangerine or a clementine and arrange the segments around the lip of the bowl like chubby rays of sunshine. Sometimes, I add some frozen blueberries to the bottom of bowl before ladling in the porridge. By the time my son gets to the table, dressed for school, the porridge has cooled down sufficiently to not delay him and I am quietly smug in the knowledge that he’s not going to be experiencing that mid morning sugar crash AND that I’ve managed to get 1 or 2 portions of fruit in him already. At the weekends, breakfasts are a more leisurely affair; eggs and sausages or french toast or pancakes but oatmeal doesn’t figure.

Until now, that is. I saw a photo for Oatmeal Casserole (which sounds a little grim, don’t you think?) on Pinterest and then surfed through several recipes for Baked Oatmeal, many of which included chocolate. This is my version which is full of healthy ingredients and tastes absolutely delicious. It’s warm, fruity, nutty and chewy. It takes about 15 minutes to put together and needs half an hour in the oven, filling the kitchen with gorgeous aromas as it bakes. It is ideal for a weekend breakfast. Left overs can be taken into to work or frozen in portions and warmed up in the microwave. You can chop and change the fruit and nuts to suit your palate or take into account what is in your cupboards. This is also something that you could bake in the evening during the week, to effortlessly have ready for the following morning.

Baked-fruit-and-oatmealPlace the oats, sugar, baking powder, cinnamon, salt, walnuts, dried fruit and half the blueberries in a large bowl.

Baked-fruit-and-oatmealGrate in the orange zest and mix thoroughly.

Baked-fruit-and-oatmealSlice one banana and arrange on the bottom of the oven safe dish. Cover with the dried mixed ingredients (which I forgot to photograph!)

Baked-fruit-and-oatmealJuice the orange.

Baked-fruit-and-oatmealWhisk the wet ingredients together in the same mixing bowl you used for the dry ingredients. (If you want to substitute honey or agave syrup for the sugar, add it now, to the wet ingredients.) I find that it is best to “temper” melted butter by slowly whisking in a little cold milk into it and then adding it to everything else. Otherwise, the melted butter just solidifies into fat globules that float on top.

IMG_6150Slowly and gently, pour the wet mixture over the oatmeal mix.

Baked-fruit-and-oatmealScatter over the remaining blueberries and the coconut flakes. (If you wish to use desiccated coconut instead, mix it in with the dry ingredients.) Slice the second banana and arrange over the top and bake for half an hour. (A scattering of pumpkin or sunflower seeds would be nice too.)

Baked-fruit-and-oatmeal

Baked-fruit-and-oatmealServe warm with a dollop of yoghurt.

I have included some vegan options for the dairy and egg but these are untested by me. Thanks to Susan Edelman of watchhatchfly for the information!

Baked Fruit and Oatmeal

  • Servings: 6
  • Difficulty: easy
  • Print

INGREDIENTS

  • 2 cups oats (anything but instant or quick cook)
  • 1/4 cup muscavodo (or brown) sugar plus enough for a sprinkle later
  • 1 tsp baking powder
  • 1 tsp ground cinnamon
  • ½ tsp salt
  • zest of 1 orange
  • ½ cup walnut pieces – broken up to make them smaller
  • ½ cup dried mixed fruit like cranberries and cherries or apricots and raisins or dates
  • 1 cup of blueberries divided into two portions
  • 2 large ripe bananas
  • 3tbsp/45g  melted butter (or vegan soy spread/coconut oil)
  • 2 cups milk ( or soy milk/almond milk/rice milk)
  • 1 large egg ( or applesauce/mashed banana/vegan egg replacer/ground chia and flax seeds)
  • Juice of one orange
  • 1 tsp vanilla extract
  • ½ cup coconut flakes
  • yoghurt to serve (or coconut milk or soy milk yoghurt)

INSTRUCTIONS

  1. Pre-heat the oven to 190C/375F.
  2. Butter or oil an oven safe dish (mine is 28 x 20cm/11″x 8″).
  3. Thoroughly mix the first 9 ingredients (using only half the blueberries)  in a large bowl to distribute everything evenly.
  4. Slice one banana and arrange on the bottom of the dish.
  5. Cover with the dry mixed ingredients.
  6. In the same bowl that you used for the dry ingredients, lightly whisk the egg.
  7. Slowly whisk a a cup of milk into the cooled butter to amalgamate it and pour it and the second cup of milk onto the whisked egg together with the vanilla and the orange juice and whisk again.
  8. Slowly and evenly pour the wet mixture over the dry ingredients.
  9. Scatter over the remaining portion of blueberries and the coconut flakes (some seeds would be nice too).
  10. Top with the slices from the second banana.
  11. Bake for 30 – 40 minutes until bubbling and golden brown.
  12. Sprinkle a little more brown sugar over the top and leave to cool a little.
  13. Serve warm with yoghurt.