Ricotta and Chive Cakes

Ricotta and Chive Cakes | Selma's TableI have a friend who I think of as the Imelda Marcos of lunch boxes. She has the most incredible selection – ones for breakfast, ones with separate compartments for salads and dressing, ones that can go in the microwave, spill proof soup mugs, ones that have their own placemat, ones that have their own cutlery – you name it – she’s most probably got it! She takes the most delicious things to work and obviously saves a fortune in the process.

Ricotta and Chive Cakes | Selma's TableHave you ever totted up what you spend on food during the working week? I’m not talking about going out for restaurant  lunches but the stuff you get from the thousands of takeaway sandwich bars and cafe’s that line our streets. Starting with your morning latte and yoghurt pot/muffin/croissant to a mid morning snack, lunch of sandwiches/salads/noodles/sushi, coffee or tea, juice etc…it really adds up. At let’s say £5 – £10 a day, that’s £25 – £50 a week which works out to £1,250 – £2,500 a year! With a little fore thought and organisation, you could so easily be taking in your own food which will be delicious, not full of salt, sugar, preservatives and additives and saving you a fortune at the same time. Those Manolos might be yours sooner than you think…

Ricotta and Chive Cakes | Selma's TableAnyway, I popped round her house recently and she gave me a ricotta cake to try – she had mentioned them a few times in the past and said how wonderful they were and how perfect in one of her “salady” lunch boxes and I could immediately see why. It was so savoury; light but filling and extremely low carb, so, no mid afternoon carb coma. She did tell me what was in them, but all I could remember was the ricotta and parmesan. Possibly basil.

The other day, I bought some ricotta to make ravioli and had some left over so thought I would give the cakes a go. I did a little googling to get the proportions right and came up with these…They are so easy. Just whisk up a couple of eggs with salt and pepper, snip in the chives and stir in the cheeses. Spoon into very well greased tins, top with a little more parmesan and bake. So, so delicious!

These are really quite small – you would probably want 2 or 3 – maybe more, per serving, depending on your appetite. I also think that these would be lovely with a little grated lemon zest in them and maybe a sliver of sundried tomato on top. Thyme or oregano would work well here too. So many possibilities…

P.S. if you click on the link to the Manolo Blahnik website, there is THE most fabulous short film about how, as a child growing up in the Canary Islands, Manolo Blahnik made shoes from sweetie wrappers for lizards. I used to make Christmas decorations out of sweetie wrappers – think I may have missed my calling…

Ricotta and Chive Cakes

  • Servings: makes about 22 small cakes
  • Difficulty: easy
  • Print

INGREDIENTS

  • 2 large eggs, free range or organic
  • ½ tsp salt
  • ½ tsp ground black pepper
  • 1 bunch of chives about 25g
  • 500g ricotta cheese
  • 60g finely grated parmesan cheese, halved

INSTRUCTIONS

  1. Pre-heat the oven to 150C/300F. Thoroughly grease and flour a couple of 12 hole patty tins (the shallow kind used for mince pies or Yorkshire puds).
  2. Lightly whisk the eggs in a medium sized bowl. Whisk in the salt and pepper and snip in the chives – scissors are much better than a knife for chives.
  3. Add the ricotta and half the parmesan and whisk until all the ingredients are well mixed together.
  4. Pop a tablespoon of the mixture into each hole and lightly smooth over the tops.
  5. Evenly sprinkle over the remaining parmesan cheese.
  6. Bake for 20 minutes or until lightly golden. Let cool for 5 minutes then remove from pans to either finish cooling on a wire rack or eat warm with a salad.
  7. Store in a lidded container in the fridge for up to 7 days.
© Selma Jeevanjee and Selma’s Table, 2015. Unauthorised use and/or duplication of this material, including photographs without express and written permission from this blog’s author and/or owner is strictly prohibited. Excerpts and links may be used, provided that full and clear credit is given to Selma Jeevanjee and Selma’s Table with appropriate and specific direction to the original content.

Blood Orange, Cavalo Nero and Fregola Salad

Blood Orange, Cavalo Nero and Fregola Salad | Selma's TableA couple of times a year, four of us get together and spend the day wandering around a food market, shopping and then repairing to one of our homes to cook a tasting style menu. Usually, friends and family will turn up later on for dinner – it’s such a lovely and convivial day – I wrote about it in a little more detail, last year.  I suppose it is an echo of days gone by when families, friends and neighbours would gather to celebrate a harvest, cooking and eating together. Blood Orange, Cavalo Nero and Fregola SaladThis time, M suggested that we visit a Sardinian store called Vallebona, to which she had taken me before. I am not sure that I can find the words to describe the Vallebona experience but I will try. It’s like stumbling upon the most wonderful secret and realising that you have just joined the best club ever. It is family owned and run with great, enthusiasm, knowledge and style – visiting is just an utter delight and pleasure. Blood Orange, Cavalo Nero and Fregola Salad | Selma's TableVallebona in the middle of an industrial estate in Wimbledon, so finding it is the first challenge. Upon pulling up, it’s all forbidding burgundy coloured steel doors with only the signage to indicate that you are in the right place.

Upon pressing the buzzer to gain entry,  the door swings open into a stunning white space, filled with stylishly arranged Sardinian groceries and wine. The rooms have a distinct warehouse vibe with white painted brick walls and vintage shelving and accessories.

Blood Orange, Cavalo Nero and Fregola Salad | Selma's Table

Nibbles in wooden cones

You are pretty much handed a glass of wine and a few nibbles shortly after walking in which makes it a very enjoyable way to browse through the stunningly arranged warehouse rooms.

There is the most fabulous climate controlled cheese and meat room and also a kitchen from which they produce samples of their food to try and where they also cater for lunches and dinners.

Vallebona have recently started stocking fresh fruit and vegetables so it was the perfect food destination from which to make up our menu.

There were recipe suggestions galore so we decided on Spicy Sausage and Fregola main dish, a fabulous selection of cheeses and this gorgeous Blood Orange, Cavalo Nero and Fregola Salad. Blood Orange, Cavalo Nero and Fregola Salad | Selma's TableFor this recipe, you will need to segment oranges. It is really easy to do so give it a go if you haven’t tried this before. The video below shows how easy it is.

Fregola is similar to the giant Israeli couscous except that it is lightly toasted so has a wonderful flavour. Cavalo Nero is related to kale and cabbage and is used to make the classic Tuscan Ribollita Soup.

Blood Orange, Cavalo Nero and Fregola Salad | Selma's Table

Dan Lepard’s Rye Crackers

I always make something to take with me and this time I made Dan Lepard’s Rye Crackers to have with the cheese that I knew we would buy. They were delicious and easy to make but really showed up the hot spots in my oven! The recipe is in his book Short and Sweet which I highly recommend if you enjoy baking.

This Blood Orange, Cavalo Nero and Fregola Salad is a delicious marriage of flavours; sharp, sweet, salty, toasty and green. and perfect with fish too. If you can’t find blood oranges, use regular ones instead. Walnuts would also be the perfect substitution for the toasted sliced almonds. I am taking this to the virtual table at Fiesta Friday #58, hosted by the talented Angie of The Novice Gardener. Last week was sugar fuelled so a salad like this is sure to balance things out! This week we have Caroline @Caroline’s Cooking and Elaine @foodbod to thank, as our co-hosts. Both are fantastic cooks and have a wealth of recipes on their sites – do go over and take a look. If you blog, please do join in, reading the the guidelines first to get you going.

Blood Orange, Cavalo Nero and Fregola Salad

  • Servings: 4-6
  • Difficulty: easy
  • Print

adapted from Vallebona’s recipe for Cavalo Nero, Blood Orange and Almond Salad

INGREDIENTS

  • 100g dried weight fregola,
  • 2 blood oranges
  • 1 lemon
  • 200 g Cavalo Nero (also known as Black Kale or Black Cabbage)
  • 1 tsp flakey sea salt
  • ½ tsp sugar
  • 2 Tbsp olive oil
  • handful of sliced almonds

INSTRUCTIONS

  1. Soak the Cavalo Nero in plenty of cold water.
  2. Cook the fregola in lots of boiling, salted water for 10 minutes; drain, rinse and set aside.
  3. in the meantime, segment the oranges by slicing off the top and bottoms, then vertically running a knife between the flesh and the pith, following the curve of the orange. Then segment by slicing out the flesh from between the membrane. Cut these segments into 2 or 3 pieces each and set aside.
  4. Squeeze all the juice out of the membranes into a separate bowl. Juice the lemon into this bowl too and set aside.
  5. Drain the Cavalo Nero and remove the stalks and discard. Slice the leaves into 1 inch pieces then chop a couple of times.
  6. Sprinkle the salt and sugar over the Cavalo Nero then pour over the combined juices. Massage (squelch) the leaves with the mix of salt, sugar and citrus juices for 4 or 5 minutes to break down the fibres and soften the leaves. Pour over the olive oil and massage again for a minute or so then set aside for 15 – 20 minutes.
  7. Toast the almond slices until golden brown.
  8. When ready to eat, toss the Cavalo Nero with the blood orange pieces, the cooked fregola and the toasted almond slices. Toss and serve.
© Selma Jeevanjee and Selma’s Table, 2015. Unauthorised use and/or duplication of this material, including photographs without express and written permission from this blog’s author and/or owner is strictly prohibited. Excerpts and links may be used, provided that full and clear credit is given to Selma Jeevanjee and Selma’s Table with appropriate and specific direction to the original content.

Romanesco and Feta Cakes with Za’atar

Romanesco and Feta Cakes with Za'atar | Selma's TableOne of the few benefits of globalisation is the exposure and the availability we now have to a huge variety of fruits and vegetables. In England, garlic, which was once regarded as foreign muck is now as ubiquitous as the humble spud. Blood oranges, native to Italy are now cultivated and eagerly anticipated worldwide. When we moved to Canada in the mid ’70’s coriander leaves were scarce and an exotic luxury – my mother would use them parsimoniously out of necessity. Today, sheaves of them can be bought in the grocery stores. It is easier than ever to eat a huge variety of fruits and vegetables which has so many knock on benefits.

Romanesco and Feta Cakes with Za'atar | Selma's TableI can’t remember when I first saw my first romanesco broccoli (aka romanesque cauliflower) but it was a stunningly beautiful if strange, otherworldly looking vegetable that once brought home, I could not bear to destroy by cooking! Cultivated in Italy since the 15th/16th century, this is another vegetable that is now easily available to us. It has a the nutty, buttery flavour of the more familiar broccoli and cauliflower but without the bitter edge that cauliflower can sometimes have and is much preferred by children for that very reason.  I love the florets in a cauliflower cheese, or pureed to go with a roast or roasted themselves, but these cute little cakes another way to have them that doesn’t take long and can also be assembled ahead of time if necessary. The feta gives them a salty creamy kick and the za’atar picks out the lemony flavours. A hint of earthy, aromatic rosemary pulls it all together.

After steaming the florets, just mix the ingredients together, shape into little patties and bake – what could be easier?

Romanesco and Feta Cakes with Za'atar | Selma's TableI am sharing these with those die-hard party goers at Fiesta Friday, hosted by the talented Angie of The Novice Gardener. This week we have  Suzanne @apuginthekitchen and Sue @birgerbird to thank, as our co-hosts. Both are fantastic cooks and have a wealth of recipes on their sites – do go over and take a look.

If you blog, please do join in, reading the the guidelines first to get you going.

R e a d e r   G i v e a w a y!

Ruby Chard, Shitake Mushroom & Chestnut Tart | Selma's TableWin a copy of FIVE by Rachel de Thample!

Ever since my son, Jake, began weaning, I have instinctively incorporated more fruits and vegetables into our diet. I always make sure to include at least three fruits/vegetables at meals – usually more if I can. For instance yesterday we had a stir fry of shredded white cabbage, cavalo nero, ruby chard, kale tops, leeks and red onion with some salmon. This is why Rachel de Thample latest recipe book called FIVE which I reviewed last week, appeals so much to me. it shows you how easy it is to eat well and deliciously.  It is full of varied, accessible and delicious recipes that will have you packing away fruits and vegetables without any effort at all. There is a very useful double page spread listing fruits and vegetables and their portion sizes and the recipes clearly state how many portions are in each recipe. And the recipes! There isn’t a single one which I wouldn’t make – from creative breakfast truffles and clever muffins to galettes, latkes, stunning salads, hearty soups, curries, pastries, cakes, puddings, sorbets – and I have one copy to give away to a lucky reader!

All you have to do is follow this blog via email (if you don’t already) and leave a comment below telling me what one of your favourite vegetable dishes is – one of my favourites is  griddled courgette/zuchinni slices, tossed with basil or mint, lemon zest, olive oil, parmesan and toasted almond slivers – so delicious!

Now on to the recipe –

Romanesco and Feta Cakes with Za'atar

  • Servings: makes about 9 small cakes
  • Difficulty: easy
  • Print

INGREDIENTS

  • 1 small romanesco cauliflower ( approx. 175 g prepared weight) or substitute broccoli or cauliflower
  • 75 g feta cheese
  • 20 g panko or bread crumbs
  • zest of half a lemon
  • ½ tsp finely chopped rosemary needles
  • ½ tsp vegetable bouillon powder or a good pinch of salt (remembering that the feta is salty)
  • 1 Tbsp finely chopped parsley
  • 1 Tbsp za’atar
  • 1 egg, lightly beaten
  • 1 tsp fine semolina

INSTRUCTIONS

  1. Preheat the oven to 180C/350F
  2. Break up the romanesco into fairly small florets and steam for about 8 minutes. A knife should be able to pierce them easily but they should not disintegrate. Allow to cool a little.
  3. In the meantime, crumble or chop the feta in small cubes,
  4. When the romanesco is cool enough to handle, mix in the remaining ingredients.
  5. Taking walnut sized pieces of the mix, squeeze and shape into balls. Wetting your hands makes them easier to shape.
  6. Lightly oil a baking tray and place the balls on the tray, Flatten them slightly and then drizzle over a little oil. Dust with semolina, Turn over and repeat.
  7. Bake for 10-12 minutes until tinged with gold.
  8. Serve warm with a dollop of lemony creme fraiche or greek yoghurt.
© Selma Jeevanjee and Selma’s Table, 2015. Unauthorised use and/or duplication of this material, including photographs without express and written permission from this blog’s author and/or owner is strictly prohibited. Excerpts and links may be used, provided that full and clear credit is given to Selma Jeevanjee and Selma’s Table with appropriate and specific direction to the original content.

Warm Blue Cheese Tartlets with Candied Walnuts

Warm Blue Cheese Tartlets with Candied Walnuts | Selma's TableIt’s hard to believe that a whole year has gone by since Angie dreamt up Fiesta Friday. I remember how she said that she wanted us all to mix and mingle with each other because it was a party. I must admit that I was sceptical – I had tried various linky parties which made me feel like a virtual wallflower – hardly anyone visited, and the few that did, never commented or liked what I shared. So, when Fiesta Friday started, I stood on the sidelines for a few weeks, popping by to see what was going on and couldn’t believe how fabulous Angie’s bash was. People were submitting gorgeous recipes and they were all mingling like mad! The comments were so supportive, encouraging  and some were very funny too. It quickly became apparent that some people were super bubbly and had to be kept away from the sweets – and I am not naming any names here! So, I really pushed the boat out and made a batch of Nutella Espresso Sticky Buns. Well, the WordPress app on my phone didn’t stop pinging all weekend – people were commenting, following my blog and generally doing exactly what should be happening at linky parties. I felt like the fabled swan when Angie featured my post the following week! So Angie, congratulations on such a successful event and a huge thank you for hosting a brilliant party and gathering these lovely bloggers to your fold.

Warm Blue Cheese Tartlets with Candied Walnuts | Selma's TableThese Blue Cheese Tartlets with Candied Walnuts are something that I have been wanting to make for some time. I watched one of the contestants on Masterchef making something similar with roasted tomatoes and basil oil and the idea of an individual savoury cheesecake really made an impression on me. Also, I bought half a dozen cute little fluted tart tins from the dollar store in Winnipeg when I was there last and keep looking for an excuse to use them. I thought that walnuts would be a much better flavour match for blue cheese so dressed my tarts with the candied walnuts and the walnut dressing.

Making a “crust” with buttery bread crumbs couldn’t be easier and the cheesecake filling comes together so easily with a little whizz in the food processor.

Warm Blue Cheese Tartlets with Candied Walnuts | Selma's TableThis recipe is worth it just for the candied walnuts alone – you will not be able to stop eating them so I suggest you make twice as many. Just sayin’.

Warm Blue Cheese Tartlets with Candied Walnuts | Selma's TableThe tarts are gorgeous – the rich cheese filling with the crispy, crumbly breadcrumb crust, the peppery rocket leaves and the sharp nutty dressing topped off with the sweet and slightly spicy crunchy walnuts – perfect dinner party fodder if you ask me!

I am taking this over to Angie’s Fiesta Friday Anniversary Part 1 which this special week is being co-hosted by my two of my favourite Canadian bloggers,  Hilda @Along The Grapevine and Julianna @Foodie On Board – the original two co-hosts for the first few Fiesta Fridays.

If you are new to blogging, please do join the party, we would love to see you. Fiesta Friday is a great way to gain exposure and make new friends too. Be sure to comment, like and follow – Angie has such a friendly crowd at this party that you will come away with lots of new followers (as long as you interact) as well as a lot of inspiration! Submit a post (please be sure to include the link and a mention, in your post, to Angie’s Fiesta Friday Anniversary Part 1 post – it’s only polite and also ensures that you can be considered for a feature next week!)  or just take a look at others are up to! If you’re new to Fiesta Friday, please read the Fiesta Friday guidelines and invitation post for helpful hints.

It’s been my great pleasure to co-host Fiesta Friday several times and I am so honoured that Angie has asked me to co-host  the Fiesta Friday Anniversary Part 2 with  Nancy @ Feasting With Friends next week. The theme is mains and puddings/sweets next week, so best wear loose clothing! Jhuls, I will bring lots of camomile tea with me! I look forward to seeing what you lovely people bring this week and next. Happy Anniversary Fiesta Friday!

Blue Cheese Tartlets with Candied Walnuts

  • Servings: 4
  • Difficulty: easy
  • Print

Inspired by MasterChef

INGREDIENTS

For the Candied Walnuts

  • 150 g of walnut halves or pieces
  • 100 g of caster sugar
  • 15 g butter
  • a few shakes of cayenne pepper

For the Walnut Dressing

  • 1 Tbsp/15 ml white wine/apple cider vinegar
  • pinch of sea salt
  • 1 tsp French mustard
  • 2 Tbsp/30 ml walnut oil
  • 1 Tbsp/15 mi extra virgin olive oil

For the Blue Cheese Tartlets

  • 100 g white bread (trimmed of the crusts)
  • 50 g butter
  • salt and pepper
  • 100g full fat cream cheese
  • 75 g blue cheese
  • 1 egg yolk
  • 1 tsp flour
  • 1 Tbsp double cream/creme fraiche

To serve

  • Rocket leaves

INSTRUCTIONS

For the Candied Walnuts

  1. Place all the ingredients into a nonstick pan and stir over a medium heat.
  2. Keep stirring until the sugar turns to caramel and starts to coat the nuts. This takes between 3 to 5 minutes. Don’t let the caramel burn – just keep stirring it.
  3. Once the caramel is a toffee brown, pour the mixture onto a silicone sheet or parchment paper – be careful as the caramel is very hot – and using a rubber spatula or a wooden spoon, separate the nuts making sure that there is caramel on each one.
  4. Let cool, then store, out of sight, in a lidded jar to avoid eating the whole lot.

For the Walnut Dressing

  1. Place the vinegar and sea salt in a small bowl and whisk to dissolve the salt.
  2. Whisk in the mustard then slowly whisk in the oils. You can also just put the lot in a lidded container and shake hard but I like the rounded airy fullness that whisking gives to a dressing.
  3. Set aside.

For the Blue Cheese Tartlets

  1. Preheat the oven to 190C/375F. Butter/spray the bases and sides of 4 x 8cm/3in fluted, loose bottomed flan tins.
  2. Whizz the bread in a food processor to fine crumbs. Melt the butter and tip in the crumbs, stirring to combine. Season with a little salt and pepper.
  3. Divide into 4 then press the mixture on the base and up the sides of the prepared tins. Use the back of a teaspoon to even out the base.
  4. Place on a baking sheet and bake for about 10- 12 minutes or until the bases are golden but keep an eye on them as they can catch quite quickly.
  5. Beat the rest of the ingredients together and divide between the tins. I did this in the mini processor in which I whizzed the bread crumbs.
  6. Place on a baking sheet and bake for 10 – 12 minutes or until the tops are golden and just set – a little wobble in the middle is desired.
  7. Cool for a few minutes then remove carefully from the tins.
  8. Serve warm or at room temperature on a few rocket leaves, drizzling the dressing around the plate and garnishing with the candied walnuts.
© Selma Jeevanjee and Selma’s Table, 2013 – 2015. Unauthorised use and/or duplication of this material, including photographs without express and written permission from this blog’s author and/or owner is strictly prohibited. Excerpts and links may be used, provided that full and clear credit is given to Selma Jeevanjee and Selma’s Table with appropriate and specific direction to the original content.

Crunchy Pickled Radish Slices

Crunchy Pickled Radish Slices | Selma's Table

After the excesses of festive season, January bears the brunt of cutting back whether it be shopping, alcohol and/or food. The feasting seems to start from the beginning of December so come January, we do crave simpler, lighter food. The trouble is that sometimes it can seem a little bland. These crunchy, pickled radish slices will perk up all sorts of things from salads to steamed vegetables, steamed fish to simply cooked meats. And of course they are superb with cheese and crackers, in sandwiches,  in burgers; anywhere you need a crunchy, spicy, floral, acidic hit of flavour.

They are ridiculously easy to make – combine the spices, slice the radishes and layer in a heatproof jar. Boil the brine to dissolve the sugar and salt and pour over the radishes. That’s it! You can eat them as soon as they have cooled or refrigerate them for later – they keep for a few weeks. I hope you find that they add a little pizzaz to some of your January meals!

I am so thrilled to be co-hosting The Novice Gardner’s Fiesta Friday with the incredibly talented Sue of Birgerbird. If you are not familiar with her work – please do take a look – her photography will blow you away and then when you see the gorgeous award winning food she cooks too – wow! She now sells her award winning pork pies so if you are lucky enough to be in the Santa Monica area, give her a yell! We are co-hosting Angie’s 50th Fiesta Friday and we can’t wait to see what you are bringing to the party!

Click on the Fiesta Friday badge below to join the party – you can submit a post (please be sure to include the link and a mention, in your post, to Angie’s  FF#50 post – it’s only polite and also ensures that you can be considered for a feature next week!)  or just take a look at others are up to!

Speaking of features, there were some stunners last week! I still can’t get over Lily’s Dark Chocolate Cupcakes with White Chocolate Buttercream and Naina’s Firecracker Shrimps look fantastic. And how about a Lemon Meringue Pie Cocktail from Dini to kick things off with? Then for pudding we have Pecan-Bacon Squares A’ La Mode from Judi! Wowsers!!

If you are new to blogging, Fiesta Friday is a great way to gain exposure and make new friends too. Be sure to comment, like and follow – Angie has such a friendly crowd at this party that you will come away with lots of new followers (as long as you interact) as well as a lot of inspiration!

If you’re new to Fiesta Friday, please do take a minute to read the guidelines.

fiesta-friday-badge-button-click-to-join1

Crunchy Pickled Radish Slices

INGREDIENTS

  • 1 bunch of radishes

Brine

  • 200 ml white wine or apple cider vinegar
  • 200 ml water
  • 3Tbsp sugar, honey or maple syrup
  • 2 tsp salt

Spices

  • ½ – 1 tsp chilli flakes depending on how spicy you like it
  • ½ tsp mustard seeds
  • ½ tsp red peppercorns
  • ½ tsp fennel seeds
  • ½ tsp coriander seeds

INSTRUCTIONS

  1. Trim off the tops and tails of the radishes. then, using a sharp knife or a mandolin, slice very finely into rounds.
  2. Mix the spices together and place half in the bottom of a heat proof jar.
  3. Fill the jar with the sliced radishes and top with the remaining spices.
  4. Bring the brine ingredients to a boil, stirring occasionally.
  5. Pour over the radishes and let this cool to room temperature before serving or storing in the fridge.

The radishes will last for a few weeks in the fridge.

© Selma Jeevanjee and Selma’s Table, 2013 – 2015. Unauthorised use and/or duplication of this material, including photographs without express and written permission from this blog’s author and/or owner is strictly prohibited. Excerpts and links may be used, provided that full and clear credit is given to Selma Jeevanjee and Selma’s Table with appropriate and specific direction to the original post.

Plenty More by Yotam Ottolenghi – Christmas Giveaway!

Plenty More by Yotam Ottolenghi - Giveaway! | Selma's TableHow would you like to get your hands on a copy of one of this year’s eagerly awaited and most coveted recipe books? Plenty More by Yotam Ottolenghi has made it onto all the must-have Christmas gift guides and this is your chance to either cross that foodie off your Christmas shopping list or keep it for yourself as an early Christmas pressie from which you can prepare gorgeous dishes for friends and family – truly, the gift that keeps giving!  The lovely people at The Happy Foodie have sent me a copy of Plenty More to give to one lucky reader.

Plenty More picks up where Plenty left off, with 150 more dazzling vegetable-based dishes, this time organised by cooking method. Grilled, Baked, Simmered, Cracked, Braised or Raw, the range of recipe ideas is stunning. With recipes including Alphonso Mango and Curried Chickpea Salad, Membrillo and Stilton Quiche, Buttermilk-crusted Okra, Lentils, Radicchio and Walnuts with Manuka Honey, Seaweed, Ginger and Carrot Salad, and even desserts such as Baked Rhubarb with Sweet Labneh and Quince poached in Pomegranate Juice, this is the cookbook that everyone has been waiting for…Ebury Publishing

I’ve had my copy for a couple of months now and have made numerous recipes from it, all of which have been utterly delicious – this is a book which has already become a stalwart in my kitchen.  Here is a short video of the great man himself, recipe testing and talking about his inspirations and processes – oh how I would love to be working in that “under the arches” test kitchen of his!!

With unreserved apologies to my many and cherished international readers, this giveaway is limited to UK and EU addresses only. As a consolation to them and to whet your appetite, you can download a handful of the recipes from the Ebury Press website.

You  have up to 3 chances to win!!

1. You can enter up to 3 times via the following platforms;

2. The deadline for entries is 9pm (GMT), Tuesday 09 December 2014.

3. I will plug all the entries into a bit of software called The Hat which will randomly choose a winner.

4. The winner will be announced and contacted on Wednesday 10 Dec 2014 and I will mail the book out as soon as I have your postal details.

5. Remember – UK and EU addressees only!

Good luck everyone and get commenting!!

Roasted Pumpkin Pancakes

Roasted Pumpkin Pancakes | Selma's TableI had half a crown squash in my veg box the other day and couldn’t decide what to make with it. Jake’s not a fan of sweet vegetables like parsnips, squashes or sweet potatoes and I didn’t want to end up eating it all myself. So I roasted it off and mashed it,  thinking that I would freeze the puree in ice cube trays so that I could just use a couple when ever I needed to thicken a sauce. Or something. Jake came into the kitchen as I was mashing the squash and just sort of mentioned that we hadn’t had pancakes in a while. Egads!! Brilliant idea!! I used the Homemade Pumpkin Pie Spice Mix which I posted last week and also made up the pancake batter the day before cooking as it’s always better after a rest overnight in the fridge. If you can be that organised. Normally I am not.

Roasted Pumpkin Pancakes | Selma's TableI make my pancakes quite small – I use a table spoon to measure them out the batter with and they are only 3 inches wide but I just prefer that as portion control and they are easier to flip too, that the ones than use a half cup measure.

Roasted Pumpkin Pancakes | Selma's TableI’m always looking for ways to speed up preparation or just make things easier in the kitchen generally. I find the least stressful way to roast squash is to slice it in half, remove the seeds, drizzle with a little oil and then roast the squash in it’s skin. Once cooked, the skin simply peels off. In this case, I scooped out the seeds, cut the squash into wedges and roasted them at 200C/400F for 20 minutes until they were tender.

Roasted Pumpkin Pancakes | Selma's TableThese pancakes are not ethereally light and fluffy like my sour cream, cinnamon and blueberry ones – the puree does weigh them down a little but they are absolutely gorgeous! Perhaps separating the egg, whisking the white until the soft peak stage and folding this in would help but we thought they were delicious as they were. The pumpkin sweetens the batter and the spicing warms up the flavour beautifully. I think that a few pumpkin seeds would be nice sprinkled on the top of the pancake batter before they get flipped too. These would go very well with something salty on the side for contrast. Jake mentioned again, the other day, how good the pancakes had been – this was while he was looking at a tray of roasted pumpkin cubes covered in Pumpkin Pie Spice Mix with, however, no desire to taste them!! He really is not a fan of sweet vegetables!

Roasted Pumpkin Pancakes | Selma's Table

I’m a little late to the party this week but I am still sharing these with the revellers at Angie’ of the Novice Gardener’s Fiesta Friday! Angie has made some stunning pancake waffles with a really clever twist on chocolate “sauce”. Also do take a look at the features from last weeks Fiesta Friday – lots of wonderful recipes that you will want to make right now!

This week we are co-hosted by the bubbly Jhuls of The Not so Creative Cook who has made some rather moreish looking twist cookies and reflects on maturing, accepting, forgiving and moving on.  Our second co-host is Margy of La Petite Casserole who has not only made a gorgeous butternut squash and coconut soup but also begs the question, why  do we eat airline food when, each time we fly, we say we won’t – I know I do that!!  A huge thanks to all three of you!

Roasted Pumpkin Pancakes | Selma's Table

If you blog and would like to join the party, you would be most welcome. Click on the button below to join Fiesta Friday and please do read the guidelines before linking up.

fiesta-friday-badge-button-click-to-join1

Roasted Pumpkin Pancakes

  • Servings: 15 x 3 inch pancakes
  • Difficulty: easy
  • Print

INGREDIENTS

  • 115g Plain/AP Flour
  • 1 Tbsp brown sugar
  • 1 tsp Pumpkin Spice Mix
  • 1 ½ tsp baking powder
  • pinch salt
  • 15g butter (preferably, unsalted) melted and cooled but still runny
  • 1 large egg at room temperature
  • 150 ml milk
  • 230 g roasted pumpkin puree
  • pumpkin seeds – optional

INSTRUCTIONS

  1. Place the dry ingredients, (flour through to salt) in a medium sized mixing bowl and whisk to combine and aerate.
  2. Lightly whisk the egg in a measuring jug then which in the cooled melted butter  then finally tup up with the milk. Whisk again.
  3. Make a well in the dry ingredients and pour in the egg mixture. Using a circular stirring motion, gently stir to draw in the dry ingredients to the middle, being careful not to over mix – a few floury patches are fine. It should be quite thick and a bit lumpy.
  4. Stir in the pumpkin puree.
  5. SET ASIDE for 1/2 an hour at room temperature or overnight in the fridge.Don’t, whatever you do, stir the batter after the resting stage. You just want to scoop out tablespoonfuls, straight into the frying pan.
  6. Pre-heat the oven to 75 C or very low. Get an oven proof dish out and a piece of foil to cover it with.
  7. Put the widest non-stick fry pan  you have, on a medium low heat. If it is too high, the outside burns before the insides are cooked…Once the pan is hot, brush with a little butter (I stick a piece on the end of a table knife and swipe it around the pan, cringing whenever the metal touches the non-stick base).
  8. Using a tablespoon, scoop out and place the batter on the pan – I can get 4 to 5 pancakes going in mine but it is a rather large pan. The batter spreads a little so just try spacing 3 out to start with. Top with a few pumpkin seeds if desired.
  9. They will need to cook for  2 or 3 minutes on this side. Keep checking and also keep an eye on the heat which you may have to keep adjusting. (Just have a peek under the pancake, by lifting a corner with a spatula, to see how it is colouring)
  10. When the tops of the pancakes have lots of holes in them, it is time to flip them over.  The second side will not take as long to cook – about a minute – so keep an eye on them. When they are done, remove them to the ovenproof platter, loosely cover with foil and pop them in the oven. Carry on with the next round, lightly buttering the pan when you need to and keeping an eye on the heat.
  11. Serve with proper Canadian maple syrup.

© Selma Jeevanjee and Selma’s Table, 2013, 2014. Unauthorised use and/or duplication of this material, including photographs without express and written permission from this blog’s author and/or owner is strictly prohibited. Excerpts and links may be used, provided that full and clear credit is given to Selma Jeevanjee and Selma’s Table with appropriate and specific direction to the original content.


Ginger Berry Nutty Crisp

Ginger, Berry, Nutty Crisp | Selma's TableI rather love September – not only because my favourite (!) son was born towards the latter end of the month but also because it’s full of new beginnings. A new school year begins with high hopes and  all the paraphernalia that goes with it – uniform, school shoes, pens and pencils, geometry sets, books, teachers and classmates. Only this year, as Jake enters what is known as Sixth Form (the last two years of school before University) there is no “uniform” other than the Sixth Form tie. All the boys must wear a suit (navy, charcoal or black), a white shirt and black shoes. He does go off to school looking terribly smart!

Ginger, Berry, Nutty Crisp | Selma's TableMeaning to make a crumble to showcase a pretty bowl (I know, how shallow am I?), I bought some lovely blackberries and raspberries from the market. But making a crumble seemed akin to admitting that the summer was over – which I am not quite ready to do! The weather has been warm in that September sort of way and the trees seem determined to hang onto their verdant hues though there are a few on the turn too.

Ginger, Berry, Nutty Crisp | Selma's TableIt didn’t seem right somehow to be making a winteresque pudding so I adapted the Peach and Amaretti Crisp I made last week to make a Ginger Berry Nutty Crisp. I used a spicy biscuit called Speculoo, added some ground ginger and walnuts to the base and topping and included that gorgeous Japanese citrus flavour called Yuzu in the icing. I used a golden icing sugar which is unrefined – it gives the icing a gorgeous caramel colour and flavour too. Any spicy biscuit will do – by spicy I mean with ginger or cinnamon – not chilli!! And if you can’t get ahold of Yuzu seasoning (please do look out for it – it is amazing in dips and with fish as well as cocktails) then use a couple of teaspoons of lemon juice along with some zest.

Ginger, Berry, Nutty Crisp | Selma's TableA quick word on preparing pans for baking. I don’t think that enough emphasis is placed on it but it is essential to do this well so that your delicious and lovingly prepared bakes are easy to turn out and present. If you bake frequently, it is completely worth buying pre-cut circles, strips and rolls of baking paper. In the UK, Lakeland and John Lewis are great resources as are eBay and Amazon. It’s not necessary to grease and paper the tins but do use a few dabs of butter so that the paper sticks to the tin and doesn’t move about.

How to line a baking tinAnd how to easily paper a square or rectangular tin? You can either cut out two long strips that are as wide as the tin so that they cover the base as well as the sides or you can do what I do which is to turn the tin over then drape and cut off enough paper to fit over it. Make a neat pleat at the corners- as if gift wrapping then turn the tin over and the paper should slip straight in. For a circular tin, cut out a strip which is a little longer than the length of the circumference. Then make a narrow fold along the length of it and snip along it at an angle. Dab a little butter along the sides of the tin and place the strip along it with the snipped section flat against the base of the pan. Place a circle of paper on the base on top of the snipped section and you are good to go.  I have lots of tips that you might find interesting on my TIps and Tricks page. If you go over and take a look, do leave your best tips in the comments box. I will include them with a credit to you.

Ginger, Berry, Nutty Crisp | Selma's TableI’m taking my Ginger Berry Nutty Crisp along to Angie of the Novice Gardener’s Fiesta Friday #32 – the weekly virtual get-together where we share fabulous stories and recipes from all over the world. Please do join in by seeing what is on offer or sharing a post. This week (as well as last week) Hilda from Along the Grapevine is helping Angie as a co-host. Hilda lives on a rather idyllic 7 acre property in Ontario, where she shares her stories and recipes of all the things she grows and forages on her land – this week it’s her incredible tomatoes – sigh! And Angie has brought a delicious Chilli con Carne – one of my favourite dishes! A huge thanks to both Angie and Hilda for hosting!!

Ginger, Berry, Nutty Crisp | Selma's TableClick on the Fiesta Friday badge below to join the party – you can submit a post (be sure to include a link to Angie and Hilda’s FF#32 posts – it’s only polite and also ensures that you can be considered for a feature next week!)  or just take a look at others are up to!

fiesta-friday-badge-button-click-to-join1

Ginger Berry Nutty Crisp

  • Servings: 16 pieces
  • Difficulty: Easy
  • Print

INGREDIENTS

For the base and topping:

  • 80 g Speculoo biscuits (a spicy biscuit)
  • 20 g walnuts
  • 190 g plain/AP flour
  • 50 g oats
  • 20 g ground almonds/almond meal/almond flour
  • 1 tsp ground ginger
  • 150 g cold, unsalted butter, cubed
  • 50 g chopped walnuts – reserve for the topping

For the filling:

  • 275 – 300 g mixed soft berries I used raspberries and blackberries
  • 1 large egg
  • 100 g light brown sugar
  • 1 Tbsp ground almonds/almond meal

For the glaze:

  • ½ c golden icing/super fine sugar
  • 2 Tbsp crème fraîche
  • 2 tsp Yuzu Citrus Seasoning

INSTRUCTIONS

  1. Pre-heat oven to 180 C/350 F
  2. Line a 9 inch square tin with greaseproof paper so that the base and sides are covered – use a few dabs of butter to get the paper to stick to the pan.
  3. While the oven is heating up, place the 20 g of walnuts on a tray and toast for 5 – 8 minutes. Cool, then place in a food processor and pulse until finely chopped. Don’t take it too far otherwise you will have a nut paste rather than a nut flour. Set aside.
  4. Place the Speculoo biscuits in a food processor and blitz to fine crumbs.
  5. Add the flour, oats, ground almonds, the ground walnuts and ginger and pulse a couple of times to combine.
  6. Add the cold butter and pulse until the mixture looks like coarse, damp sand.
  7. Set aside 1 cup of this mixture for the topping and tip the rest into the prepared tin. Pat it level – don’t press down too hard or it will be tough – then bake for 15 minutes.
  8. While the base is baking, get the filling ready; sort through the fruit and discard any mouldy ones.
  9. Using an electric mixer and a medium sized bowl, whisk the egg and sugar until coffee coloured and creamy – about 2 minutes. Then add the almond meal and salt and whisk again. Fold in the berries.
  10. After the base has been in the oven for 15 minutes, remove it and top with the filling – covering the hot base as evenly as you can with the fruit.
  11. Sprinkle over the chopped walnuts and the reserved topping.
  12. Bake for 30-35 minutes until golden brown.
  13. Cool in the tin for 10 minutes, then using the lining paper as handles, lift out and place on a wire rack to cool completely before glazing.
  14. Combine glaze ingredients together until smooth and drizzle over the top.

Stores brilliantly, covered in the fridge for 4-5 days.

© Selma Jeevanjee and Selma’s Table, 2013, 2014. Unauthorised use and/or duplication of this material, including photographs without express and written permission from this blog’s author and/or owner is strictly prohibited. Excerpts and links may be used, provided that full and clear credit is given to Selma Jeevanjee and Selma’s Table with appropriate and specific direction to the original content.

Fruited Soda Bread with Sunflower Seeds and Rosemary

fruited-soda-bread-with-rosemary

I have been intending to make a soda bread ever since baking one on Nina Oortman‘s brilliant bread making class.  (You can read the post I wrote about that class – Bread Angel –  Nina Oortman  by clicking on the link.)  I’ve mulled over different flavour combinations and wondered if my temperamental oven would render the bread inedible. I finally took the bull by the horns and made one, lightly perfumed with rosemary and scattered through with mixed peel, dried cranberries and sunflower seeds. It was very nice indeed. Lovely with a piece of cheddar as an after school snack.

fruited-soda-bread-with-rosemary

Soda breads are so quick and easy to make – they are made without yeast and don’t require any kneading either. In fact, the less the dough is handled, the better. One has to work quickly as the baking soda starts to react pretty much straight away with the buttermilk so I wasn’t able to stop and take photos of the process this time. It will work with all sorts of different combinations of ingredients, sun dried tomato and feta cheese; cheddar and spring onion; raisin and cinnamon, chopped olives and mozzarella…

Buttermilk – The name conjures up bucolic images of  metal canisters of rich creamy milk at the barn door full of fat globules of yellow butter floating in it. Buttermilk is nothing of the sort. Originally it was used to describe the whey that was left behind after butter had been churned from cream. Today it is made from pasteurised skimmed milk to which a culture of lactic acid bacteria added. The lactic acid works on fermenting the lactose, ( the main sugar in milk) decreasing the PH which causes the milk to clabber or get thicker and taste sour. 100ml contains 59 kcals, 0.1 g of fat, 7.8g sugar, 8.8g carbohydrate and 5.5g protein which is quite respectable. Buttermilk is often used with baking soda as a raising agent as the acid activates the bicarbonate to produce carbon dioxide, thus producing pockets of air in baked goods like scones, pancakes and soda bread. It is wonderful for tenderising chicken in a marinade and making salad dressings too.

fruited-soda-bread-with-rosemary

Polish Buttermilk

If you come across any shops with Polish groceries, then look for Maslanka in the dairy section, which is the Polish name for buttermilk.

fruited-soda-bread-with-rosemary

fruited-soda-bread-with-rosemary

fruited-soda-bread-with-rosemary

fruited-soda-bread-with-rosemary

Fruited Soda Bread with Sunflower Seeds and Rosemary

  • Servings: 1 loaf
  • Difficulty: easy
  • Print

Adapted from Nina Oortman’s Bread Angel Baking Class

INGREDIENTS

  • 250g strong white or plain flour (not self raising)
  • 1 tsp Bicarbonate of Soda (or baking soda)
  • 1 tsp salt
  • 50 g mixed peel
  • 50 g dried cranberries
  • 25 g pumpkin seeds
  • 1 tsp finely chopped rosemary needles
  • 300 g buttermilk (or full fat milk with lemon juice)

INSTRUCTIONS

  1. Preheat oven to 200C/400F and line a good solid baking tray with parchment.
  2. In a medium bowl, whisk together the flour, baking soda and salt until it is well mixed and aerated.
  3. Gently stir in the dried fruit, seeds and rosemary.
  4. Make a well in the middle of flour mixture and pour in the buttermilk.
  5. Using a dinner knife, cut in as quickly and gently as you can until all the buttermilk has been absorbed and you have a scraggy dough. Do not over mix or your loaf will be tough.
  6. Scrape the dough onto the prepared tray and shape into an oval or a round. Using a serrated knife, slash a deep cross through it. This helps with heat distribution but tradition has it that it was to let the devil out! Sprinkle a little flour over the top.
  7. Bake for 30 – 40 minutes depending on how hot your oven is. The loaf should sound hollow when you tap the base.
  8. Delicious warm and best enjoyed on the day it is made.
© Selma Jeevanjee and Selma’s Table, 2013, 2014. Unauthorised use and/or duplication of this material, including photographs without express and written permission from this blog’s author and/or owner is strictly prohibited. Excerpts and links may be used, provided that full and clear credit is given to Selma Jeevanjee and Selma’s Table with appropriate and specific direction to the original content.

If you are in or around Malvern and want to learn how to make this and yeasted breads, Nina has added another bread making class to the roster  – click on the link for more information or if you would like to book yourself in – http://www.ninasbakery.co.uk/classes.html

fruited-soda-bread-with-rosemary

Roast Fennel and Cannellini Bean Puree

Roasted Fennel and Cannellini Bean PureeI have been wanting to make this Roast Fennel and Cannellini Bean Puree for some time now and last night, which was as cold and gusty as an angry witch’s furious gasps, seemed the perfect time to make it. Moreso as a friend was coming round for a catch-up and a glass of wine…

Marcella Hazan introduced me to the many delights of white beans when I first started cooking in the mid eighties. She has a recipe for “Zuppa di cannellini con aglio e prezzemolo” (Bean soup with parsley and garlic)  in her Classic Italian Cookbook that is simply superb. Sadly this brilliant book is out of print now but can still be bought second hand though I am shocked that anyone would ever part with it!

There are many recipes for white bean purees and this particular recipe has been inspired by a post in Food52 that I saw recently. The dish will not win any beauty contests but it tastes absolutely amazing and is perfect with a roast or a simply cooked piece of fish which is what we had it with last night.

The depth and complexity of flavours depends on cooking the ingredients fully and carefully before pureeing so don’t skimp on turning the fennel pieces over 3 or 4 times and watch the frying garlic as it goes from perfectly golden to burnt in a few seconds especially as it continues to cook in the hot oil when you take it off the heat. I have to say that the roasted fennel is absolutely delicious on it own too so feel free to make more that is needed for the puree if you want to have it as a vegetable side.

Roasted Fennel and Cannellini Bean Puree

Fennel, quartered and seasoned in roasting dish with the unpeeled garlic cloves

Caramelised fennel and garlic

Caramelised fennel and garlic

Gently frying the chopped garlic and rosemary

Gently fry the chopped garlic and rosemary in olive oil

Adding the beans to the garlic and rosemary and heating through

Add the beans to the garlic and rosemary and heat through

Mixing in the roasted fennel and garlic cloves before blitzing with a stick blender

Mix in the roasted fennel and garlic cloves before blitzing with a stick blender

Scrape out mixture into a baking dish and sprinkle with chilli flakes and fennel seeds before sprinkling on the remaining parmesan cheese.

Scrape out mixture into a baking dish and sprinkle with chilli flakes and fennel seeds before sprinkling on the remaining parmesan cheese.

Delicious and ready to eat if not winning any beauty contests!

Delicious and ready to eat if not winning any beauty contests!

Roast Fennel and Cannellini Bean Puree

  • Servings: 4 side servings
  • Difficulty: easy
  • Print

Inspired by a post on Food52 for Roast Fennel and White Bean Dip 

INGREDIENTS

Roast Fennel:

  • 2 small fennel bulbs, trimmed and cut into quarters. They will fall apart but that is okay.
  • 1-2  Tbsp olive oil
  • 4 large unpeeled garlic cloves
  • Pinch of salt
  • Pepper

Cannellini Beans:

  • 3 Tbsp olive oil
  • 2 finely chopped cloves of garlic
  • 1 tsp finely chopped fresh rosemary
  • 1 tin of cannellini or white beans, drained and rinsed
  • 1 Tbsp lemon juice
  • 1/2 cup finely grated parmesan cheese
  • 1/2 tsp fennel seeds
  • pinch of chilli flakes
  • branch of vine cherry tomatoes as long as they are tasty!

INSTRUCTIONS

  1. Pre-heat the oven to 200C/400F
  2. Closely trim the bottom of the fennel and trim the ends off the tops as well. Halve and then quarter the pieces, bearing in mind that they will fall apart. Place in a roasting tin with the unpeeled cloves of garlic and dribble over the oil. Using your hands, gently toss the fennel in the oil so that it is all coated. Season with salt and pepper and roast in the oven, for 30-40 minutes, checking every ten minutes to turn the pieces over. I find a that a timer helps here. Stop when the pieces are soft and  golden. Cooking it this way drives out a lot of the moisture, concentrating that aniseed flavour and you will find that they shrink down quite a lot.
  3. In the meantime start the cannellini beans; pour the oil into a saucepan and heat gently. Add the chopped garlic and cook until nicely coloured. Watch it like a hawk as you get near the end as it will catch really easily, burning and turning bitter. Add the rosemary and then stir in the cannellini beans and the lemon juice and let it heat through. Take off the heat and set aside until the fennel is ready.
  4. Once the fennel is cooked turn the oven up to 220c/425F and stir fennel and peeled garlic cloves into the bean mixture along with the lemon juice and most of the parmesan cheese – reserve 2 or 3 Tbsp of cheese for the topping.  I used a stick  blender to puree the mixture but you could also use a food processor. Taste the puree and adjust the seasoning  to your taste. If it is too thick, add a little water to loosen it up remembering that the texture should be like mashed potatoes.
  5. Scrape it into an ovenproof dish and sprinkle over the chilli flakes, fennel seeds and remaining parmesan cheese. Place the vine tomatoes on top if using. Dribble a little oil around the edges too. Cook for 15 minutes and serve immediatley.

Enriched Milk and Butter Loaf topped with Floppy Onions and Cheese

Enriched Bread topped with Floppy Onions and Cheese

Enriched Bread topped with Floppy Onions and Cheese

I am in Cape Town, staying with my friends A and R who really make the most of this beautiful city they call home. They live in a gorgeous Victorian villa in Sea Point, perched high on the slopes of Signal Hill with a panoramic view of the suburb below and the Atlantic Ocean.

View from the deck

View from the deck

As you may imagine, the sunsets have been simply stunning.

Sunset over Sea Point

Sunset over Sea Point

Sunset from the deck

Sunset from the deck

The people I have met on this visit have been so friendly and so sociable and seem to pack so much into their days. The magnificent landscape probably has a lot to do with this as well as not having to waste hours commuting on a packed train to and from work.  The days and evenings have been spent  meeting up with or hosting friends in that warm, hospitable Capetonian manner, enjoying the gorgeous wines and eating beautiful food. There is an incredible food scene here about which I will post more another time.

Sundowner on the deck

Sundowners on the deck

We spent last weekend at their stunning holiday home in Greyton where R cooked up a storm.

The garden at Greyton and Lily the springer spaniel

The garden at Greyton and Lily the springer spaniel

Saturday was spent walking their adorable dogs, wandering around the Saturday market in Greyton, lunching at Searle’s and then back to the house for a marathon cooking session.

Searle's

Searle’s

Searle's

Searle’s

A stunning cake was baked and iced.

THAT cake!

THAT cake!

Bread was baked (recipe below), fillet was stuffed and trussed and salads were made. For dinner that night, a group of us feasted on the braaied (barbecued) fillet and boerewors, potato wedges, salad with flowers from the garden, palm hearts dressed with white balsamic and parmesan cheese, tomato and mint couscous, the bread and finished off with a slice of that cake.

Feasting at Greyton

Feasting at Greyton

This bread needs a little elbow grease but is completely worth it.

Dough before second proofing

Dough before second proving

Dough after second proving

Dough after second proving

Bread before topping

Bread before topping

Topping with floppy onions

Topping with floppy onions

Topping with cheese

Topping with cheese

Ta da!

Ta da!

Enriched Milk and Butter Loaf topped with Floppy Onions and Cheese

  • Servings: 12
  • Difficulty: intermediate
  • Print

INGREDIENTS

  • 500g bread flour
  • 10g instant yeast (10ml)
  • 10g salt
  • 350ml tepid milk
  • 50g softened butter

Topping:

  • 1/2 a large white onion sliced in half moons and one clove of chopped garlic, fried in a little olive oil until translucent but not caramelised
  • 100 g grated cheddar cheese

INSTRUCTIONS

  1. Place the flour yeast and salt in a bowl and slowly pour in the tepid milk, 100 ml at a time. The milk must not be too hot as it can kill off the yeast. (24-28 degrees)
  2. Stir with your fingers until it comes together. You may not need all the milk so don’t pour it all in.
  3. Turn out onto a lightly  floured surface and start to knead, incorporating the butter, one spoonful at a time. Or, if your butter isn’t quite soft enough, cube it and add it in a few cubes at a time. Knead until the dough is elastic, smooth and glossy – this may take up to 20 minutes. It is quite a wet dough so it does take some time to come together. The dough should be fairly firm and not sticky to touch.
  4. Oil a bowl and place dough in it turning it around in the oil and cover with tea towel or cling film ad leave it to rise until doubled. Knock back (deflate) and then weigh dough. Slice off approximately 100g lumps of dough and roll and shape each one by placing on your worktop (you should not need any flour) Cup your hand over it and start work in a circular motion, tucking with with your thumb and fingers – the finished ball will have a smooth top with the crease underneath.
  5. Place in a round tin – we used a non-stick one, cover and leave to rise again for about an hour. It should double in size, filling in any gaps.
  6. Bake in a oven preheated to 230 C /450 F for 1/2 an hour. Scatter over the floppy onions and then the grated cheese and place back in the oven for another 15 minutes or so. Cool on a rack for about 5 mins and then turn it out of the tin.
  7. The bread is ready when it is golden brown and sounds hollow when you rap the base with your knuckles.

Enriched Bread topped with Floppy Onions and Cheese

Enriched Bread topped with Floppy Onions and Cheese

Sweet Red Peppers with Feta and Pesto

Sweet Red Peppers with Feta and Pesto This recipe for Sweet Red Peppers with Feta and Pesto, comes by way of my dear friend C who has a largely vegetarian diet and like everything that she makes, is really full of flavour and utterly delicious. The peppers get slightly charred in the oven, the tomatoes become juicy and intensify their flavour through roasting face down in the pesto and the feta adds a salty, lemony and creamy note. Whenever I need to cut back on the calories, I make these peppers (with a little less cheese) to layer in my lunchbox with lots of salad leaves and also some green lentils which I cook in stock with some chilli flakes and thyme. The juices from the lentils and the peppers means that a dressing is not needed. It is so full of flavour and releases energy slowly so that I don’t feel hungry or unsatisfied.  The peppers are also gorgeous warm with some roast salmon or chicken or as a side to a stew. These are really quick and effortless to make also scaling up easily to make more servings… Sweet Red Peppers with Feta and Pesto Prepare the peppersSweet Red Peppers with Feta and PestoSmear with pestoSweet Red Peppers with Feta and PestoFill with halved cherry tomatoes Sweet Red Peppers with Feta and Pesto Top with feta cheese, trickle over some EVOO and place in the oven.Sweet Red Peppers with Feta and Pesto

Sweet Red Peppers with Feta and Pesto

  • Servings: 4
  • Difficulty: easy
  • Print

INGREDIENTS

  • 2 long sweet red peppers (they are sometimes called ‘pointed’)
  • 4 generous tsp pesto
  • 8-10 cherry or mini plum tomatoes
  • 100 g feta cheese
  • Extra virgin olive oil

INSTRUCTIONS

  1. Pre-heat oven to 180 C/350 F.
  2. Before slicing the peppers in half, take a look at them to determine the most sensible side to do this from – they need to sit flat on the tray. Pointed peppers tend to be sort of flat and wide – they have a narrower side which is where they are best sliced from. I find that if I lay one down so that it lies flat and then give it a quarter turn, that is the best place to slice them in half – it gives me two fairly stable and wide halves. After you have sliced them in half, remove the seeds and the white membrane but try and leave the stems on as they look rather pretty. If there are any rogue seeds, hold the pepper half over the sink, cut side facing down and give it a little tap or two with the flat of the knife and the seeds should fly out. Nestle the prepared peppers in a baking dish which will hold them snugly. The tin that I use is 7″ x 10″ (which is 26cm x 17cm) and comfortably holds 4 halves.
  3. Smear 1 generous teaspoon of pesto into each half. Slice the tomatoes in half and nestle, cut side down into the pesto – put in as many as you can squeeze in. When I can find them I also use a few yellow cherry tomatoes.
  4. Slice the feta into cubes and divide this evenly over the tomatoes.
  5. Trickle over a little EVOO and pop in the oven for 20-25 minutes.
  6. Serve warm as a side with a roast or stew or cold in a lunch box with a salad. This is delicious with a lentil salad and also on toasted slices of baguette…

SUBSTITUTIONS
I have made these with green pointed peppers which went down well despite my not liking the flavour of green peppers in general. They can be topped with grated parmesan cheese instead of the feta. Adding a few slices of anchovy filets, red onion and black olives would be rather lovely.

© Selma Jeevanjee and Selma’s Table, 2013, 2014. Unauthorised use and/or duplication of this material, including photographs without express and written permission from this blog’s author and/or owner is strictly prohibited. Excerpts and links may be used, provided that full and clear credit is given to Selma Jeevanjee and Selma’s Table with appropriate and specific direction to

Gorgeous Tiny Cheese Muffins

Tiny Cheese Muffins

Tiny Cheese Muffins

During my early school years, my father would collect me at lunch time, to go home to eat a delicious meal around the dining table, all of us together, before he dropped me back and carried on his way to work. This was in the days before Nairobi became so congested with traffic and people so as to make it impossible to go anywhere quickly. When I started secondary school, for reasons that are not clear to me now, I was signed up for school lunches.  After a week of leathery grey slices of meat in thick brown gluey gravy, grey mushy vegetables and claggy puddings with skins on them, I told my mother that I thought pork was being served and that of course I wasn’t touching it so I wasn’t eating a thing and therefore starving in the afternoons. The double whammy of forbidden meat and a hungry tummy had exactly the effect I had hoped for. No more inedible food in the smelly dark dining hall but glorious packed lunches eaten under the trees in front of the school tennis courts with my friends. Our cook, Migaleh, had come to work for us via some ambassador’s house and would cook the most scrumptious “european” food – roasts, chops, steaks, chips, sausages, mashed potatoes, omelettes – for me and my brother at tea time. Now he was making me a thermos of hot chunky chicken soup or thick roast beef or chicken salad sandwiches to take to school…oh how I pitied those boarders trapped in the dining hall with the nuns as we sat in the sunshine shaded by the Jacaranda trees!

I was reminded of this today as I shopped for after school snacks. School has begun; the children are off the streets and out of the shops and can now be seen looking tired and despondent in their school uniforms on their way home for tea. It is difficult to get back into a routine in those first couple of weeks but all too soon the summer holidays will be but a distant memory as the unrelenting schedule of early mornings, lunch boxes, sports practices, clubs and societies, music practice, homework and a regular bedtime establishes itself. Until half term that is.

IMG_4019My friend C alerted me to this recipe for cheese muffins from a wonderful New Zealand book of traditional home baking compiled from old community cookbooks by Alexa Johnston, called  Ladies, A Plate. I found great pleasure in reading the stories that hark back to “a gentler time” which are attached to many of the receipts. C sometimes makes these for her packed lunches and once I had a taste, I was smitten! I make these quite often as they come together very quickly and it’s just so handy to have a few stashed in the freezer.

Dry ingredients

Dry ingredients

They are incredibly quick to make. Measure out the dry ingredients into one bowl and use a whisk to aerate and mix at the same time. I’ve substituted bouillon powder for the salt for a more savoury flavour.

Mix in the parsley and the cheese

Mix in the parsley and the cheese

Then, add the parsley and about 2/3rd of the grated cheddar cheese and mix again to coat the cheese.

Whisk the dry ingredients in the measuring jug

Whisk the dry ingredients in the measuring jug

Pour the wet ingredients into a measuring jug and whisk.

Lightly mix the batter

Lightly mix the batter

Gently add to the dry ingredients and mix very lightly until it has just about incorporated – don’t overwork the batter otherwise the muffins will be tough. It’s perfectly alright if there are some tiny pockets of flour visible.

Coarse grated parmesan

Coarse grated parmesan

Grate some parmesan  using the coarse side of a box grater to get lovely long pieces of cheese rather than the finer more powdery output that is usual.

Filled muffin cups topped with cheeses

Filled muffin cups topped with cheeses

Divide as equally as possible among the cups of a 24 mini muffin pan (which have been very well  greased, hopefully with a saved butter wrapper). Use a dessert spoon and a rubber spatula to fill the cups and then top with the two cheeses.

Lovely and golden!

Lovely and golden!

IMG_40Tiny cheese muffins18

Cooling on a rack

I am submitting this recipe for September’s Cheese, Please! Recipe challenge as hosted by the informative and delicious blog Fromage Homage. Do go over and take a look at what she’s been up to – cooking with cheese, tasting it and travelling for it and making her own cheese. And she’s a mother – I am in awe!

Fromage Homage

Gorgeous Tiny Cheese Muffins

  • Servings: makes 24 mini muffins
  • Difficulty: easy
  • Print

Barely adapted from Alexa Johnston, Ladies a Plate

INGREDIENTS

  • 180G flour
  • 3 1/2 tsp baking powder
  • 1/2 tsp Marigold bouillon powder or Knorr Aromat  powder or salt
  • 1/2 tsp cayenne powder (chilli powder)
  • 80g strong cheddar cheese coarsely grated
  • 2 Tbsp chopped parsley
  • 1 large egg
  • 190ml milk
  • 2 or 3 Tbsp coarse grated parmesan cheese

INSTRUCTIONS

  1. Preheat oven to 190C/375F and thoroughly grease a 24 cup mini muffin tin.
  2. Measure out the flour into a medium size mixing bowl; whisk in the baking power, bouillon powder or salt and the cayenne. The salt either in the bouillon or itself is important as it activates the baking powder when the wet ingredients are added.
  3. Stir in the chopped parsley and 2/3rds of the cheddar cheese with a table knife, coating all the cheese and parsley with the flour mixture.
  4. Pour the milk into a measuring jug, crack the egg into it and whisk together.
  5. Pour the wet ingredients onto the dry and mix gently with the table knife until it is just combined. Don’t overwork the batter.
  6. Spoon into 24 mini muffin cups as evenly as possible. Top with the reserved cheddar and then with the parmesan.
  7. Bake for 10-15 minutes until golden brown and crispy.
  8. Remove to a wire rack to cool. They should pop out really easily.
  9. These are best, greedily devoured, warm of course but are delicious cold. They freeze well and are ideal to pop into a lunchbox where they will have thawed out by the time you are ready to eat. Lovely with soup or as a rustic nibble with drinks!

SUBSTITUTIONS

-Replace the parsley with finely chopped spring onions (scallions)

-Replace parsley with a couple of tablespoons of finely chopped sundried tomatoes and/or olives and one tsp of very finely chopped rosemary or dried oregano. Replace the cheddar with crumbled feta or goat’s cheese.

-Use smoked paprika instead of the cayenne

Quick summer pickle – Sweet and Sour Courgettes

Sweet & Sour Courgettes

Sweet & Sour Courgettes

As the halcyon days of summer slowly but inevitably draw to a close, it is with mixed emotion that I look towards the autumn days which are fast approaching. J will be back at school and studying hard, I hope, for his GCSEs (formerly known as “O” levels) while I try my best not to worry that he is not doing enough. On the other hand there are birthday celebrations to plan, trips to look forward to and game and autumn harvests to anticipate. It has been a wonderful summer of glorious weather, new beginnings, re-connecting with family and old friends and making some lovely new ones along the way. I never look forward to the cold weather but will try to appreciate more the events that it heralds.

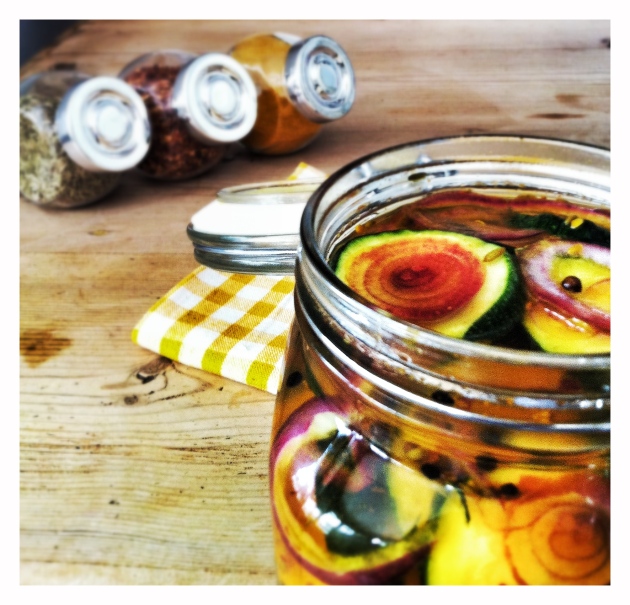
Now is the time to preserve what you can of summer’s bounty. We are very lucky to have wonderful neighbours who have planted a vegetable patch from which they have been kind enough share their courgettes. Which I love! I came across a recipe for a quick summer pickle in an in-store magazine and straight away had to make it, tinkering with the flavourings of course.

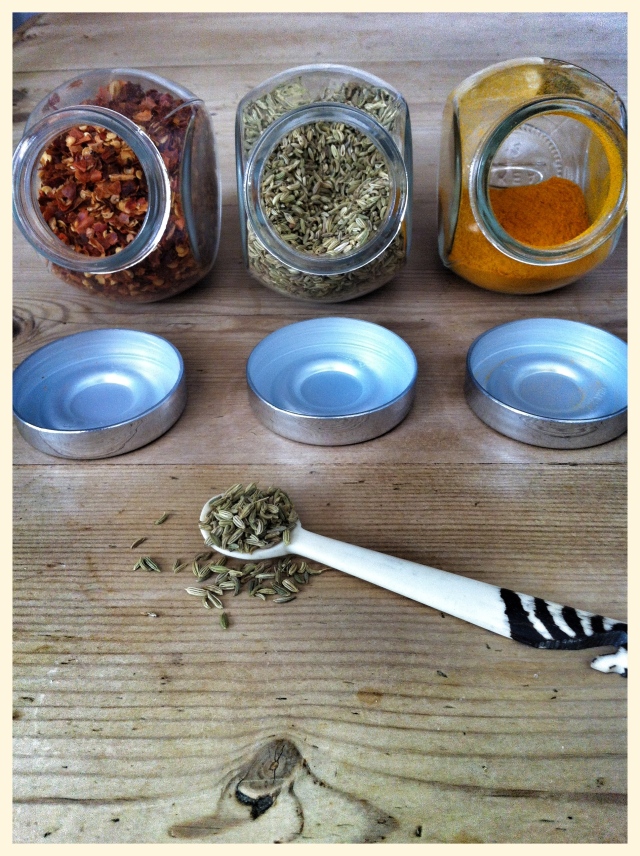
Chilli flakes, fennel seeds and turmeric. (Missing from the photo are the coriander seeds)

Chilli flakes, fennel seeds and turmeric. (Missing from the photo are the coriander seeds) The gorgeous little spice bottles are from Ikea.

The turmeric gives the courgettes a glowing golden hue and the fennel and the coriander seeds contribute a warm herbal note.

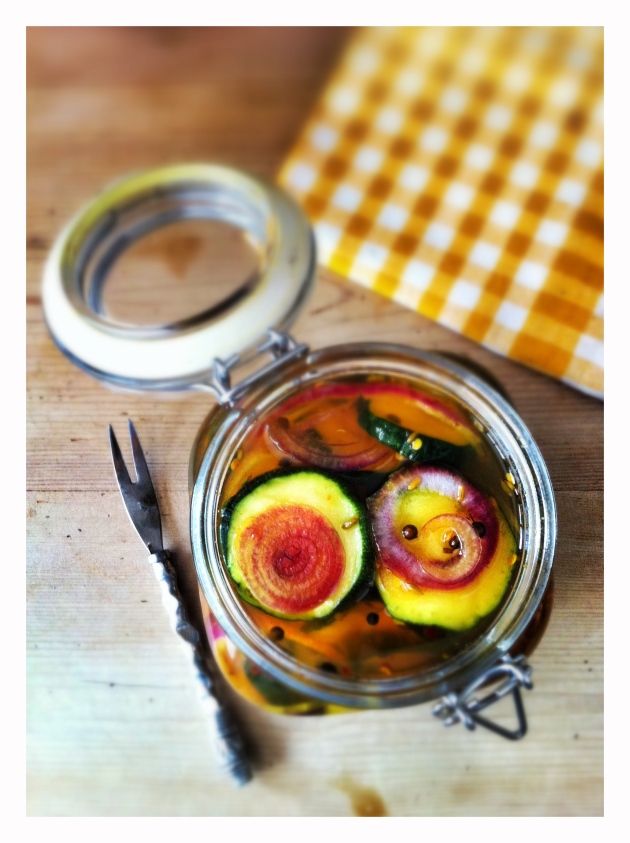
Sweet and Sour Courgettes

Sweet and Sour Courgettes

The sweet and sour pickle juice is delicious too – use in salad dressings and marinades; douse hot potatoes with it and then add a little mayo and chopped up pickles for a delicious salad. And the sweet and sour pickle juice fantastic in a Bloody Mary! There is a wonderful article on Food52 about the uses of pickle juice. Pickleback shot anyone?

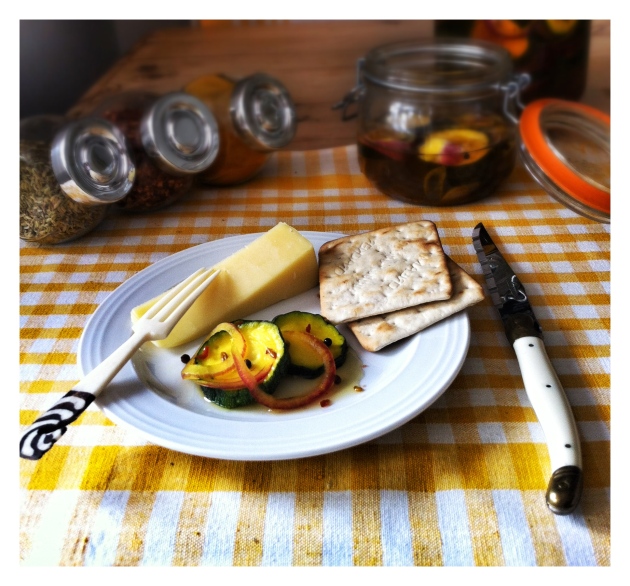
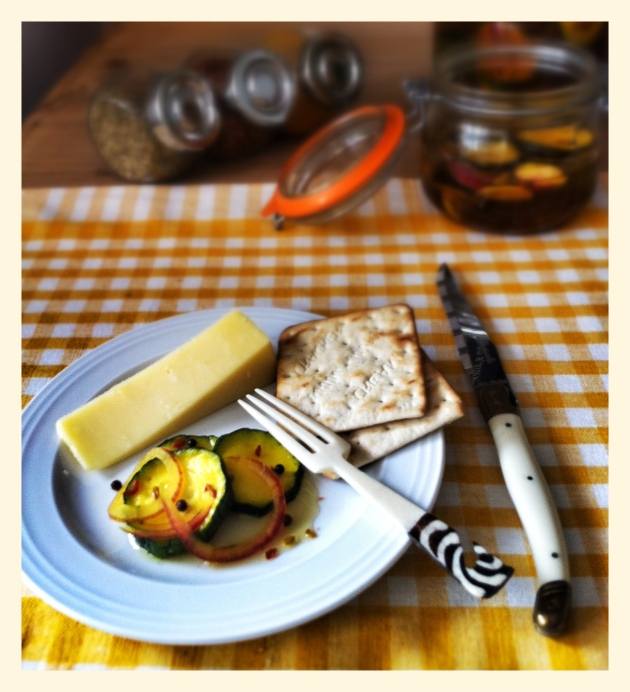
Cheese, Crackers and Sweet & Sour Courgettes

Cheese, Crackers and Sweet & Sour Courgettes

The courgettes retain their crunch whilst the onions mellow in the brine

I am entering this recipe in the Shop Local Challenge hosted by Elizabeth’s Kitchen Diary. Do go over and take a look at her blog – there are some wonderful recipes there.

Shop Local

Shop Local hosted by Elizabeth’s Kitchen Diary

Sweet and Sour Courgettes

  • Servings: Makes 1 x 500ml or 2 x 250ml jars
  • Difficulty: easy
  • Print

INGREDIENTS

  • 500g courgettes (or thereabouts)
  • 1 red onion
  • 2Tbsp flaky sea salt like Maldon (substitute  about 1Tbsp regular table salt if you don’t have the flaky sea salt). Kosher or pickling salt is the best but I don’t think it is easily found here in the UK – or maybe I just haven’t noticed it!

Sweet Brine:

  • 400ml white wine or cider vinegar
  • 200g sugar (use white sugar as golden muddies the colour of the brine syrup)
  • 1/4 tsp turmeric
  • 1/2 tsp red chilli flakes (you can increase this to 1 tsp if you like a little more heat)
  • 1tsp fennel seeds
  • 1tsp *dry roasted coriander seeds

INSTRUCTIONS

  1. Trim the ends then slice the courgettes into 1/2cm coins.
  2. Peel and slice the red onion into thin rings
  3. Layer in a bowl and sprinkling with salt as you go
  4. Cover and place in the fridge for about an hour or cover with ice for the same time. Keeping them cold helps to keep the courgettes firm.
  5. In the meantime, place all the sweet brine ingredients into a (non-reactive) saucepan and bring to a boil. Turn heat down and simmer for about 5 minutes. Remove pan from heat and let the brine cool to room temperature. You might want to open all your windows and turn on all extractor fans when you make the brine – the smell of boiling vinegar is quite pungent to say the least.
  6. Layer the courgettes and onions (do not rinse off the salt) into a sterilised jar, pour over the sweet brine, cover and refrigerate. Ready after a 24 hour steep and still tastes delicious 6 weeks later.

*To dry roast seeds like cumin and coriander, pop them into a non-stick pan on medium high heat for about 5-8 minutes, stirring or shaking the pan from time to time to ensure that all sides are being roasted. You can smell them as they begin to toast – but do keep as eye on them as they can burn easily. I usually do a small jar full at a time as they keep for a long time. Dry roasting really intensifies the flavour and adds more depth to the finished dish.

USES

  • Cheese plate
  • Roast beef or tuna or cheese sandwiches
  • Chopped up in a potato salad also using the brine to douse the hot potatoes before adding  mayonnaise
  • In an egg salad
  • With cold cuts
  • In burgers
  • Serve as a condiment at a barbecue
© Selma Jeevanjee and Selma’s Table, 2013, 2014. Unauthorised use and/or duplication of this material, including photographs without express and written permission from this blog’s author and/or owner is strictly prohibited. Excerpts and links may be used, provided that full and clear credit is given to Selma Jeevanjee and Selma’s Table with appropriate and specific direction to the original content.

Cheese plate

Cheese plate


Goats’ Cheese, Onion and Potato Bread with Thyme

SO_0212_Leiths_Bread

Photo by Stuart Ovenden

I had a big birthday recently. Ok, so it was two years ago recently. Knowing full well my passion for food, my dissatisfaction with my job and my hive inducing reaction to big changes in my life, my dear friends N and J sent me on a food styling course at Leith’s Food and Wine in west London in the hopes that I might find a truer calling and stop the whining I was subjecting them to.

It was an amazing experience run by the lovely Sarah Cook, Deputy Food Editor of BBC Good Food magazine. One of our first tasks was to try and recreate the “money shot” on a ready meal using a pack of M&S lasagne. Well that was an eye opener. In the UK, one cannot use more food in the photo than is in the ready meal itself. So in order to make the lasagne look fuller as in the pack photo, the pasta was separated from the ragout and the sauce as best as we could manage. Then paper towels were scrunched up and strategically centred on the pasta whilst filling in the edges with what now looked to be a terribly generous portion of ragout. Apparently, we could have used cardboard to level the floppy pasta sheets. We also got to make and style a Greek salad and a fruit trifle, using our own props, both of which were challenging! The course culminated with a professional photo shoot using food we had made. Sarah brought in some amazing props which she has been collecting, magpie like over the course of her career and we got to work with the uber talented Stuart Ovenden Food/Lifestyle Photographer & Deputy Art Editor, Good Food Magazine at BBC Worldwide.

I realised fairly early on in the course that placing bits of parsley with a set of tweezers was not for me – I like a more natural finish which is not to say that I don’t appreciate a beautifully styled shot – I just don’t have the patience for it and can drive myself to distraction agonising over which berry should be at the front of the shot. So when it came time to decide what to make for the shoot I remembered a Delia Smith bread recipe that I had earmarked from a long time ago and thought I would give it a try. I mean, why make something I had tried before right? Luckily I had had some sort of foresight to buy extra chèvre because of course the first loaf, delicious as it was, looked a complete and hideous mess. The second one turned out beautifully but as I was now running late, I had to pack it (and its ugly older sister), still warm, loosely wrapped in its parchment paper into a basket along with some props which I thought we could use and schlep across London on Sunday public transport to the school. The Tube has never smelt so delicious as I sat there pretending that it had nothing to do with me!

The ugly sister

The ugly sister

Second loaf prior to baking

Second loaf prior to baking

My photo of the second loaf

My photo of the second loaf

I fretted all the way there worrying that I had done something too basic – it wasn’t even a yeasted bread…and when I got to the shoot, my worst fears were confirmed. One person had prepared a trio of beautiful tarts complete with chocolate decorations. Another had made a meze of three or four Lebanese dishes – from scratch. Someone else  had caramelised a pear and made a ginger pudding with chocolate sauce…a fourth was doing some fantastic wizardry with a sugar candy machine to make candy floss “ice cream” cones.

I sheepishly laid out my props on one of the tables and pulled out the loaf , smoothing out the parchment paper to let it finish off cooling.  Sarah came over and said how wonderful it smelled and looked, Stuart came over, smiled and asked if he could have a piece of the ugly sister to eat and went back to shooting and before I knew it, most of the ugly sister had been eaten by people coming over to take a look. Still feeling a little sheepish when it was my turn I hesitantly took it over to the table where Stuart was working. He practically snatched it out of my hands and told me that he wanted to shoot it as it was, on the parchment it had been baked in and transported on and that props really would not be necessary as it was such a beautiful thing on its own.  I was speechless. Can I tell you that I’m ridiculously proud that he included it on his gorgeous blog appledrane, here some time later?

Below are some of the images that were shot on the day. Aren’t they gorgeous?

Leiths2

Leiths1

Looks aside, this is a really delicious bread, which smells wonderful. It is quick as no yeast is involved and goes well with a soup or with cold cuts. Yet another good candidate for a picnic.

GOAT'S CHEESE, ONION AND POTATO BREAD WITH THYME

  • Servings: 4-6
  • Difficulty: easy
  • Print

Adapted from Delia Smith
Makes one delicious loaf which will serve 4-6 people

INGREDIENTS

  • 180g log of firm goats cheese (chèvre)
  • 4 spring onions finely sliced
  • 1 spring onion coarsely sliced for the top
  • 175g (approx) red potato which is about a medium one
  • 1 generous Tbsp of chopped thyme leaves as well as a couple of sprigs for the top
  • 175g self raising flour plus a little more to sprinkle on the top
  • 1 tsp salt
  • 1/2 tsp cayenne pepper
  • 1 large egg
  • 2 Tbsp (30ml) milk
  • 1 heaped tsp of grain mustard

INSTRUCTIONS

  1. Preheat oven to 190 degrees Celsius.
  2. Lay a piece of parchment paper on a sturdy baking tray and butter a 6 inch loaf shaped area onto it.
  3. With a sharp knife, remove the rind as best as you can from the chèvre. Don’t worry if there are a few bits left on here and there. Then slice it into half inch cubes. Set aside about a 1/3 for the top.
  4. Sift the flour, salt and cayenne pepper into a bowl. I have found that I can get the same effect by putting all the ingredients into a bowl and using a balloon whisk to mix and aerate it.
  5. Peel the potato and coarsely grate it into the flour mixture. Tip in the finely sliced spring onions and 2/3’s of the cheese and mix it all together with a palette knife.
  6. Gently whisk the egg with the milk and mustard, then pour the mixture onto the dry ingredients. Using the palette knife, Bring it all together to a form a loose, rough dough.
  7. Tumble it onto the buttered parchment paper on the baking sheet and gently form it into a 6 inch (15 cm) rough loaf. Lightly press the rest of the cheese over the surface as well as the coarser chopped spring onion. Dust with a little flour and scatter over the small sprigs of thyme.
  8. Bake the bread on the middle shelf of the oven for 45-50 minutes or until golden brown. Remove it to a cooling rack and serve it still slightly warm if possible.

Makes one delicious loaf which will serve 4-6 people

© Selma Jeevanjee and Selma’s Table, 2013. Unauthorised use and/or duplication of this material, including photographs without express and written permission from this blog’s author and/or owner is strictly prohibited. Excerpts and links may be used, provided that full and clear credit is given to Selma Jeevanjee and Selma’s Table with appropriate and specific direction to the original content.