Basic Buttermilk Muffins with Variations

basic-buttermilk-muffins-with-additionsI am always surprised at how many people buy those cakey muffins at coffee shops to take back to their desks, either in the morning or at break times. Or the people who buy them in packs from the supermarkets – you know the ones full of preservatives and correspondingly long sell by dates. Muffins are so easy to make with the added bonus of being fresh and with ingredients that you are able to control and can pronounce the names of. In less than 45 minutes you can be sitting down to a warm freshly baked muffin and a cuppa, smug in the knowledge that you have 11 more to pack into lunch boxes or dish up as an after school snack with a glass of milk for the kids. They can be as healthy or as sinful as you like. It’s entirely up to you and what you have in your larder/pantry. I haven’t tried to freeze them, mainly because they don’t last that long – I used to always pack extra for Jake to share with his lunchtime gang. If you try freezing them, let me know in the comments and I will edit this post to include your thoughts, with a credit to you of course!

basic-buttermilk-muffins-with-additions
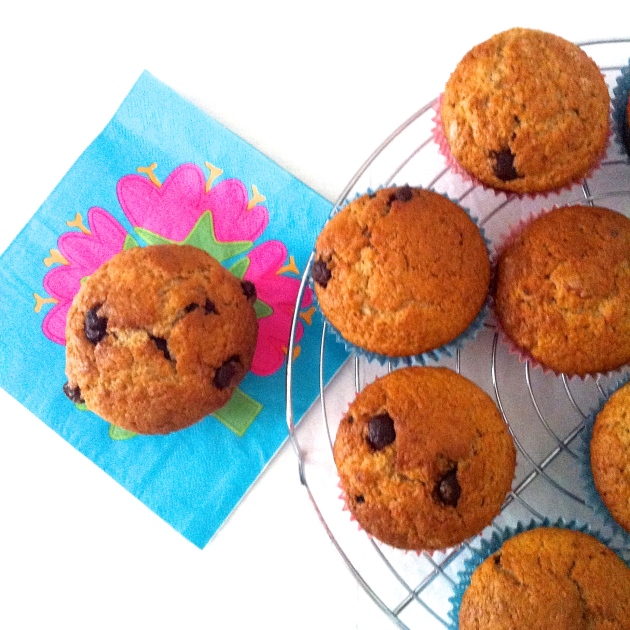
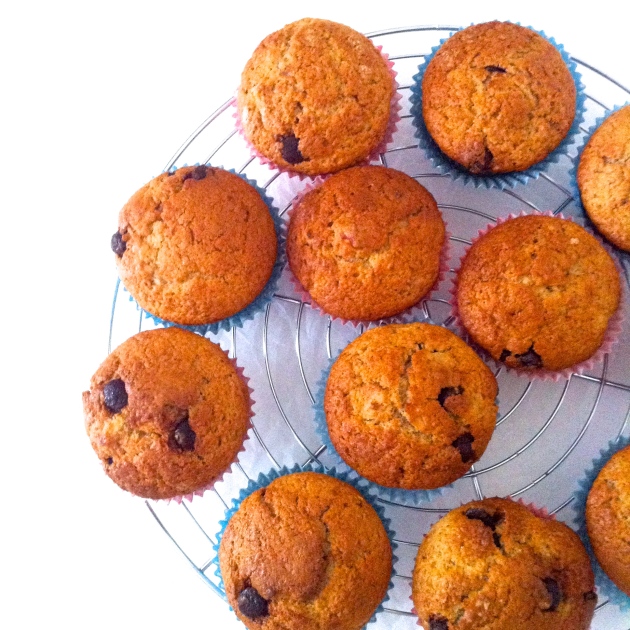
I haven’t made muffins recently but I had three very ripe bananas that needed using up and found myself pulling out the muffin pan…these ones are banana, cinnamon and chocolate chip.

This recipe is one that I have been using for many years – I have tweaked it and tweaked it over time to suit all the ingredient changes that I have made. Adding buttermilk or the more easily available yoghurt keeps the crumb really moist.

All you need by way of kitchen equipment is;

  • a regular 12 hole muffin tray and cupcake liners
  • two mixing bowls plus a smaller heatproof one to melt the butter in
  • electronic scales – if you don’t have one, please, please add it to your wish list as it is the most accurate way to measure out ingredients, especially for baking. If you set your mixing bowl on the scales and set it to zero then you can just keep adding your dry ingredients to it (re-setting to zero each time) which keeps the washing up to a minimum too.
  • a small hand whisk
  • a measuring teaspoon
  • a rubber spatula
  • a large spoon to scoop out the dry ingredients with and then to fill the muffin cups with.

The basic premise is to put all the dry ingredients into the larger mixing bowl and whisk well to aerate and combine. I add any dried fruit or chocolate chips at this stage too as the flour coating helps them not to sink to the bottom. Use a smaller mixing bowl for the wet ingredients. I mash my very ripe bananas straight into this bowl after whisking the egg. The buttermilk comes in a 300ml carton, and if you decide to use a yoghurt pot then just use that to fill the milk up in it – no need for a measuring jug! Pour the wet ingredients onto the dry ingredients. Stir lightly – streaks (but not large pockets) of flour are desirable. Scoop into muffin cups. Top with seeds or nuts if using. Bake. Cool and enjoy!

basic-buttermilk-muffins-with-additions

I am taking these over to the friendliest party around – Angie’s Fiesta Friday #26. Today we have two talented co-hosts who are not only fabulous and creative cooks but who can also spin a yarn or two. Prudy @ Butter Basil and Breadcrumbs and Jess @ Cooking Is My Sport.  Let’s party!!

Basic Buttermilk Muffins with Variations

  • Servings: 12 Muffins
  • Difficulty: easy
  • Print

INGREDIENTS

  • 250 g plain/AP flour
  • 150 g golden caster/superfine sugar – you can just use the normal white version too
  • 2 tsp baking powder
  • ½ tsp baking soda
  • 1/4 tsp table salt
  • 1 large free range egg
  • 300 ml buttermilk (or 125 ml yoghurt/creme fraiche/ sour cream plus 125ml milk)
  • 80 g melted unsalted butter

Delicious variations- not ALL at the same time!!

General additions and subs:

  • sunflower seeds, walnuts, pecans- as a topping
  • 125 g blueberries/raisins/ chopped dried apricots/chopped dates etc
  • 25 g coconut flakes – reduce flour by 25 g
  • 100 g spelt or buckwheat flour – reduce flour by 100 g
  • 50 g jumbo oats – reduce flour by 50 g

Banana and Chocolate Chip Muffins

  • 1 tsp cinnamon
  • 3 very ripe bananas
  • 80 g chocolate chips

Blueberry, Lemon and Poppy Seed Muffins (Lovely with a little lemon and icing sugar glaze)

  • zest of 1 lemon
  • 1 Tbsp poppy seeds
  • 125 g blueberries

Carrot Cake Muffins (Delicious with a little honeyed cream cheese topping)

  • 125 g grated carrot
  • 80 g soaked and drained sultanas or raisins
  • ½ tsp cinnamon
  • ½ tsp mixed spice
  • Replace butter with 80 ml of oil

Coconut, Raspberry and White Chocolate Chip Muffins

  • 125 g raspberries
  • 25 g coconut flakes – reduce flour by 25 g
  • 80 g white chocolate chips

INSTRUCTIONS

  1. Pre-heat oven to 180C/350F/. Prepare a 12 hole muffin tin with liners or grease them well
  2. Pop the butter in a heat proof bowl and place in the oven for 5 minutes (set the timer!!) while it is heating up.
  3. In a medium mixing bowl, hand whisk the egg. If you are going to add bananas, add them now and mash with a fork – I like to leave them a little chunky . Add the buttermilk or yoghurt/creme fraiche/sour cream and milk mixture and whisk to combine everything.
  4. In a large mixing bowl, measure out the flour, the oats and or coconut if using, the sugar, the baking powder , the  salt and chocolate chips or raisins or cinnamon or lemon zest and poppy seeds if using. Whisk well to aerate and to combine all the ingredients. Make a well in it and set aside.
  5. Slowly pour in the melted butter onto the egg/buttermilk mixture, whisking all the while to mix in the butter evenly which will begin to solidify as it hits the cold liquid.
  6. Pour in the wet ingredients onto the dry and stir to mix. Do not over mix – leave some streaks of flour but not huge pockets of it!
  7. Stir in any delicate berries at this point.
  8. Divide the mixture between the 12 muffin cups and top with the seeds or nuts if using.
  9. Bake for 20-25 minutes until golden brown. Test with a wooden skewer (or a piece of uncooked spaghetti!) – if there is any batter clinging to it, pop the tray back in for a 2 or 3 minutes.
  10. Cool in the pan for 5 minutes then remove to a wire rack to cool off completely.

© Selma Jeevanjee and Selma’s Table, 2013, 2014. Unauthorised use and/or duplication of this material, including photographs without express and written permission from this blog’s author and/or owner is strictly prohibited. Excerpts and links may be used, provided that full and clear credit is given to Selma Jeevanjee and Selma’s Table with appropriate and specific direction to the original content.


Home-made Lemon Olive Oil and Dukkah

home-made-lemon-olive-oil-and-dukkahIt’s time for Fiesta Friday #17 hosted by the lovely Angie @ The Novice Gardener. This week she is joined by  three, yup, three co-hosts! Sweet Alex @ Dinner Daydreams, bubbly  Jhuls @ The Not So Creative Cook and yours truly.  Jhuls and I had a lot of fun co-hosting a couple of weeks ago – she has a soft spot for the dessert table which is where you are likely to find her hanging out! Alex will be keeping an eye on the rest of the proceedings while I expect to be propping up the bar! Do check out their wonderful blogs for some great recipes!

Today, I have a couple of recipes to share – both very simple yet with lots of flavour and a myriad of uses. The first is a lovely, really simple recipe for Lemon infused Olive Oil. The oil takes a month to infuse and only uses two ingredients – unwaxed lemons and olive oil. The oil is wonderful drizzled over fish, seafood, chicken, couscous, pasta, soup, tomatoes and also makes a lovely salad dressing and marinade too. All you have to do is place a few clean unwaxed lemons in a jar, top up with olive oil and store in a cupboard for a month. That is it!. A friend that I had made some for, used to just top up the jar with more oil so that she had a constant supply. The lemons get a bit fizzy while they are steeping so it’s a good idea to open the jar to release the gas every week or so. home-made-lemon-olive-oil-and-dukkah
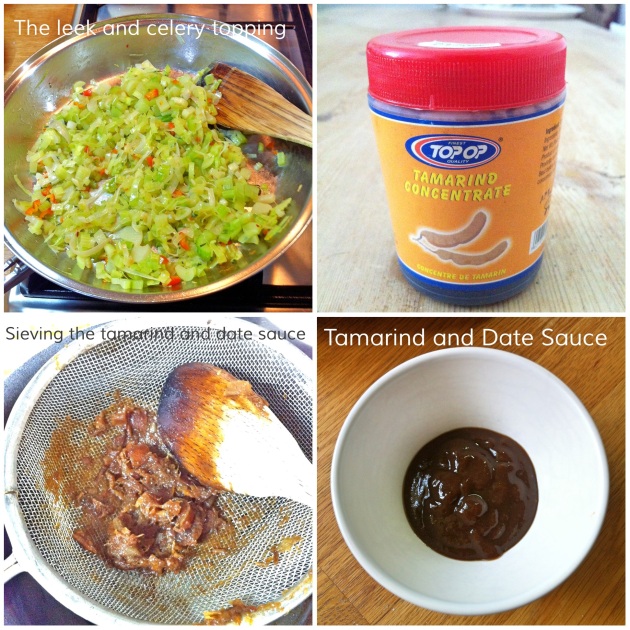
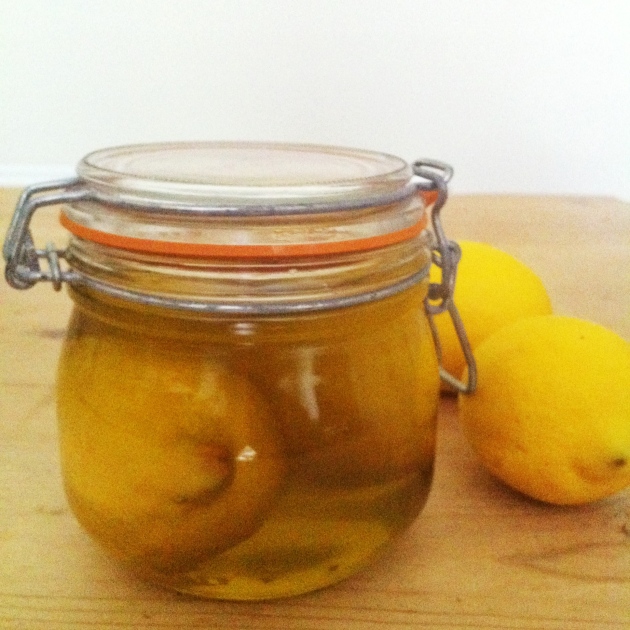
The second recipe is for Dukkah – a coarse Middle Eastern nut, seed and spice blend that is ridiculously versatile. Traditionally, it is served in a small bowl alongside another of olive oil and some warm flatbread. The bread is dipped in the oil and then in the spice blend. It can also be used to sprinkle over hoummus, fried or boiled eggs, tossed with Mediterranean vegetable before roasting and used to coat tiny tender lamb chops before cooking.  Claudia Roden published the first recipe for Dukkah, outside of Egypt in A Book of Middle Eastern Food, back in 1968. Every family has a different version of this which is kept in a large jar in the pantry. It is just a matter of toasting the nuts, seeds and spices, before grinding coarsely.

I had some beautiful beetroot in my veg box which I roasted, whole and unpeeled, wrapped in foil, at 180C for an hour. When they were cool enough to handle, I peeled and sliced them, drizzled them with a little of the lemon oil and sprinkled them with dukka and some chopped salted pistachio nuts. It made for a really delicious and  healthy lunch!

The submissions for Fiesta Friday #17 are looking pretty spectacular already so do take a look and leave a comment too to say hello! Click the link to take you to Angie’s post then click the purple badge to add your link to the party! http://thenovicegardener.wordpress.com/2014/05/22/fiesta-friday-17/ Hope to see you there!!

Lemon Olive Oil

INGREDIENTS

  • 2 unwaxed lemons (or however many will fit in your jar)
  • Olive oil

INSTRUCTIONS

  1. Rinse the lemons in warm water and dry thoroughly.
  2. Place in a clean jar with a tight fitting lid.
  3. Top up with olive oil or a blend of olive and vegetable oil.
  4. Keep in a dark place for a month before using,

Dukkah

Original recipe from Claudia Roden

INGREDIENTS

  • 250g sesame seeds
  • 125g coriander seeds
  • 60g hazelnuts
  • 60g ground cumin
  • Salt and pepper

You can also add dried mint,dried oregano, fennel seeds, roasted chickpeas, almonds…

INSTRUCTIONS

  1. Put the seeds and nuts on separate trays and roast them in a preheated 250C gas 8 oven for 5 – 10 minutes or until they begin to colour and release an aroma.
  2. Put them together in the food processor with salt and pepper and grind them until they are finely crushed but not pulverised. Be careful not to over blend or the oil from the too finely ground seeds and nuts will form a paste. Dukkah should be a dry crushed mixture, not a paste.
  3. Store in an airtight jar in a pantry cupboard.

© Selma Jeevanjee and Selma’s Table, 2013, 2014. Unauthorised use and/or duplication of this material, including photographs without express and written permission from this blog’s author and/or owner is strictly prohibited. Excerpts and links may be used, provided that full and clear credit is given to Selma Jeevanjee and Selma’s Table with appropriate and specific direction to the original content.

Thyme & Seed Pide topped with Leek, Celery & Cheese

thyme-and-seed-pide-with-a-leek-celery-and-goats-cheese-toppingIt’s funny how inspiration strikes. Aware that the clock was counting down fast on the deadline for submitting a ‘yeast and herb’ based post for Angie’s first Fiesta Friday Challenge, I found myself dithering over recipes, like a debutante in a dress shop. I cursorily glanced through some of my bread baking books but nothing appealed. I googled “yeast recipes”; still nothing appealed. In the meantime, fabulous dishes were being submitted; Sue with her fabulous fermented kvas as a base for a Russian soup, Michelle with her luscious peach and basil danishes; Angie herself posted a stunning looking Fougasse…tick, tock, tick tock… Oh, what to do? I pop into my local green grocers to pick up some tomatoes and basil for a salad. Checking my purse, there isn’t enough change to cover it so I pull out my card to pay then realise that there is minimum £5 purchase for card transactions. I had been eyeing up a tray of squidgy Mejool dates, so I added them to the basket as Jake loves them. The next day, I wander into the kitchen to make a coffee, idly thinking about the day ahead when my eyes fall on the dates. I think about flavour combinations and imagine that dates and goats’s cheese would work. A quick internet search shows that I am not alone in thinking this. Progress! I plump for a seeded flatbread by bread maestro, Dan Lepard, to which I will add thyme, make tamarind and date sauce and a topping of leeks & celery. I have a moment’s worry as to this flavour combination, so try a teaspoonful of the leek and celery, topped with a cube of goat’s cheese with a dribble of the date and tamarind sauce. Hurrah!! It is delicious! Sharp, tart, grassy, crunchy, earthy, lemony, spicy – it works!! I will go to the ball, I will! thyme-and-seed-pide-with-a-leek-celery-and-goats-cheese-topping thyme-and-seed-pide-with-a-leek-celery-and-goats-cheese-topping
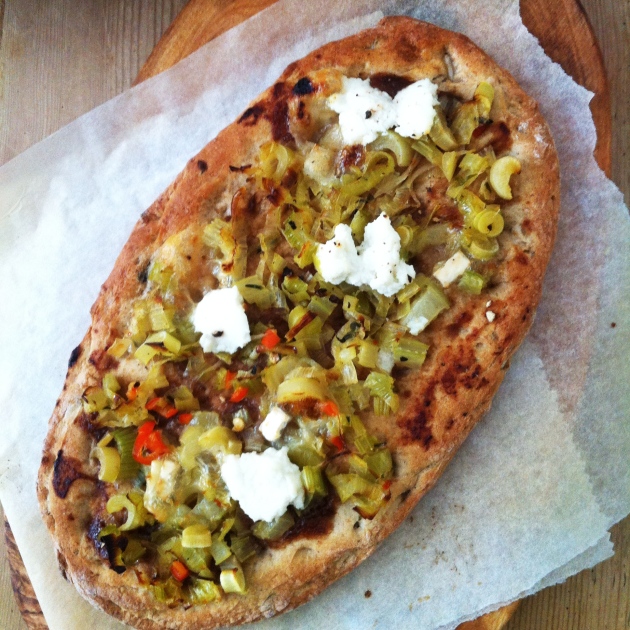
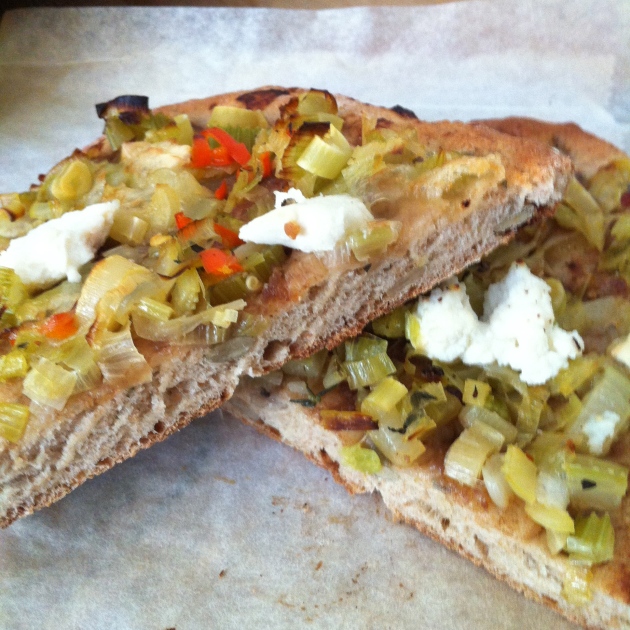
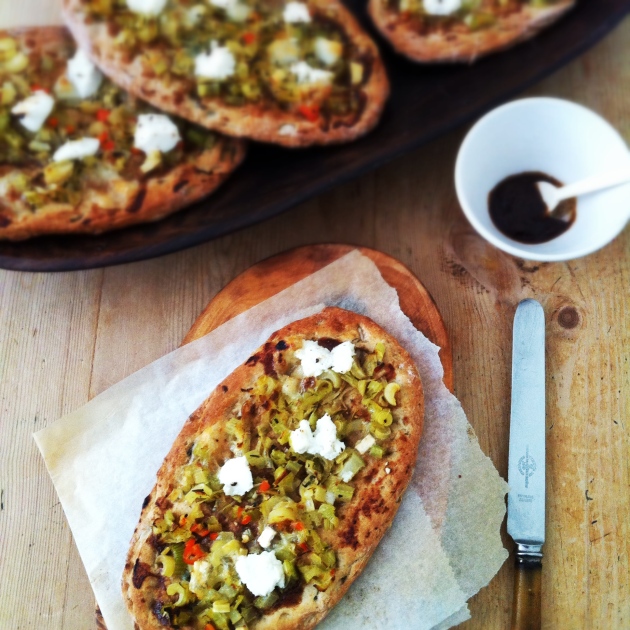
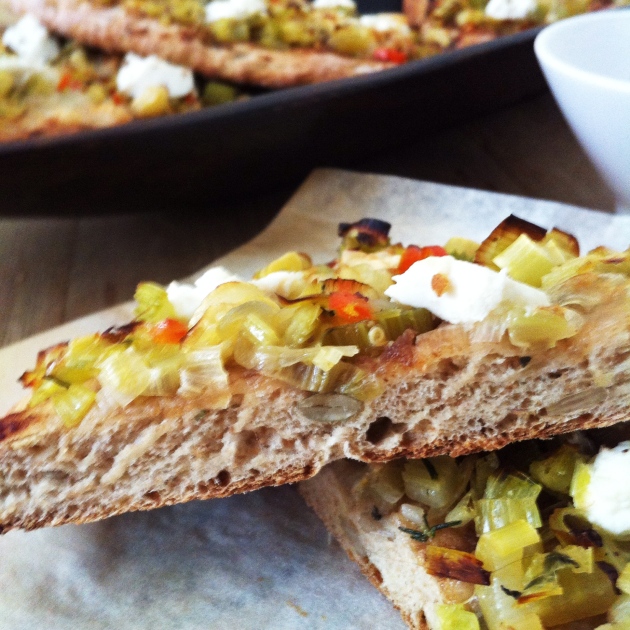
Once baked, the goat’s cheese has melted and the creamy ricotta is a wonderful counterpoint to the heat from the chilli flakes and the crunch of the seeds. Next time I will add more ricotta (I’ve updated the recipe below to account for this). Angie is being very ably assisted by Catherine @ Catherine Cuisine. Please do go and look at the entries for this yeast and herb based challenge; you will find crumpets, semolina pancakes, pizzas, flat breads and  much, much more – the Creative Fiesta Friday Crew are rising beautifully (see what I did there, Angie and Catherine?) to the challenge! So this is how to make some easy and delicious Turkish inspired Pides – feel free to use different toppings but I have to say that I was really pleased with the combination below. As always, a printable recipe follows the photo tutorials and any musings. thyme-and-seed-pide-with-a-leek-celery-and-goats-cheese-topping Ever since I attended Nina Oortman’s bread making class, I have been coveting the stainless steel counters that make bread kneading, shaping and  clean up so effortless. I came across this rather large stainless steel serving/prep  tray from my catering days, while I was unpacking and had a Eureka! moment. Rather than bestowing the tray on my local charity shop, it could come in useful for pasta and dough making – and it has, as you will note from the photos below… thyme-and-seed-pide-with-a-leek-celery-and-goats-cheese-topping 
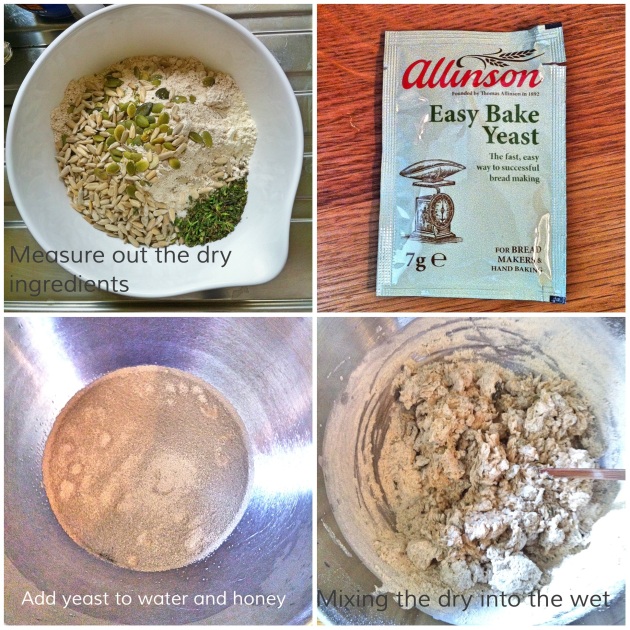
I used a chopstick to roughly mix the dry ingredients into the wet, thanks to a tip from Aneela @ The Odd Pantry and it worked brilliantly. No more sticky dough adhering plaster-like to each finger! The dough is sticky – resist the temptation to add lots of flour when you are working with it. This dough does not require very much handling – hardly any kneading in fact. A light hand and as little additional flour as possible will yield a more tender bread. http://theoddpantry.com/2014/05/07/in-my-kitchen-of-alternative-uses-may-2014/ http://theoddpantry.com/2014/05/07/in-my-kitchen-of-alternative-uses-may-2014/

Thyme and Seed Pide with a Leek, Celery and Goat's Cheese Topping

  • Servings: makes 4 pide
  • Difficulty: easyish!
  • Print
Adapted from Dan Lepard’s Supper Flatbread Recipes in the Guardian INGREDIENTS For the pide:

  • 175 g all plain flour
  • 75 g spelt flour (or wholemeal)
  • 25 g sunflower seeds
  • 25 g pumpkin seeds
  • 1 Tbsp chopped thyme leaves (fresh)
  • 1 tsp fine salt
  • 175 g warm water (this is the same as 175 ml in volume. Weighing the water is a more accurate measure)
  • 25 g honey
  • 7 g sachet fast acting yeast

For the leek and celery topping:

  • 1 Tbsp olive oil
  • 100 g diced celery (3 stalks)
  • 2 shallots finely sliced
  • 140 g finely sliced leeks
  • water as required
  • 1 mini sweet red pepper finely diced
  • pinch of chilli flakes
  • 1 tsp finely chopped thyme leaves (fresh)
  • 60 g cubed or crumbled goat’s cheese
  • 12 tsp ricotta cheese
  • salt and pepper

For the tamarind and date sauce:

  • 10 soft pitted dates roughly chopped – soak them if they are dry
  • 1 ½ tsp tamarind concentrate
  • 100 ml water

INSTRUCTIONS For the pide:

  1. Measure out all the dry ingredients (not the yeast though) into a mixing bowl and stir well to combine.
  2. Measure the honey and warm water directly into a mixing bowl set on the scales and mix well to combine
  3. Sprinkle over the yeast and stir in.
  4. Add the dry ingredients and mix until it is a soft, shaggy, sticky dough (I used a chopstick to stir it round and round ).
  5. Cover and let this rest for 10 minutes.
  6. Lightly flour a work surface and very lightly knead the dough for about 10 seconds! It comes together very quickly.
  7. Place back in the bowl, cover and leave to prove for 30 minutes.

For the leek and celery topping:

  1. Heat the olive oil in a frying pain set on a medium low flame.
  2. Add the celery and shallots and sauté gently for 5 minutes to soften a little. Season with a good pinch of salt.
  3. Stir in the leeks. If there isn’t enough oil, add a splash of water to get things going – you may need to do this several times. Cook until floppy then stir in the thyme and red pepper and chilli flakes. Cook for a couple of more minutes, season to taste then take off the heat and leave to cool.

For the tamarind and date sauce:

  1. Place the dates and tamarin in a saucepan set over a medium low flame.  Add the water in splashes, stirring  with a wooden spoon to dissolve the tamarind – mash the dates with the back of the spoon too. Let this reduce to a thick lumpy sauce (mashing and stirring all the while) and take off the heat.
  2. Scrape into a wire mesh strainer and set it back over the saucepan. Using the wooden spoon, stir and press the mixture through the sieve until you are left with just the date fibre in the sieve. Scrape the sauce from the bottom of the sieve and into the pan.

To assemble and bake the pide:

  1. Pre-heat the oven to 240C/465F. Prepare 2 baking trays with parchment or silicone paper or dust with flour.
  2. Cut the dough into quarters (I weighed the dough, then divided it by four and tried to get 4 balls fairly equal in weight)
  3. Shape into balls by cupping and pushing the dough to stretch it out and get a smooth top.
  4. Cover and leave for 5 minutes.
  5. On a lightly floured surface, roll out each ball into an oval that is about 20 cm x 10 cm. Push at the edges to make a slight lip and lay on the prepared baking sheets.
  6. Spread a 1 ½ teaspoons of the tamarind date sauce on the dough, leaving the edges free.
  7. Top each pide with ¼ of the leek and celery mixture.
  8. Top this with the goat’s cheese and little blobs of ricotta.
  9. Bake for 10 – 15 minutes. Mine were ready in 10 minutes.
  10. Eat warm!
© Selma Jeevanjee and Selma’s Table, 2013 – 2015. Unauthorised use and/or duplication of this material, including photographs without express and written permission from this blog’s author and/or owner is strictly prohibited. Excerpts and links may be used, provided that full and clear credit is given to Selma Jeevanjee and Selma’s Table with appropriate and specific direction to the original content.

Breakfast Bars

Breakfast BarsMade these lovely Breakfast Bars yesterday inspired by a twitter link from Nigella Lawson. Other than the condensed milk, the ingredients are super healthy and these bars taste much nicer that the cereal ones that you can buy.  I had lots of seeds left over from making the Seeded Spelt Crackers which were perfect for this recipe.

Breakfast BarsFeel free to use the recipe as a template. You could use varied types of nuts and dried fruits, chocolate chips (not so healthy then) and even add cinnamon or drizzle the top with chocolate. These Breakfast Bars come together in minutes and bake for an hour – who could ask for more?!

Breakfast Bars

Breakfast

  • Servings: 16 bars
  • Difficulty: easy
  • Print

Adapted from Nigella Lawson’s Breakfast Bars 

INGREDIENTS

  • 1 x 397 g can caramel condensed milk (or use plain)
  • 250 g rolled oats (not instant)
  • 75 g shredded coconut
  • 100 g dried berry mix – mine had raisins, cranberries and cherries
  • 125 g mixed seeds (pumpkin, sunflower, linseed, sesame)
  • 100 g flaked almonds

INSTRUCTIONS

  1. Preheat the oven to 130°C/250ºF and oil a 23 x 33 x 4cm / 9 x 13 inch baking tin, or use one of those disposable foil trays if you have one lurking around from the summer which is what I did.
  2. Measure out all the dry ingredients into a large bowl and mix well to distribute evenly.
  3. Heat the caramel condensed milk in a large pan and when it is warm, give it a good stir and take if off the heat.
  4. Stir in the dry ingredients and give it a good mix.
  5. Scrape it out into the prepared pan and  pat it out as evenly as you can.
  6. Bake for one hour, checking after 50 minutes.
  7. Let cool for 15 minutes then, using a long knife, slice into four long bars, then give it a quarter turn and slice into four again.
  8. Store in an air tight tin.

Seeded Spelt Crackers

Seeded Spelt CrackersNigel Slater is one of my favourite food writers. In addition to a plethora of really, really good cook books, he also writes for the Observer Magazine and the Observer Food Monthly Supplement. His food is intuitive, uncomplicated and unpretentious with fabulous flavour.  When I first returned to work, his “Real Fast Food”  and “Real Food” are what I read at bedtime to prime myself for the evenings to come so that I could still have people over for supper and not go into a complete meltdown in the process. “Appetite” remains one of my most referred to books and “Kitchen Diaries” still helps to inspire when I am feeling as jaded and uninspired as stale cracker…

Seeded spelt crackers

Speaking of which, I watched him make these spelt crackers on catch-up television the other day and shortly after, found myself in Whole Foods where you can buy tiny (or huge) scoops of flours, rice, pulses, seeds and nuts from their bulk bins. I had already looked up and saved the recipe to Pepperplate so all that was left to do was to look it up on my phone and  buy what was needed.  The seeded spelt crackers are dry, crumbly and nutty from the seeds – perfect with a bit of blue or creamy cheese after dinner.

Seeded spelt crackers

Spelt is a truly ancient grain which can be traced as far back as the 5th millennium BC. It has a nutty and slightly sweet flavour and can be helpful for people who are wheat intolerant but not coeliacs as it does contain gluten. I have used the flour to make delicious pancakes in the past (substituting half of the flour with spelt) and it can be used in cakes and biscuits as well.

Do have a go at these crackers – they really are delicious!

Seeded Spelt Crackers

Seeded Spelt Crackers

  • Servings: 24
  • Difficulty: easy
  • Print

Barely adapted from Nigel Slater’s Dish of the Day – Savoury Biscuits 

INGREDIENTS

  • 90g spelt flour
  • 15g  golden linseeds
  • 15g  pumpkin seeds
  • 15g  sesame seeds
  • 15g sunflower seeds
  • 50g soft butter
  • 2 Tbsp water
  • flaky sea salt to sprinkle

INSTRUCTIONS

  1. Pre heat oven to 180C/350F and prepare your baking sheet by laying some greaseproof paper on it.
  2. Place the flour and seeds in a bowl and whisk to combine.
  3. Stir in the butter with a wooden spoon or just use your hands to rub the butter into the flour/seed mix until it is evenly distributed.
  4. Sprinkle on the one tablespoon of water and use your hands to start bringing the dough together, adding the second tablespoon of water as you go.  You should end up with a nubbly ball of dough.
  5. Wrap in cling film and rest in the fridge for at least an hour or overnight. It will be quite hard when you retrieve it so let it warm up a bit before trying to roll it out.
  6. Place the dough between two sheets of grease proof paper or cling film and roll out quite thinly. The original recipe says as thick as a pound coin but I rolled the dough much thinner than than – more like a 5p coin.
  7. Using a 2 inch pastry cutter or a wine glass (any thin glassed vessel will do..) stamp out rounds – I managed to get 24, re-rolling the scraps a couple of times.
  8. Place rounds on the prepared baking sheet – they don’t spread very much so you can place them quite close together – and sprinkle with a little salt.
  9. Bake for about 10 minutes, checking after 8 minutes. They are ready when they look golden brown.
  10. Remove to a wire rack to cool and store in an airtight tin.

Seeded Spelt Crackers