Smoky, Spicy Roasted Corn Soup

Smoky, Spicy Roasted Corn Soup | Selma's TableI popped into Borough Market on Saturday, just to buy some gnarly heirloom tomatoes – something both Jake and I really enjoy with basil and buffalo mozzarella. The market is uncomfortably busy on a Saturday so I didn’t linger but just made my way to the periphery where there are some brilliant farm vegetable stalls and also came away with these lovely ears of corn.

Smoky, Spicy Roasted Corn Soup | Selma's TableI’ve been craving the East African dish of “Makai Paka” or  “Corn in Coconut” but after a conversation with my mother, realised that I didn’t have a couple of items so decided on making a rustic soup instead. I used a dried chipotle pepper to add a smoky spicy depth to this dish – you could add smoky paprika and some chilli flakes if you don’t have chipotle peppers. After rehydrating it in hot water, I sliced it in half and scraped out the seeds as it was quite hot enough!

Smoky, Spicy Roasted Corn Soup | Selma's TableI had seen a method of slicing off corn kernels that I had been itching to try. which involves a Bundt pan and a sharp knife – it worked! The hole in the middle of the pan supports the cob and the pan itself catches most of the kernels and really contains the ‘scatter and splatter’ that inevitably results when slicing off fresh corn kernels.

Smoky, Spicy Roasted Corn Soup | Selma's Table

When roasting the kernels, don’t over do them – for this soup, they are nicer when they are still quite creamy and tinged gold rather than hard chewy golden nuggets! And don’t throw the corn cobs away – they are needed to make a corn broth for the soup!

This is a lovely dish to enjoy as a light lunch or supper, making the best of the late summer produce that is around! I am taking this over to share with the lovely bloggers over at The Novice Gardener’s, Fiesta Friday #31  which today, is being hosted by Angie herself. Angie is sharing the most delicious spread of bruschetta and crostini and the featured recipes from last week are absolutely mouth watering! Smoky, Spicy Roasted Corn Soup | Selma's Table

Smoky, Spicy Roasted Corn Soup

  • Servings: 4
  • Difficulty: easy
  • Print

Adapted from Fresh Corn Soup by David Lebovitz

INGREDIENTS

  • 4 cobs of corn
  • 2 pointed sweet red peppers
  • 4 cloves of garlic in their skins
  • 1 tsp sea salt
  • 2 Tbsp olive oil
  • 800 ml water
  • 1 medium onion
  • splash of olive oil
  • 150 ml creme fraiche
  • 1 dried chipotle pepper (or 1 tsp smoked paprika and ½ tsp chilli flakes)
  • 1 tsp dry roasted cumin seeds, crushed coarsely
  • 2 Tbsp chopped fresh coriander leaves or use parsley or chervil instead
  • lemon wedges to serve

INSTRUCTIONS

  1. Leave the chipotle pepper to soak in a little hot water.
  2. Preheat oven to 190 C/ 375F
  3. Shuck the corn and slice off the kernels. Set the cobs aside. to make a broth. Slice the red peppers in two and de-seed.
  4. On a large baking tray, mix the kernels, the peppers, the garlic, the salt and the olive oil – spread out and roast for 25 mins, stirring a couple of times. The corn should be tinged gold in places but don’t over-roast – the kernels should still be succulent.
  5. While the kernels are  roasting, snap the cobs into pieces and place in a saucepan. Cover with 800 ml of water and bring to a simmer. Simmer on a low heat for about 30 minutes.
  6. Sauté the onion in a large saucepan until floppy and slightly golden.
  7. When cool enough to handle, chop the sweet red pepper into small pieces.
  8. Drain the chipotle pepper, cut in half and remove the seeds to reduce the heat. Chop  finely and have a little taste to see how hot it is.
  9. Squeeze the garlic out of their skins and add to the onions in the saucepan, along with the kernels and the chopped red pepper. Stir in the chipotle pepper to your taste – I used the whole one. Or add the smoky paprika and the chilli flakes if not using the chipotle pepper. Add a teaspoon of vegetable bouillon and the crushed cumin seeds
  10. Remove the corn cobs from the water and discard. Tip the corn broth into the saucepan and bring to a simmer. Do not boil.
  11. Stir in the creme fraiche and the herbs.

Serve with a lemon wedges which really sharpen the flavour and tone down the heat at the same time.


© Selma Jeevanjee and Selma’s Table, 2013, 2014. Unauthorised use and/or duplication of this material, including photographs without express and written permission from this blog’s author and/or owner is strictly prohibited. Excerpts and links may be used, provided that full and clear credit is given to Selma Jeevanjee and Selma’s Table with appropriate and specific direction to the original content.


Courgette, Red Pepper & Mint Gratin with Chèvre

Courgette and Red Pepper Gratin with Chèvre | Selma's Table

Such a glut of courgettes (zucchini) around – do you know that right now, the most popular recipe on my blog is Quick Summer Pickle – Sweet and Sour Courgettes? It gets more views every day than anything else at the moment! I love courgettes but unfortunately, Jake does not. No matter how I cook them, oven fries, griddled, sautéed, grated raw or ribboned  in a salad – he just picks them out and says that it is a texture thing. I can’t even fool him anymore by saying that it’s cucumber – he’s waaaay beyond that stage now!

So in order to satisfy my craving for them, I tend to cook them so that they will keep for a couple of days at least – that means gratins and stews. This one is a riff on the very first recipe I posted a year ago, Courgette, Feta and Thyme Bake. I still can’t photograph it that well – it’s not a looker but it tastes fabulous warm, room temperature  or cold.

This Courgette, Red Pepper & Mint Gratin with Chèvre is a good dish for a picnic or a barbecue as it can be made ahead and ideal for a buffet table as well. I like it on a slice of toasted sourdough with a rocket salad – it makes the perfect light lunch or supper. The combination of courgettes, mint, red pepper and goats cheese is lovely and fresh – perfect to see off the summer with.

Courgette and Red Pepper Gratin with Chèvre | Selma's Table

Courgette and Red Pepper Gratin with Chèvre | Selma's Table

My Courgette, Red Pepper & Mint Gratin with Chèvre is terribly easy to make. Sauté some shallots and peppers, then add the coins of courgettes, garlic and seasonings. While that is going on, mix up the custard – the eggs, creme fraiche and parmesan cheese. Then it’s just a matter of layering it all together and dotting it with chunks of chèvre (goats cheese) and popping it in the oven for half and hour or so. Now the trick with layering is to start off really parsimoniously – be as mean as you can get away with so that you have generous amounts left for the top layers. Printable recipe follows below, as always!

Courgette and Red Pepper Gratin with Chèvre | Selma's Table

Courgette and Red Pepper Gratin with Chèvre | Selma's Table

Courgette, Red Pepper & Mint Gratin with Chèvre

  • Servings: 4 - 8 servings
  • Print

INGREDIENTS

  • 1 Tbsp rapeseed or mild olive oil
  • 2 large banana shallots or 1 medium onion
  • 1 large sweet red pointed pepper
  • 4 medium courgettes/zucchini
  • pinch of salt
  • pepper
  • 2 cloves of garlic, minced
  • ½ tsp finely chopped fresh rosemary
  • 1 tsp vegetable bouillon powder
  • a splash of water
  • 1 tbsp fresh mint leaves finely chopped
  • 3 medium free range or organic eggs
  • 150 ml reduced fat creme fraiche
  • Juice of half a lemon
  • 2 Tbsp grated parmesan cheese
  • 100 g of soft goats cheese/chèvre

INSTRUCTIONS

  1. Pre-heat oven to 220 C/450F and butter an oven proof dish.
  2. Warm oil in a large frying pan over a medium low flame
  3. Slice shallots into half moons and stir in.
  4. De-seed and slice the red pepper and stir in. Add a pinch of salt and give it all a stir.
  5. Slice the courgettes into ½ cm coins. When the shallots start to caramelise and the peppers are starting to soften, stir in the courgettes. Let these sauté for about 5 – 7 minutes, stirring frequently so that the shallots don’t catch. The courgettes should be just cooked through and a little browned in places. It does help to use a big frying pan.
  6. Stir in the minced garlic, the rosemary and the bouillon powder and add a little splash of water and scrape up the delicious caramelised juices that will have stuck to the pan. Turn off the heat, stir in the mint and set aside to  cool while you get on with the eggs.
  7. Lightly whisk the eggs in a medium sized mixing bowl. Whisk in the creme fraiche , the lemon juice and the parmesan cheese. It will look slightly curdled and will thicken from the lemon juice but it is fine.
  8. In a well buttered ovenproof dish, layer a scant half of the vegetables and cover with a very scant half of the custard. Repeat, finishing by dotting blobs of the soft goats cheese over the top.
  9. Bake for 25-35 minutes until set and golden brown in places.

Serve warm or at room temperature.

Serves 6/8 as side dish or 4 as a light lunch with salad

Also fabulous to take on picnics or in packed lunches.

© Selma Jeevanjee and Selma’s Table, 2013, 2014. Unauthorised use and/or duplication of this material, including photographs without express and written permission from this blog’s author and/or owner is strictly prohibited. Excerpts and links may be used, provided that full and clear credit is given to Selma Jeevanjee and Selma’s Table with appropriate and specific direction to the original content.

Flourless Chocolate and Raspberry Torte

flourless-chocolate-and-raspberry-torteIt’s Friday and time to head on over to the friendliest virtual party going –  Angie’s Fiesta Friday; to catch up with everyone and enjoy the offerings they bring to the party. It’s not just food you know, although admittedly, that is the main thrust – just look at what else we’ve had recently…

  • Pang@CircaHappy brought these utterly stunning floral arrangements – Pang is a talented dynamo; her food is equally as beautiful and her photography is fabulous.
  • Megan@Firebonnet brought these amazing old Ladies Home Journals full of glorious hats from the early 1900’s. Megan has a joyful blog full of happiness, hope and art.
  • Rakhi@BlissBook  told us how she and her brother threw a surprise 30th anniversary party  for their parents, pulling it off magnificently despite her mother’s honed detective skills – a touching post with photos of pure happiness and joy that did make me well up a bit! 
  • Justine@ElecticOddsnSods brought some music to cook by and asked us to share our favourites too. Justine is at heart a writer and has three, yes I said three blogs, written in her inimitable and witty style.
  • Loretta@SafariOfTheMind shared her glorious gardens with us and they are quite something – jaw droppingly spectacular. Loretta has started blogging quite recently and her post on her trip to Kenya is quite the read.

So it’s not all delicious food, decadent puds and glamourous cocktails. Pour yourself an ice cold tall drink enjoy Fiesta Friday #20 which is very ably  hosted this week by Fae@Fae’sTwistandTango and Suzanne@PugintheKitchen. Fae needs little introduction – the original blog mother hen, she has nurtured and encouraged so many whilst maintaing a truly international, inspirational and delicious blog. Suzanne is a very creative and prolific cook who creates recipes for Wholefoods and my favourite website Food52. And how adorable are her pugs? Thank you ladies – it is going to be a blast!

If you blog, please do join in, reading the the guidelines first to get you going.

flourless-chocolate-and-raspberry-torteI, of course, stay true to my nature and bring something for the table. A rather grown up and glorious Flourless Chocolate and Raspberry Torte. A torte is defined as

a sweet cake or tart; from German Torte, via Italian from late Latin torta ’round loaf, cake’. Compare with tortilla

Oh, I do like a little word-history…

flourless-chocolate-and-raspberry-torteInspired by The River Cafe’s Easy Chocolate Nemesis Cake and Nigella’s Chocolate Meringue (which is my dinner party pudding of choice) , this is a dinner party pudding cake. With a crisp meringue exterior and a rich, dense, raspberry studded interior, it is a rather decadent affair. The espresso powder intensifies the chocolate flavour and the tart raspberries offset the sweetness.

flourless-chocolate-and-raspberry-torteWhile the torte is straightforward enough to make, there are a few crucial points that would be remiss of me not to highlight;

  • Take some time to line the sides and base of the tin with waxed paper.
  • The eggs must be at room temperature – they will not whip up to the volume required otherwise.
  • Ensure that the bowl and beaters for the egg whites are scrupulously clean – any bits of grease or egg yolk and they will not whip up as voluminously. Unless you have 2 sets of beaters, start with the whites first and then move onto the yolks.
  • Use large bowls – the whites whip up to 4-5 times their original volume.
  • When you are whipping the whites, add the sugar a little at a time.
  • This is a great article on the various stages of whipping egg whites (and cream)
  • Use a large metal spoon to fold in the egg whites – rubber spatulas destroy the volume.
  • When folding the second and third batches of egg whites, be gentle – don’t knock out the air. The whites are the only leavening agent.

flourless-chocolate-and-raspberry-torte

flourless-chocolate-and-raspberry-torte

flourless-chocolate-and-raspberry-torte

IMG_8172

flourless-chocolate-and-raspberry-torte

Flourless Chocolate and Raspberry Torte

  • Servings: 10 - 12 slices
  • Difficulty: moderate
  • Print

INGREDIENTS

  • 50 g (3 Tbsp) butter
  • 200 g (7 oz) 70% cocoa, dark chocolate, broken up
  • 6 large room temperature eggs, yolks and whites separated into 2 large bowls
  • 225 g (1 cup) caster/superfine sugar, divided in half
  • 1 tsp balsamic vinegar
  • 2 Tbsp expresso powder
  • ¼ tsp salt (I used Maldon sea salt flakes)
  • 225g ripe raspberries
  • 1 x 23 cm/9″ springform baking tin, sides and bottom lined  with waxed paper

INSTRUCTIONS

  1. Place the butter and the chocolate in a heat proof bowl and set over a pan of simmering water. The water should not  touch the bowl – the steam will heat and melt the chocolate and butter. Stir it every so often until melted, amalgamated and smooth. Alternatively, place in a microwave safe bowl, cover loosely and heat on 50% power, stirring every 30 seconds until melted and smooth – this should take about 2 minutes. I used the microwave. Leave it to cool whilst getting the rest of the ingredients ready.
  2. Pre-heat the oven to 180C/350F.
  3. Line the base and sides of the tin with waxed paper using a little butter to help it stick to the tin.
  4. Whip the egg whites in a large grease free bowl until foamy on a medium setting.
  5. Add the balsamic vinegar and whisk briefly.
  6. Increase the setting to high and start adding half the sugar very gradually. The mixture will start getting glossy and increase greatly in volume. Keep going until you get to the stiff peaks stage – when you pull your beaters out, the mixture forms a peak that doesn’t flop over.  Set aside while you get on with the egg yolks.
  7. Whip the egg yolks with the other half the sugar for about 3 or 4 minutes scraping down the sides of the bowl from time to time – the mixture will turn from gloopy and bright orange to a pale, thick and creamy mass.
  8. Add the espresso powder and the salt and whip to incorporate.
  9. Add the cooled but still liquid chocolate/butter mixture and whip again until it is evenly mixed.
  10. Using a large metal spoon, fold in the egg whites to the yolk/chocolate mixture in 3 batches. The first batch is really to temper or loosen up and lighten the yolk/chocolate mixture; fold in the remaining whites carefully trying to keep as much of the volume as you can.
  11. Scrape  into the prepared pan and top with the raspberries, pushing them in slightly.
  12. Bake for 40-45 minutes or until a toothpick inserted into the middle of the cake comes out without any batter clinging to it.
  13. Cool in the pan, on a wire rack – it should collapse in the middle with a crisp meringue like shell and a fudgey centre, studded with raspberries.
  14. Serve in small slices with a little cream and a few fresh raspberries.

© Selma Jeevanjee and Selma’s Table, 2013, 2014. Unauthorised use and/or duplication of this material, including photographs without express and written permission from this blog’s author and/or owner is strictly prohibited. Excerpts and links may be used, provided that full and clear credit is given to Selma Jeevanjee and Selma’s Table with appropriate and specific direction to the original content.

Home-made Lemon Olive Oil and Dukkah

home-made-lemon-olive-oil-and-dukkahIt’s time for Fiesta Friday #17 hosted by the lovely Angie @ The Novice Gardener. This week she is joined by  three, yup, three co-hosts! Sweet Alex @ Dinner Daydreams, bubbly  Jhuls @ The Not So Creative Cook and yours truly.  Jhuls and I had a lot of fun co-hosting a couple of weeks ago – she has a soft spot for the dessert table which is where you are likely to find her hanging out! Alex will be keeping an eye on the rest of the proceedings while I expect to be propping up the bar! Do check out their wonderful blogs for some great recipes!

Today, I have a couple of recipes to share – both very simple yet with lots of flavour and a myriad of uses. The first is a lovely, really simple recipe for Lemon infused Olive Oil. The oil takes a month to infuse and only uses two ingredients – unwaxed lemons and olive oil. The oil is wonderful drizzled over fish, seafood, chicken, couscous, pasta, soup, tomatoes and also makes a lovely salad dressing and marinade too. All you have to do is place a few clean unwaxed lemons in a jar, top up with olive oil and store in a cupboard for a month. That is it!. A friend that I had made some for, used to just top up the jar with more oil so that she had a constant supply. The lemons get a bit fizzy while they are steeping so it’s a good idea to open the jar to release the gas every week or so. home-made-lemon-olive-oil-and-dukkahThe second recipe is for Dukkah – a coarse Middle Eastern nut, seed and spice blend that is ridiculously versatile. Traditionally, it is served in a small bowl alongside another of olive oil and some warm flatbread. The bread is dipped in the oil and then in the spice blend. It can also be used to sprinkle over hoummus, fried or boiled eggs, tossed with Mediterranean vegetable before roasting and used to coat tiny tender lamb chops before cooking.  Claudia Roden published the first recipe for Dukkah, outside of Egypt in A Book of Middle Eastern Food, back in 1968. Every family has a different version of this which is kept in a large jar in the pantry. It is just a matter of toasting the nuts, seeds and spices, before grinding coarsely.

I had some beautiful beetroot in my veg box which I roasted, whole and unpeeled, wrapped in foil, at 180C for an hour. When they were cool enough to handle, I peeled and sliced them, drizzled them with a little of the lemon oil and sprinkled them with dukka and some chopped salted pistachio nuts. It made for a really delicious and  healthy lunch!

The submissions for Fiesta Friday #17 are looking pretty spectacular already so do take a look and leave a comment too to say hello! Click the link to take you to Angie’s post then click the purple badge to add your link to the party! http://thenovicegardener.wordpress.com/2014/05/22/fiesta-friday-17/ Hope to see you there!!

Lemon Olive Oil

INGREDIENTS

  • 2 unwaxed lemons (or however many will fit in your jar)
  • Olive oil

INSTRUCTIONS

  1. Rinse the lemons in warm water and dry thoroughly.
  2. Place in a clean jar with a tight fitting lid.
  3. Top up with olive oil or a blend of olive and vegetable oil.
  4. Keep in a dark place for a month before using,

Dukkah

Original recipe from Claudia Roden

INGREDIENTS

  • 250g sesame seeds
  • 125g coriander seeds
  • 60g hazelnuts
  • 60g ground cumin
  • Salt and pepper

You can also add dried mint,dried oregano, fennel seeds, roasted chickpeas, almonds…

INSTRUCTIONS

  1. Put the seeds and nuts on separate trays and roast them in a preheated 250C gas 8 oven for 5 – 10 minutes or until they begin to colour and release an aroma.
  2. Put them together in the food processor with salt and pepper and grind them until they are finely crushed but not pulverised. Be careful not to over blend or the oil from the too finely ground seeds and nuts will form a paste. Dukkah should be a dry crushed mixture, not a paste.
  3. Store in an airtight jar in a pantry cupboard.

© Selma Jeevanjee and Selma’s Table, 2013, 2014. Unauthorised use and/or duplication of this material, including photographs without express and written permission from this blog’s author and/or owner is strictly prohibited. Excerpts and links may be used, provided that full and clear credit is given to Selma Jeevanjee and Selma’s Table with appropriate and specific direction to the original content.

Cook the Books – Roasted Cauliflower and Hazelnut Salad


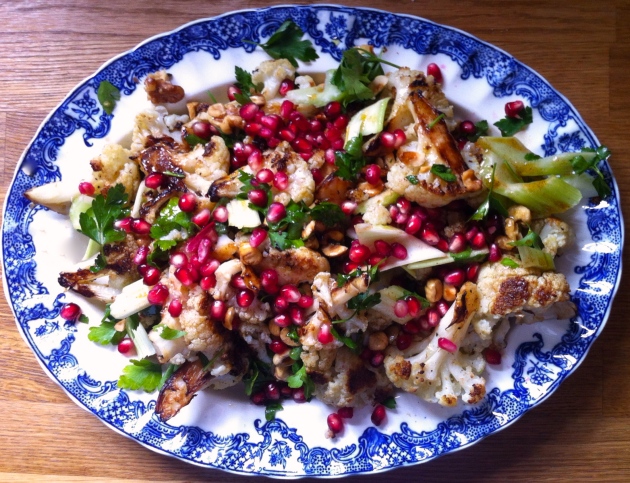
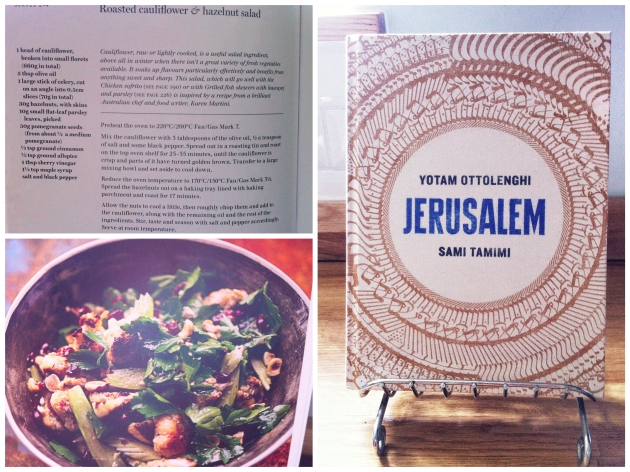
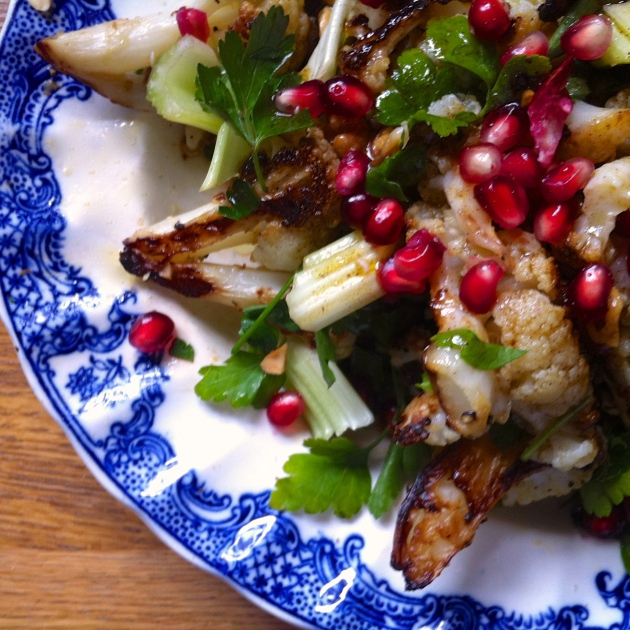
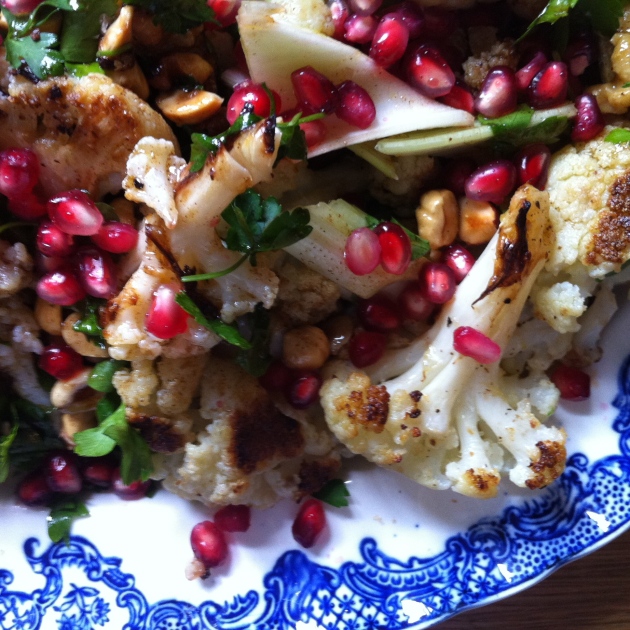
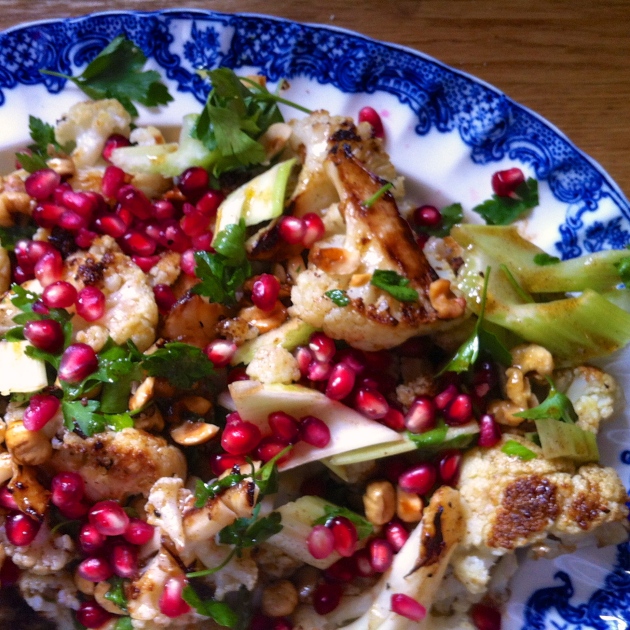
roasted_cauliflower_and_hazlenut_saladThis recipe caught my eye the other day and I have been desperate to try it – there are still lots of gleaming white cauliflowers around as well as large glossy, ruby pomegranates too so I determined to pick both up, sooner rather than later.  I was intrigued by the ‘spicing’. It’s almost Christmasy, warm, with maple syrup, allspice and cinnamon but with the fresh flavours of sweet, slightly tart pomegranate arils (seeds), crunchy celery and  grassy parsley, perfectly complemented by the roasted hazelnuts. I made it for an impromptu lunch yesterday and  two teenagers gave it a huge thumbs up. It’s a lovely way to eat cauliflower and would be a stunning addition to the Easter table.

roasted_cauliflower_and_hazlenut_saladThis really is a fabulous recipe book, full of gorgeous flavours and so much history too. Yotam Ottolenghi also writes for the Guardian at the weekend so you can catch up with his cooking there and be amazed at some of the vitriol in the comments section – I hope he doesn’t read them – from people who are sitting on their backsides contributing nothing at all to society…

roasted_cauliflower_and_hazlenut_saladPomegranates are an ancient fruit most likely originating from Persia – modern day Iran. Also mentioned in Babylonian texts, The Book of Exodus, The Q’ran and the Homeric Hymns, their history is quite amazing – do click on the link which will take you to the Wikipedia page, if you want to know more. Incredible that one was found in the tomb of the butler to Queen Hatsheput – makes one feel quite insignificant in the grand scheme of things!

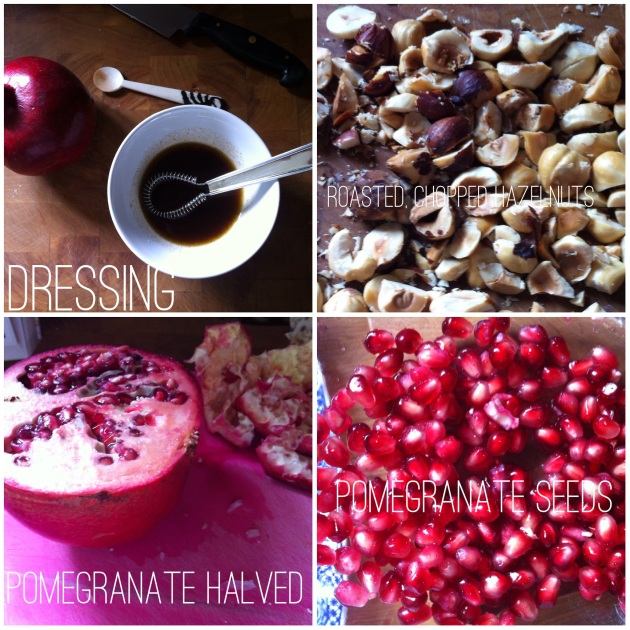
roasted_cauliflower_and_hazlenut_saladNotoriously fiddly to extract, the arils can range from sweet to sour so do taste yours to see if you need to adjust the dressing. The best way to extract the arils is to cut a fruit in half then in half again. Bend backwards slightly, to loosen then, place skin side up in a high sided bowl and paddle (whack) the leathery skin with the back of a wooden spoon. The juice does get everywhere so don’t wear white like I did! Their pith is really bitter so do pick out any stray bits that may jettison with the arils.

roasted_cauliflower_and_hazlenut_saladStrip the leaves off the cauliflower, saving the best ones for the veggie-soup-making bag in your freezer – I know you have one! Insert the point of a sturdy knife into the edge of the core at the bottom and carefully tunnel out as much of the core as you can. The florets are easy to break off then. Cut any really large ones in half and spread onto a baking sheet. Drizzle with 3 tablespoons of olive oil and tumble them around to coat with the oil. Sprinkle with salt and pepper and roast for about half an hour ’til golden and crispy in places – I turned them halfway through.

roasted_cauliflower_and_hazlenut_saladMake the dressing while the florets are roasting – I added a little pomegranate syrup for a sharper flavour. Extract the pomegranate seeds and chop the celery and parsley. If you soak the chopped celery in a little bowl of cold water they will become super crispy – a trick I learned from my mum! When the florets are done, turn the heat down and pop the nuts in to roast. Once the nuts are done and cool enough to handle, chop coarsely then assemble and dress the salad.

roasted_cauliflower_and_hazlenut_salad

I am taking this delicious, healthy salad over to the Savouring Saturdays Linky Party – hosted by

Raia from Raia’s Recipesfacebook twitter pinterest google plus rss
Eva from Whole Food Mom On A Budgetfacebook twitter pinterest google plus rss
Danielle from It’s A Love/Love Thingfacebook twitter pinterest google plus rss
Trish from Keep the Beetfacebook twitter pinterest rss youtube

Take a look to see the fabulous recipes on offer!

Roasted Cauliflower & Hazelnut Salad

  • Servings: 4 side servings
  • Difficulty: easy
  • Print

Adapted slightly from Jerusalem by Ottolenghi and Tamimi

INGREDIENTS

  • 1 head of cauliflower broken up into small florets about 660g (mine was about 800g)
  • 5 tablespoons olive oil (separated)
  • Salt and pepper
  • 2 sticks of celery cut on an an into ½ cm slices about 70g
  • 30g hazelnuts with skins (I also used a few walnuts)
  • 10g small flat-leaf parsley – leaves only
  • 50g pomegranate seeds (about half a medium pomegranate)

Dressing

  • ⅓ tsp ground cinnamon
  • ⅓ tsp allspice
  • 1 Tbsp cider vinegar
  • 1 tsp of pomegranate syrup)
  • 1 ½ tsp maple syrup

INSTRUCTIONS

  1. Preheat the oven to 220C/425F
  2. Slice any really large florets in half and place on a baking tray. Drizzle over 3 Tbsp of oil over them and season with salt and pepper. Toss them about to coat in the oil, then spread out in an even layer and roast for 25 – 35 minutes, until the cauliflower is crisp and golden brown. I turned them over after 15 minutes. Transfer to a large bowl or plate to cool down.
  3. While the florets are roasting, make the dressing by mixing the ingredients together in a small bowl. Taste and adjust the seasoning. Set aside.
  4. Chop the celery on the diagonal and very coarsely chop the parsley.
  5. Turn the heat down to 170C/325F . Spread the nuts onto a baking tray and roast for about 10 to 15 minutes.  When cool enough to handle, rub off any loose skins and chop coarsely.
  6. In a large bowl, gently mix together the cauliflower, celery,  parsley and nuts. Turn onto a serving plate, drizzle with the dressing and scatter over the pomegranate seeds.
  7. Serve at room temperature.

An Exotic Carrot Salad

An Exotic Carrot SaladI knew that with carrots as fresh as the ones in my veg box from Sutton Community Farm, a scheme I waxed lyrical about in my last post, I would have to make some sort of salad with them to make the most of their sweet, just picked flavour. I grated the carrots, nestled them reverentially on a handful of rocket leaves and then made up a dressing which was citrus sweet’n’sour, rich with cumin and humming with a little cayenne pepper. It was delicious!

An Exotic Carrot Salad

An Exotic Carrot Salad

An Exotic Carrot Salad

  • Servings: 4 side servings
  • Difficulty: easy
  • Print

INGREDIENTS

  • 4 carrots, scrubbed. Only peel then if they are not organic or if they are old as the skins can be bitter
  • handful of rocket leaves (or use other salad leaves if you have them)
  • 5 or 6 toasted walnuts halves
  • 1 tsp Za”atar spice mix

For the dressing

  • a pinch of salt
  • ½ tsp ground roasted cumin seeds
  • ¼ tsp cayenne pepper
  • juice of half an small orange
  • juice of half a lemon
  • 1 Tbsp EVOO (Extra Virgin Olive Oil)

INSTRUCTIONS

  1. Grate the carrots and place in a salad bowl on top of a handful of rocket leaves.
  2. Mix together the ingredients for the dressing – it will be a loose affair rather than an emulsified one. Don’t add all the lemon juice at once though – taste as you go along and adjust the flavours/seasoning to your palate.
  3. Pour the dressing over the grated carrots and rocket leaves and toss.
  4. Top with crumbled toasted walnuts and the za’atar and toss again.
  5. Serve immediately.